Stratus 3i Installation Guide
Make sure that aircraft power is disconnected before connecting any
.
Installing the Interface Cables
1. Wire the 9 pin D-Sub connector to the transponder following the wiring diagram on
Page 6 or 7 and the specifications below.
• Maximum harness length: 3 feet
• Wire gauge: 20 AWG
2. Plug the Stratus 3i power serial interface cable into the 9-pin D-Sub connector. Secure
using the thumb screws.
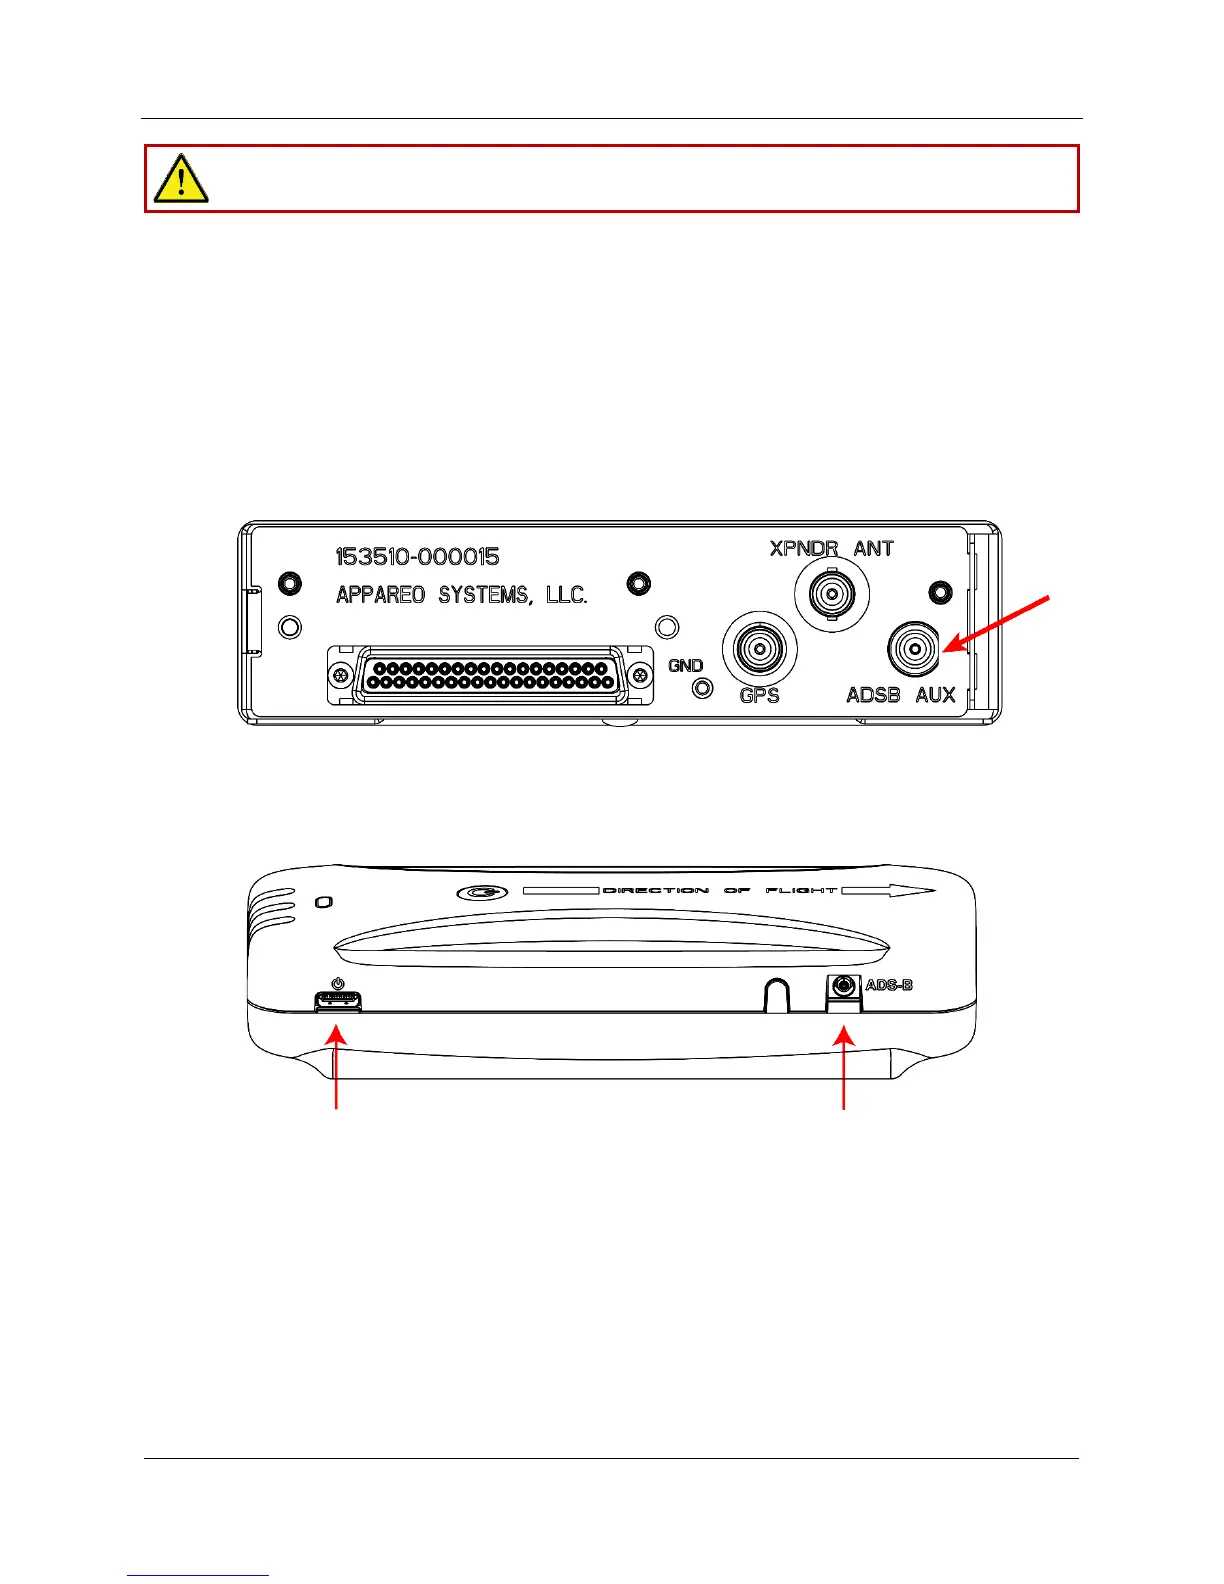
3. Install the BNC blind mate adapter in the ADSB AUX hole on the transponder backplate.
4. Plug the BNC connector of the Stratus 3i RF interface cable into the BNC adapter.
5. Connect the remaining end of the power serial cable into the power port of Stratus 3i,
and the remaining end of the Stratus 3i RF interface cable into the ADS-B port of
Stratus 3i. Secure cables as necessary.
6. Power on the aircraft to make sure that Stratus 3i is receiving power. Refer to the LED
indicator statuses on Page 8.