EasyManua.ls Logo

StreamLight STRION Series - User Manual

StreamLight STRION Series
5 pages
Print Icon
To Next Page IconTo Next Page
Loading...
STRION
®
SERIES
Operating Instructions
BC
STRION
®
LED, STRION
®
DS, STRION
®
HPL,
STRION
®
DS HPL, STRION LED HL
®
and STRION
®
DS HL
Question and Answer IconNeed help?

Do you have a question about the StreamLight STRION Series and is the answer not in the manual?

Summary

Using the Light

Operating the Tactical Switch

Details how to use the multifunction tail-mounted tactical switch for various functions.

Accessing Other Programs

Explains the TEN-TAP programmable switch for selecting different operating modes.

Charger Facts

Charger Mounting

Provides guidelines for securely mounting the flashlight charger.

USB Charger Operation

Describes the features and connection of the USB charger/holder.

USB Piggyback Charger

Charging Process

Details the procedure for charging the flashlight and battery.

LED Charge Indicators

Explains the meaning of the red LED status lights during charging.

Vehicle Installation

Power Connections

Guides on connecting the charger to a vehicle's power source.

Electrical Safety

Highlights important safety precautions for vehicle electrical connections.

Battery Replacement and Maintenance

Battery Replacement

Instructions for safely replacing the flashlight battery.

Maintenance Procedures

Covers essential maintenance for flashlight and charger longevity.

Replacement Parts

Specifies part numbers for genuine replacement components.

Overview

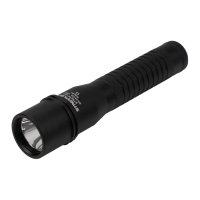
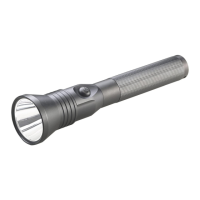
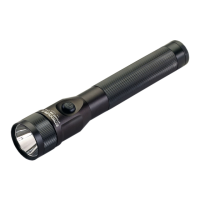
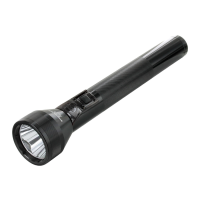
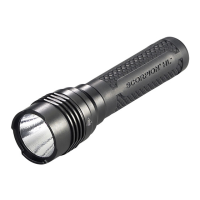
The Streamlight Strion® Series comprises a range of high-performance flashlights designed for various lighting needs, including the Strion® LED, Strion® DS, Strion® HPL, Strion® DS HPL, Strion LED HL®, and Strion® DS HL models. These devices are engineered to provide reliable and powerful illumination, with features tailored for both general and tactical use. The flashlights are built with durability in mind, ensuring years of dependable service with proper care and maintenance.

Function Description

At its core, the Strion® Series flashlight serves as a portable lighting device. It utilizes LED technology to produce a bright beam of light, suitable for a wide array of applications from everyday tasks to more demanding professional environments. The flashlights are designed to be intuitive to operate, offering multiple lighting modes to adapt to different situations.

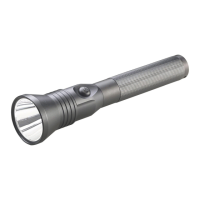
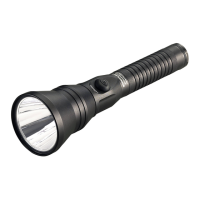
The primary function of these flashlights is to provide illumination. Depending on the model, they offer various output levels, allowing users to select the appropriate brightness for their needs, conserving battery life when full power is not required. Some models, such as the Strion® HPL, Strion® DS HPL, Strion LED HL®, and Strion® DS HL, are specifically noted for providing a powerful beam at their high setting, making them suitable for situations requiring maximum light output.

A key feature across the Strion® Series is the ability to switch between different lighting modes. This includes varying brightness levels (High, Medium, Low) and a strobe function. The strobe mode is designed for signaling or disorienting, though a safety warning advises caution for individuals with photosensitive epilepsy due to the potential for seizures.

The flashlights are powered by a rechargeable battery, emphasizing convenience and cost-effectiveness over disposable alternatives. The charging system is designed for ease of use, allowing the flashlight to be stored in its charger when not in use, ensuring it's always ready.

Usage Features

The Strion® Series flashlights incorporate several user-friendly features that enhance their versatility and operational efficiency.

Switching Mechanisms:

The Strion LED, Strion HPL, and Strion LED HL models feature a digital multifunction tail-mounted tactical switch. This switch allows for:

  • Momentary Operation: A light press of the pushbutton provides momentary illumination at full intensity.
  • Constant On: A full press (until it clicks) turns the light on at full intensity.
  • Brightness Level Cycling: Pressing and holding the switch cycles through different brightness levels. Releasing the switch at the desired level selects that output.
  • Strobe Activation: A quick double-click activates the strobe function.
  • Turn Off: A single full press from any "on" mode turns the flashlight off.

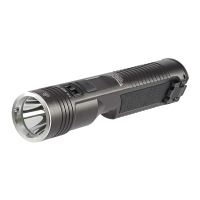
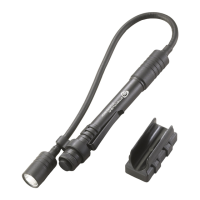
The Strion DS, Strion DS HPL, and Strion DS HL models offer an additional, independent head-mounted push-button switch, providing an alternative control point for enhanced flexibility.

TEN-TAP® Programmable Switch:

The Strion DS, Strion DS HPL, and Strion DS HL models are equipped with a TEN-TAP® programmable switch. This innovative feature allows users to customize the flashlight's programs, selecting from three different configurations:

  • High-Medium-Low/strobe enabled (Factory Default): Provides access to all brightness levels and the strobe function.
  • High only/strobe disabled: Simplifies operation to maximum brightness without the strobe.
  • High-Medium-Low/strobe disabled: Offers brightness control without the strobe.

To change programs, the user must rapidly tap the switch nine times (within 0.4 seconds per tap) from the "Off" position, then hold it down on the tenth tap. The switch should be held until the light turns off (approximately 1 second), then released.

Charging System:

The Strion® Series utilizes a sophisticated charging system that includes both standard and USB-compatible chargers.

  • Charger Mounting: Chargers should be mounted in a secure location, preferably with the flashlight vertical and head up, away from heat-sensitive surfaces. Two self-tapping screws are included for mounting.
  • USB Charger: The USB charger/holder features dual power input ports, preventing simultaneous connection of USB and 12VDC vehicle inputs. It comes with an AC/USB power supply and a custom USB cable. The micro-USB plug (SL logo up) connects to the USB connector sleeve on the charger base, which is keyed and locks into place. The charger can also be connected to any standard, powered USB outlet.
  • USB Piggyback® Charger: This variant includes an integrated charger/holder for a spare battery. The spare battery is inserted into the Piggyback sleeve towards the LED indicator.
  • Charging Process: To charge, the flashlight must be turned off and inserted into the charger. The triangular plate on the flashlight head aligns with a mating recess in the charger, and the barrel slips between the charger arms, pulling downward until it locks.
  • Temperature Regulation: A safety circuit prevents charging outside a temperature range of 20°F to 115°F, with optimal charging between 50°F and 86°F. If the temperature is out of range, the red charge LED will flash rapidly, resuming normal operation once the temperature is acceptable.
  • Charge Indicators: A red LED on the charger housing (or Piggyback sleeve) indicates charging status:
    • Steady LED: Charging.
    • Pulsing LED (shortly every second): Charged.
    • Rapidly pulsing LED: Error (e.g., out of range temperature or input voltage).
    • It is normal for the indicator to switch between steady and blinking as the battery "tops off."
  • Charge Time: Approximately 3 hours for the primary flashlight location and an additional 3 hours for the piggyback battery location (if equipped) when using the provided AC power supply or 12VDC automotive cord. Charge time may be longer with other powered USB outlets.
  • Vehicle Installation: A 12VDC power cord (#22051) with a cigarette plug is available for vehicle mounting. The plug can be removed for a more permanent installation, connecting wires directly to a power source (with a two-amp fuse on the positive lead). The USB input cord must be disconnected before plugging in the 12VDC power cord. Users are cautioned to make all electrical connections with insulated lugs or connectors and ensure the installation is fused to prevent fire hazards. Streamlight recommends connecting chargers to an unswitched power source to ensure constant charging, but advises removing the flashlight from the charger if the vehicle won't be driven for several days to prevent battery drain.

Heat Management:

The Strion® HPL, Strion® DS HPL, Strion LED HL®, and Strion® DS HL models produce a powerful beam that can cause the flashlight to become uncomfortably warm during extended operation, especially if not handheld. This is considered normal and not a defect. The design prioritizes output, and significant reduction in heat would require lowering output or increasing flashlight size. While the heat may trigger a drop reflex, it does not present a burn hazard. For extended use, employing a lower power setting is recommended to prolong battery life and reduce heat buildup.

Safety Warnings:

  • LED Radiation: Strion products are Class 2 LED products. Users are warned not to stare into the beam, as it may be harmful to eyes (Per IEC 62471 Ed 1.0:2006:07).
  • Hazardous Atmospheres: The Strion® series flashlights are not approved for use in hazardous atmospheres.
  • Charger Use: To reduce the risk of fire, electrical shock, or personal injury, the charger should only be used to recharge Strion® family lights, and no other products. Similarly, Strion® lights should only be charged with their designated charger.
  • Cord Care: The charger cord should not be abused, carried by the cord, or yanked to disconnect. A damaged charger should not be used.
  • Electrical Connections: The AC charger should be plugged directly into an electrical outlet without an extension cord. No metal objects should be placed on the charging terminals.
  • Battery Handling: Only battery #74175 should be used. Batteries should be handled carefully and never short-circuited, as they may explode in a fire. Worn or damaged batteries should be recycled properly.

Maintenance Features

Proper maintenance is crucial for ensuring the longevity and optimal performance of the Strion® Series flashlights.

General Care:

  • Lubrication: All threads and O-rings should be kept lubricated with silicon grease to maintain seals and smooth operation.
  • Tailcap Connection: The tailcap to barrel connection must be kept clean. A loose or dirty tailcap can cause the flashlight to malfunction.
  • Charger Contacts: Flashlight charger contacts should be kept clean at all times. Poor contact can lead to charger malfunction. An abrasive pencil eraser is recommended for cleaning the contacts.

Battery Replacement:

  • To replace the battery, unscrew the tailcap and slide the old battery out. The new battery should be inserted contact-end first, and the tailcap reattached.
  • It is crucial to use only genuine Streamlight® replacement parts, specifically battery P/N 74175, to ensure compatibility and performance. The flashlight's contact arrangement is designed to preclude the use of other batteries.

Repair and Service:

  • Users are advised not to attempt to repair the unit or charger themselves. Instead, the device should be taken to a qualified service facility or returned to the factory for repair.

By adhering to these usage and maintenance guidelines, users can ensure their Streamlight Strion® Series flashlight provides reliable and effective illumination for years to come.

StreamLight STRION Series Specifications

General IconGeneral
Water ResistanceIPX4
BatteryLithium Ion
Length5.9 in (14.99 cm)
Weight5.2 oz (148 g)
Impact Resistance1 m
MaterialAircraft-grade aluminum

Related product manuals