20 of 28
Operating Manual: ULT25NE 10327.1 | 12.22.2016
8. Calibration Guide
Calibrating the RTD with an Independent Temperature Indicator
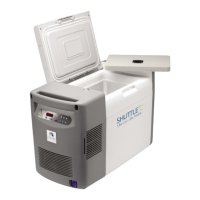
The Shuttle ULT25NE’s Resistance Temperature Device (RTD) is factory calibrated to
display both setpoint and operating temperature from a single internal RTD. In the
event that you must recalibrate the Shuttle to match the reading of an independent
temperature recording device or stand-alone electronic thermometer, please follow
this process.
1. Tools Required
• Flashlight or work light
• Long handled (6-7”), plastic, Phillip’s or flathead screwdriver
(Do not use a metal screwdriver as this may short circuit the circuit board in the event of a slip.)
• Independent Thermocouple and RTD Thermometer with sufficient lead wire to pass
through the 1/8" access port and affix to the vertical liner channel.
• Tape
2. Procedure
1. Place a thermocouple (1) inside the Shuttle cabinet.
— Note: Display temperature is calibrated using a NIST traceable
thermocouple located in the center of the cabinet (4.4” from back, 6.6”
from left side, 6.7” from bottom).
2. Turn Shuttle on.
3. Set temperature to -80
º
C.
4. Wait until the display reads -80
º
C.
— For best results wait an additional hour to ensure uniform cabinet
temperature.
5. Connect a NIST traceable thermocouple reader (2) to the thermocouple
located inside the cabinet.
6. Slide open filter door located on the side of the cabinet (3).
7. Using an extra-long screwdriver (4) locate the potentiometer through filter
opening (5).
8. Turn the adjustment screw until the Shuttle display temperature is the same
as the hand-held instrument. ¼ Turn = 3 DEGREES
9. Turn the screw to change the temperature indicated on the display
(clockwise for warmer and counter-clockwise for colder).
10. After making an adjustment, WAIT 15 SECONDS for the Shuttle’s indicated
temperature to register the adjustment. Repeat adjustment if necessary.
11. Calibration complete.