3 of 28
Operating Manual:
ULT25NE 10327.1 | 12.22.2016 www.stirlingultracold.com
ULT25NE Quick Guide
Initial Setup
Port Stopper/Sealant
The Port Stopper/Sealant must be in place during operation.
Remove tape at port stopper prior to initial use.
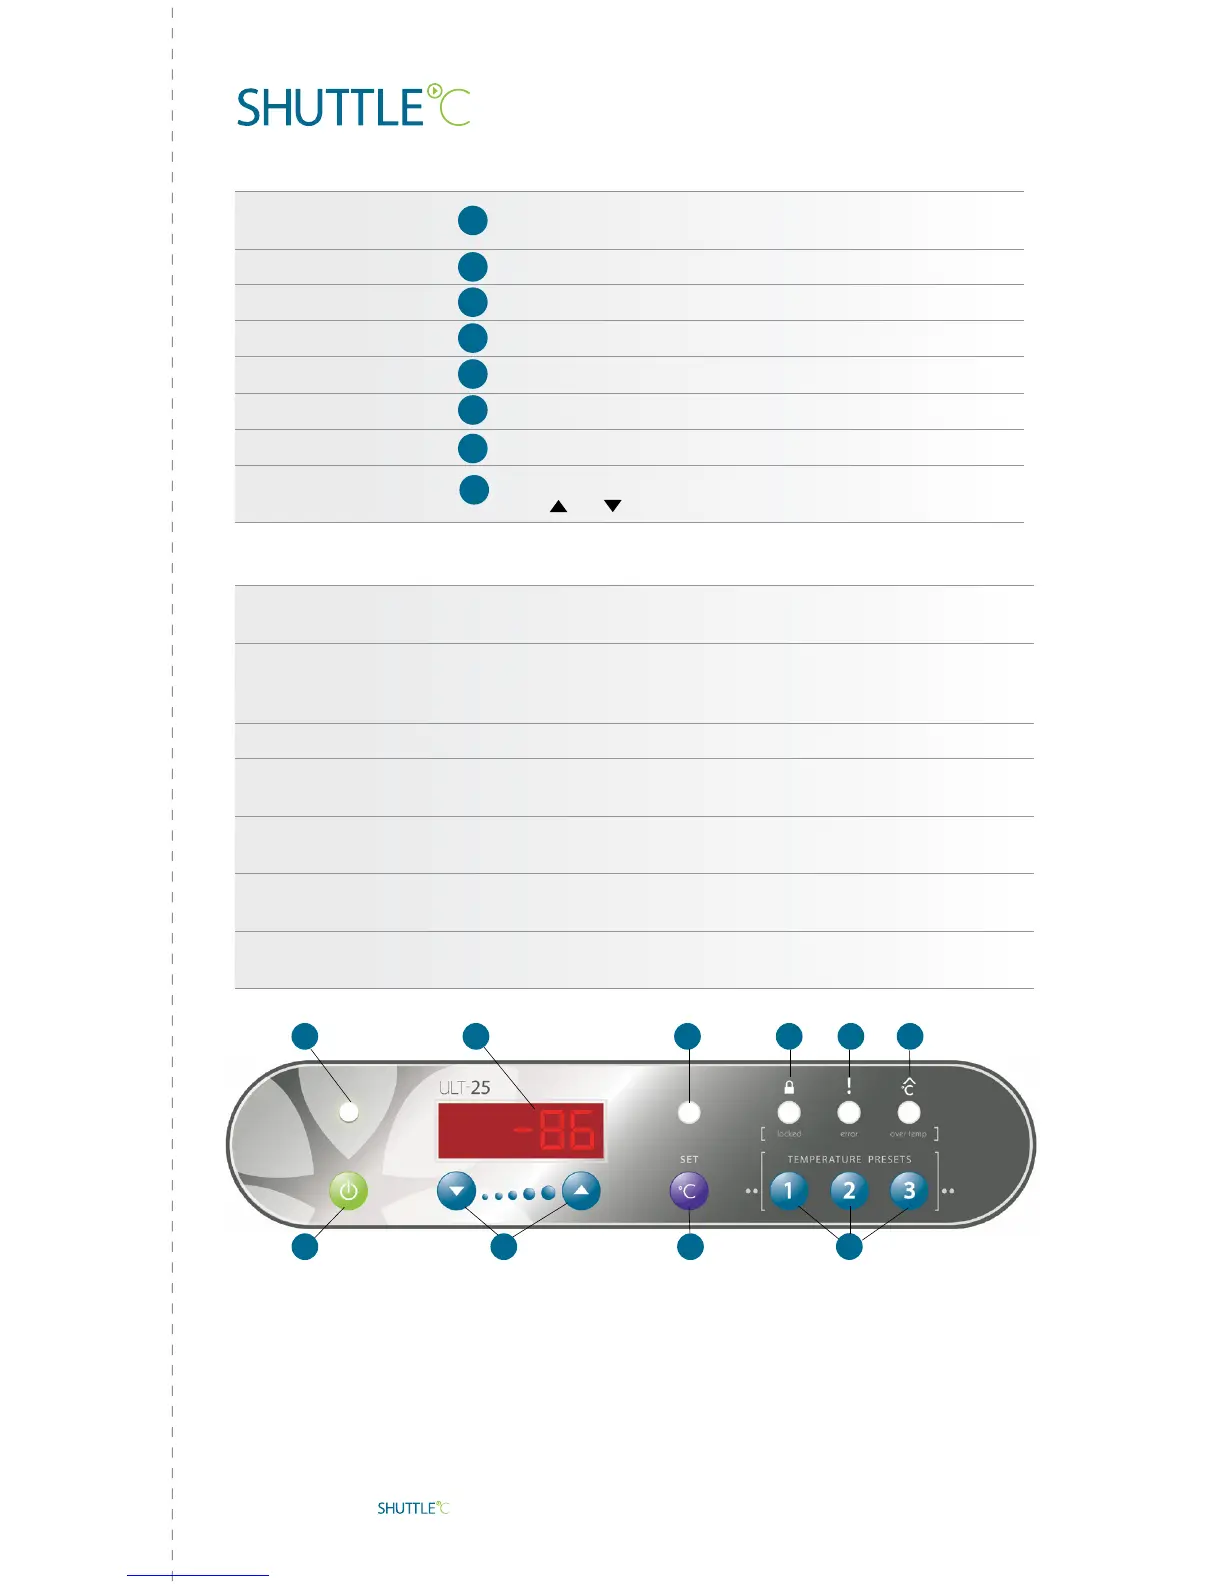
Power Indicator
The Shuttle is ON when lit
Power ON
Press and hold for two beeps
Power OFF
Press and hold for three beeps
LCD Display
Displays chamber temperature, S ## – setpoint
Display Setpoint
Press/Release to display current setpoint
Return to Temp Display
Press/Release or wait eight seconds
Change Setpoint
Press and hold until Set T LED (E) glows, S ## displayed,
then
or (D)
Advanced Functions
Change to Preset
Press and hold Set (F) until Set T LED (E) glows, S ## displayed,
then select Preset 1, 2 or 3 (J)
Postpone Over Temp Alarm
When Over Temp LED (I) glows, press Preset 3 (J) until time shows
(1.0 h) (If Over Temp LED is not glowing, then Preset 3 acts as a
Temp Preset)
Return to Temp Display Wait eight seconds, press Preset 3 to return to temperature display
See Error Code Again
If Error LED (H) is glowing, press Preset 2 (J) briefly
(If Error LED is not glowing, then Preset 2 becomes Temp Preset)
Lock Panel
Press and hold Preset 1 AND 2 AND 3 (J) until Locked LED (G) turns
on (~five seconds)
Unlock Panel
Press and hold Preset 1 AND 2 AND 3 (J) until Locked LED (G) turns
off (~five seconds)
LCD Display Codes P ## – Preset Temp, ## h – Alarm Silenced, E ## – Error Code
(see operating manual)
B
B
C
F
F
Notice:
When unit is first turned on, red Over Temp LED (I) will be on until
temperature is within 10
º
of setpoint.
Panel cannot be locked until temperature is within 10
º
of setpoint.
A
DB
C
A
G
H
I
J
E
F
!
F