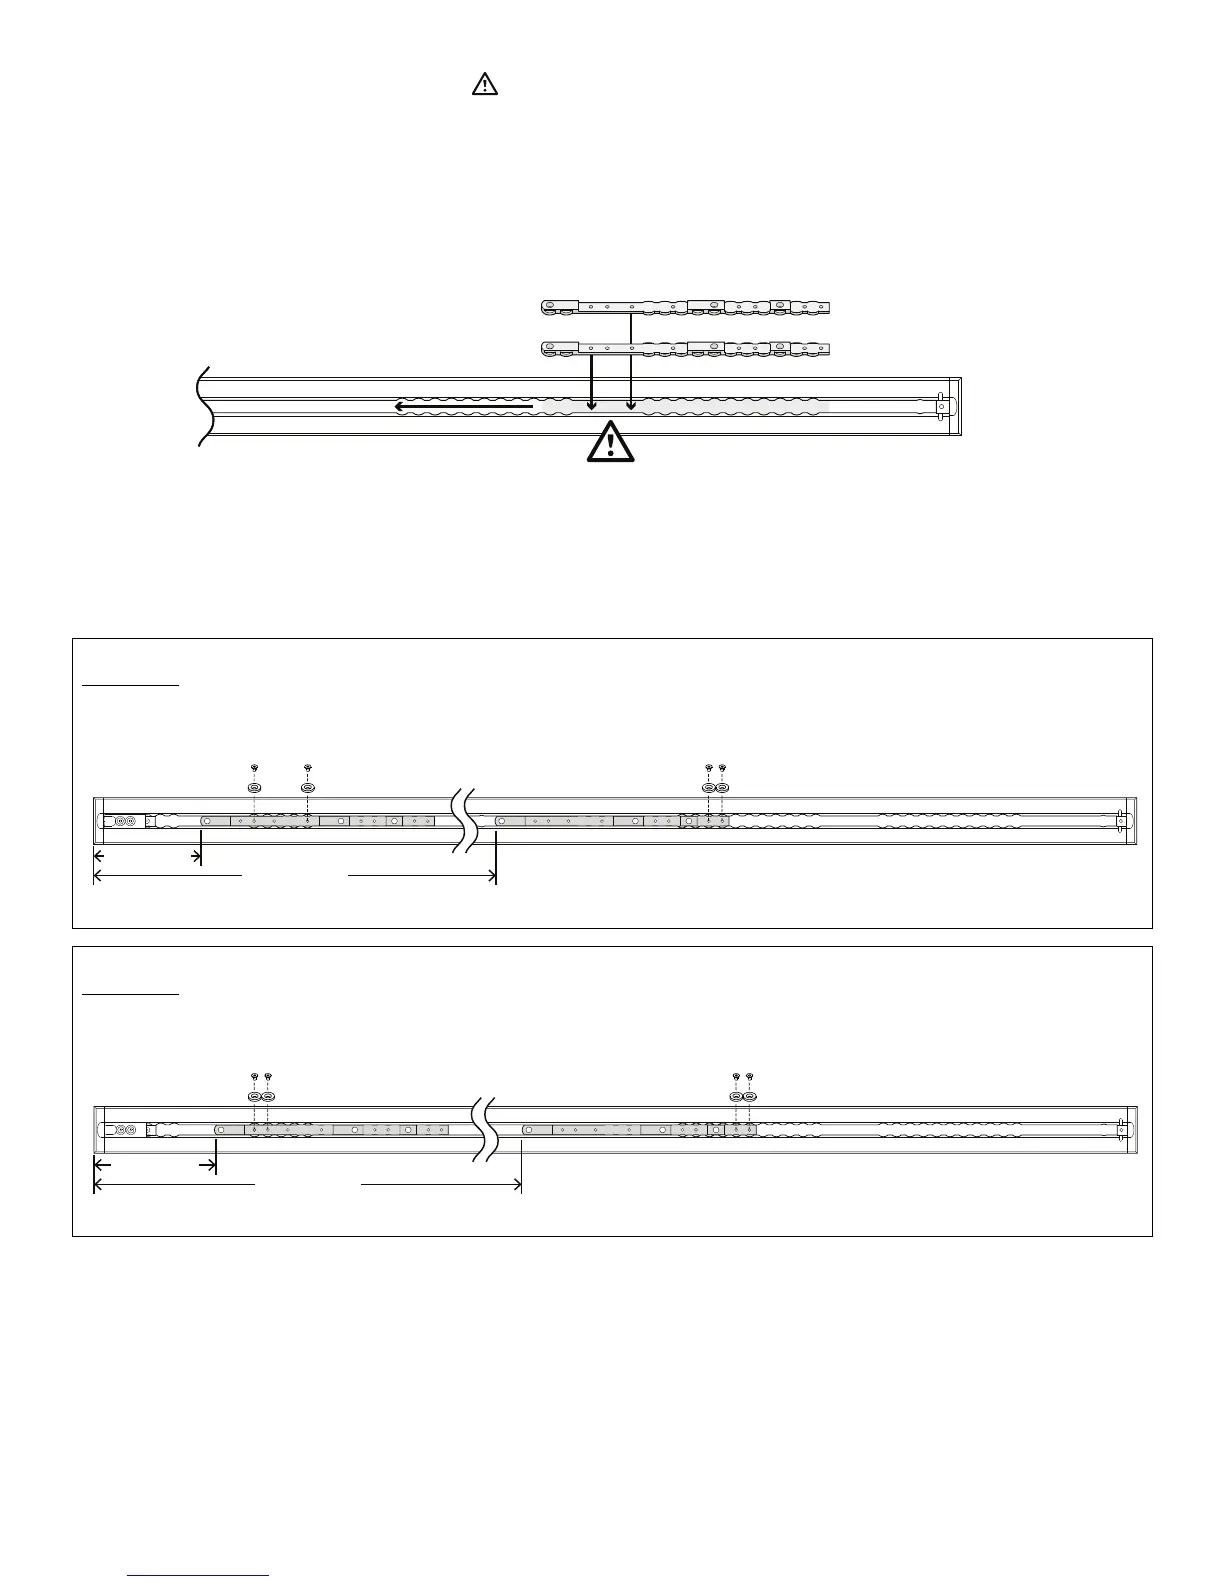
You can only insert cleats where indicated by . Use the necked area of the cleats to line up with the floor plate, so they
drop in. Both cleats are identical and must be installed flat-side down. Both cleat dimensions are taken from the cap at the
end of the floor plate.
1. Insert your first cleat (A) and slide toward the foot end.
2. Insert your second cleat (B).
Foot
end
Head
end
3. Determine your cleat (6392-001-400) and cleat locator washer (6392-001-401) locations per your Section below.
4. Using a 5/32” hex wrench, install four flat head cap screws (0001-194-000) and four cleat locator washers to secure the
cleats. Make sure that you install two cleat locator washers per cleat.
5. Proceed to Installing Performance-LOAD.
SSeeccttiioonn AA:: 5 in. (13 cm) sill to cot distance
8” (20.3 cm)
47” (119.4 cm)
SSeeccttiioonn BB:: 6 in. (15 cm) sill to cot distance
48” (121.9 cm)
9” (22.9 cm)
6392-009-001 Rev D.3 13 EN