Do you have a question about the Stryker Triathlon and is the answer not in the manual?
Standard anterior midline incision for exposure. Previous incisions can be incorporated to reduce skin slough risk.
Proper rotational alignment of the assembly using the tibial tubercle as a reference landmark.
Achieve varus-valgus alignment by adjusting the distal assembly to the proper medial/lateral position after proximal fixation.
Determine rotational alignment, then place ankle clamp proximal to the maleolus for flexion-extension alignment.
Establish tibial resection level using the tibial stylus after the tibial assembly is fixed in place.
Osteotomize the proximal tibia after removing alignment instruments and leaving the tibial resection guide in place.
Use Universal Driver for drills/pins, attaching directly to reamer, drill, or Jacob's Chuck for intramedullary alignment.
Alter distal resection level by repositioning the guide in 2 holes, removing an additional 2mm of bone.
Pre-assemble MIS Femoral Sizer Body (Left/Right) onto the MIS Femoral Sizer Adjustment Housing for A/P sizing.
Complete four femoral bone resections using a .050" (1.25mm) thick saw blade for anterior, posterior, and chamfer cuts.
Resect intercondylar notch for PS knee using the Single-Use PS Box Cutting Guide placed onto the distal femur.
Assess fit for Posterior Stabilized or Cruciate Retaining knees using the remaining portion of the technique.
Expose tibial plateau with retractors. Single-Use Femoral Trial may remain in place for component sizing.
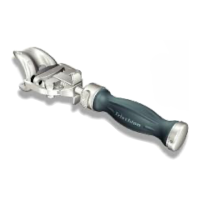
Assemble Keel Punch Guide to Universal Tibial Template in unlocked position for tibial keel punching.
Remove osteophytes and synovial insertions from the patella. Measure thickness using a caliper for preparation.
Remove debris, place correct size Patella Trial (Symmetric/Asymmetric) onto prepared patella for assessment.
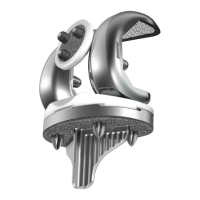
Attach Femoral Impactor Extractor to Impaction Handle and the appropriate size/side Femoral Component for implantation.
Connect Tibial Baseplate Impactor Extractor to the Impaction Handle for baseplate implantation.
Assemble the Tibial Insert to the Primary Tibial Baseplate to complete tibial component implantation.
Place Patella Component onto prepared patella, aligning fixation peg holes with corresponding holes.
After cement removal and polymerization, thoroughly irrigate the joint and close soft tissues in layers.
| Type | Total Knee System |
|---|---|
| Category | Orthopedic Implant |
| Shelf Life | 5 years |
| Fixation | Cemented and cementless options available |
| Components | Femoral, Tibial, Patellar, Bearing |
| Manufacturer | Stryker |
| Sterilization | Gamma irradiation |
| Material | Cobalt-chrome alloy, titanium alloy, polyethylene |
| Intended Use | Total knee arthroplasty |
