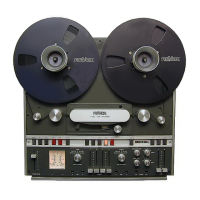
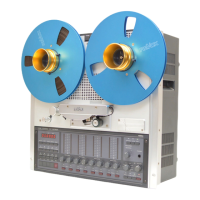
Fig.4.3.-2
At that
point
the
spring scale should
read
1000
to
1300
grams
(2
pounds
3
ounces to 2
pounds
1
5
ounces).
4.3.2. Neueinstellung des Andruck-Aggregates
-
Kopfträger ausbauen
(siehe
Kap. 3.6.)
Taste
PLAY
betätigen und
ständig
ge-
drückt lassen.
-
Andruckmagnet
lösen
und
soweit nach
links verschieben, dass zwischen
Achse
und
Bügel ein Luftspalt von ca.
0.5 . . 1 mm entsteht
lFis.
4.3.
-
2l.
Andruckmagnet in dieser
Position
wie-
der arretieren.
Kontolle:
Andruckrolle von Hand an die Tonwelle
d
rücken.
-
Taste
PLAY betätigen und
gedrückt
las-
sen.
-
Bei erregtem
Magnet muss der Luftspalt
zwischen
Achse und Bügel
auf den
vorhin
einge-
stellten
Wert
(0.5
. . 1 mm) kontrolliert
wer-
den.
Den
Andruckarm leicht
von
der Ton-
welle wegziehen, dabei darf
sich
der Magnet-
anker nicht
bewegen.
Taste PLAY loslassen.
Befestigungsschrauben
des Andruck-
magneten
mit einem Lacktropfen
sichern.
4.3.2. Re-adjustment of Pinch-Roller
Mech-
anism
Remove
sound
head
assembly
(see
sec-
tion
3.6)
Press button
PLAY and keep
it depres-
sed.
Loosen
the
mounting screws of the
pinch-
roller magnet and
move it suff iciently
to the
left
until
a
clearance of 0.5 to 1.0 mm
is
obtained
at
the
point
shown
in figure 4.3.
-
2.
Secure
pinch-roller
magnet in that
po'
sition.
Double
Check
Move
pinch-roller
arm manually towards
the capstan shaft.
-
Press button PLAY and keep
it
de-
pressed.
With
the
pinch-roller
solenoid so
ener-
gized
the clearance of 0.5 to 1.0
mm between
pin
and clevis must be
obtained again-
The solenoid
plunger
must not
move
when
pulling
the
pinch-roller
arm
slightly
away
from
the capstan shaft.
Release the button
PLAY.
Seat mounting screws
of
pinch'roller
so-
lenoid
with a drop of lacquer.
4.3,2. R6ajustage
de l'agr6gat du
galet presseur
D6monter le bloc des tötes
(voir
chap.
3.6.)
Presser
la touche PLAY et la maintenir
dans cette
position.
Desserrer l'ölectro-aimant du bras-pres-
seur et obtenir un espace d'environs
0.5...1
mm entre l'axe et la fourchette en
le
döplagant
vers la
gauche
lFig.
4.3.
-
2\.
Maintenir l'6lectro-aimant das cette
posi-
tion et serrer les vis
de
fixation.
Contröle:
Presser le
galet presseur
manuellement
sur l'axe du cabestan.
Presser
la
touche PLAY
et la maintenir
dans cette
position.
Lorsque
l'6lectro-aimant est excit6,
l'espace
entre l'axe et la fourchette doit ötre
de
la valeur
rögl6e auparavant soit:
0,5. . .1mm.
Eioigner le
galet presseur
de l'axe du
cabestan, le noyau
plongeur
ne doit
pas
bouger.
Relächer
la
touche
PLAY.
Bloquer les vis
de röglage de
l'6lectro-
aimant avec
une laque de s6curit6.
4.3.3.
Auswechseln der Andruck-
und Fühlhe-
belrollen
Deckel
von
den
Rollen
abschrauben.
Rollen
nach
oben abziehen.
Die Rollen dürten
nur mit
einem trockenen
Lap-
pen gereinigt
werden.
Es
ist
speziell darauf
zu
achten, dass kein
flüchtiges
Reinigungsmittel in
d ie
Sinterlager
gelangt.
Nur die Achsbolzen
und Deckel
sollen mit Rein-
benzin
gereinigt
werden.
Die
Rollen im trockenen
Zustand wieder zusam-
menbauen.
Die Achsen dürfen nicht
geschmiert
werden.
4.3.3.
Replacement of
Pinch-Roller and Tape
Tension Sensing Rollers
-
Unscrew covers from
the roller
shafts.
-
Pull rollers forward
and
off their shafts.
Use only
dry cloth to
clean the rollers. Take
great
care to
prevent
any volatile
liquids
from
entering
the sintered bearings.
Only
the shafts and covers may be cleaned with
benzi ne.
Re-assemble
the rollers with their shafts comple-
tely dry. Do
not apply any oil to the
shafts.
4.3.3.
Changement des
poulies
des
palpeurs
et
du
galet presseur
D6visser les
couvercles
sur
les axes de
pou
lies.
Retirer ces
dernieöres
par
le haut.
Les
poulies
ne doivent
6tre nettoyäes
qu'avec
un
chiffon
sec. Prendre
garde qu'aucun produit
de
nettoyage
ne s'infiltre dans les
coussinets.
Seuls les
axes
et les capuchons doivent Ctre
net-
toyds ä la benzine
rectifi6e.
Remonter
les
poulies
alorc
qu'elles
sont
parfaite-
ment
söchx. Les axes ne doivent
pas
6tre
huilös.
 Loading...