24
- Output boost to 30V (+/-1V)
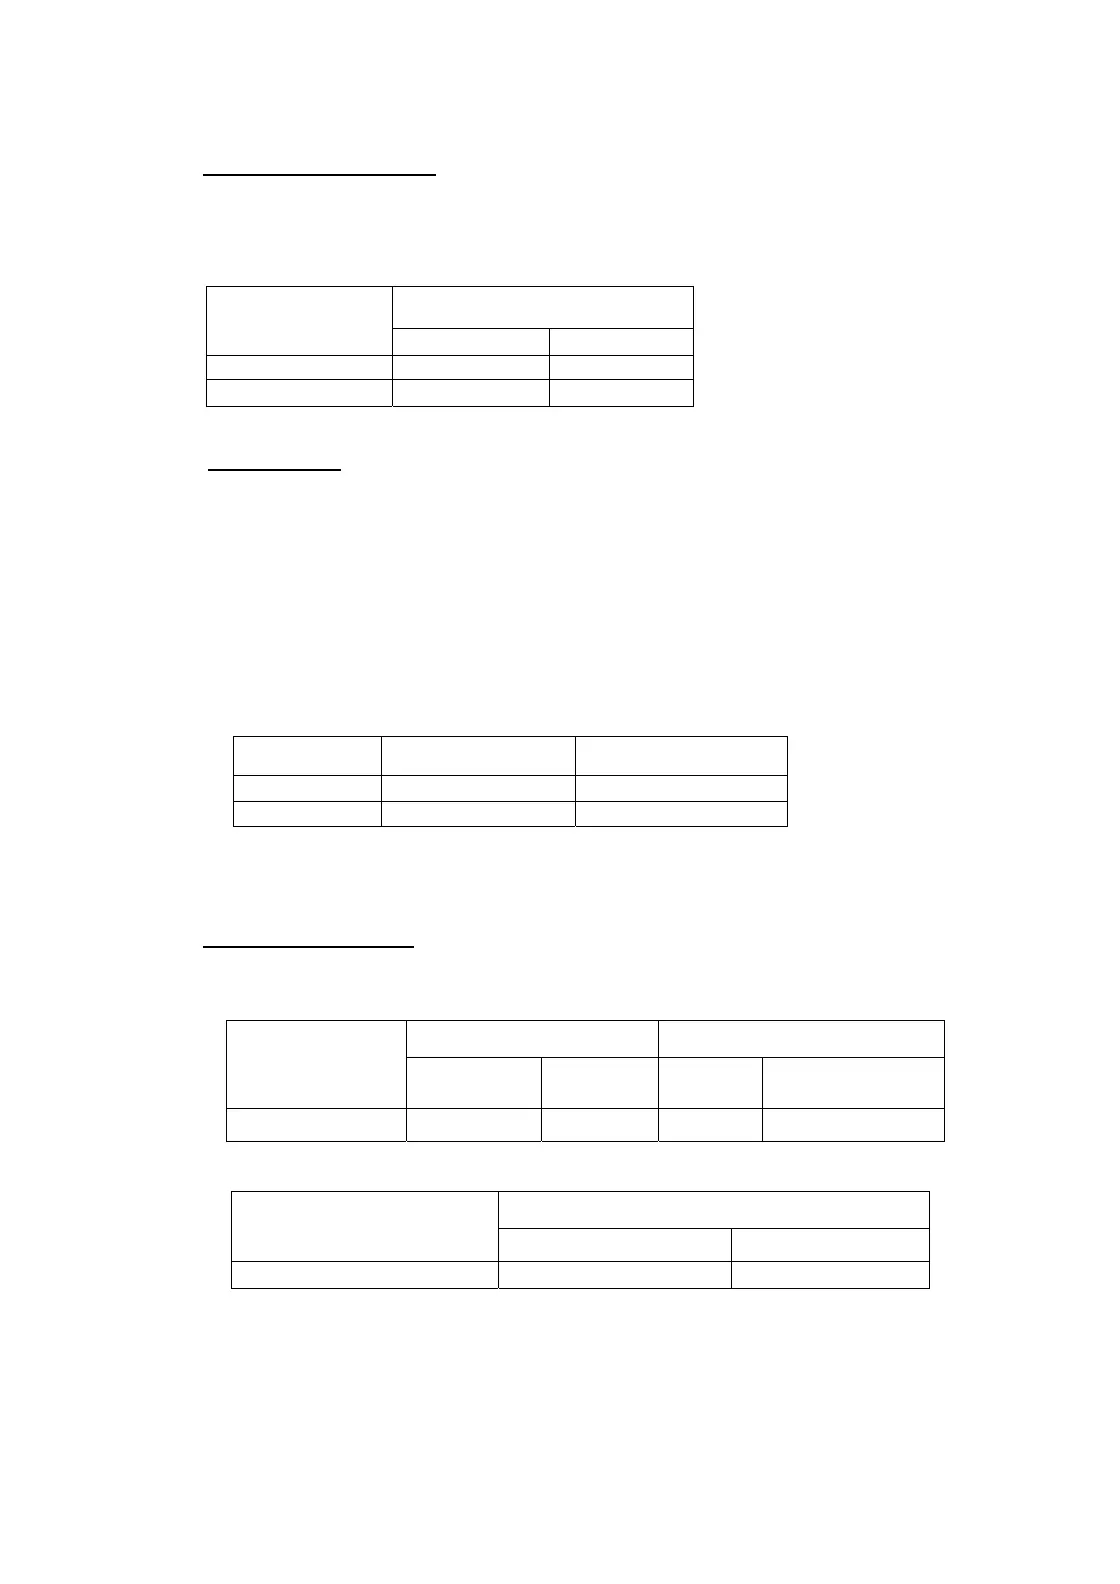
9) X TALK MEASUREMENT:
- Connect the amplifier in stereo mode with 4Ω loads at 1 kHz.
- Connect input to both the channel feeding input of rated sensitivity. Set the gain pot of both the
channels to MAX position. Set output to 66V.
- Feed input to channel 1KHz and take readings of the both channel.
- Similarly feed input to Right channel and take readings of the both channel.
Output
Input Applied To
Channel 1 Output Channel 2 output
CH 1
82V
<1mV
CH 2
<1mV
82V
10) LED TESTING:
Power LED
It turns on when power switch turn ON.
PROTECT A
It glows in case of Thermal & DC protection of CH A.
PROTECT B
It glows in case of Thermal & DC protection of CH B.
Signal and clip LED
Channel CLIP LED Indication Signal LED Indication
Left Channel 0/P 75V ±3V 1V ±0.2V
Right Channel O/P 75V ±3V 1V ±0.2V
EQ Processing LED
It Glows when the EQ Processing Switch is Turned ON.
11) SHORT CIRCUIT TEST:
Stereo mode single channel driven at 4 ohms:-
During short circuit test output signal reduces & becomes square wave.
Primary current CH1 Primary current CH2
POWER(V)
Before short After short
Before
short
After short
80V 14A(±1A) 13A(±1A) 14A(±1A) 13A(±1A)
Bridge Mode @ 8 OHM LOAD
Primary Current
POWER(V)
Before short After short
150V 25A(±2A) 20A(±2A)
12) DC PROTECTION
Remove the Transformer secondary except the one used to drive the control circuit (±15V). At the
amplifier output connect a DC power supply. Start increasing the voltage from zero and observe
where the RELAY starts Chattering.
DC protection starts at
+
5 volts & -14volts .
 Loading...