Component Access/Removal
Integrated (
Integrated (
700-
700-
2) Series
2) Series
7-5
#3756780 - Revision D - July, 2005
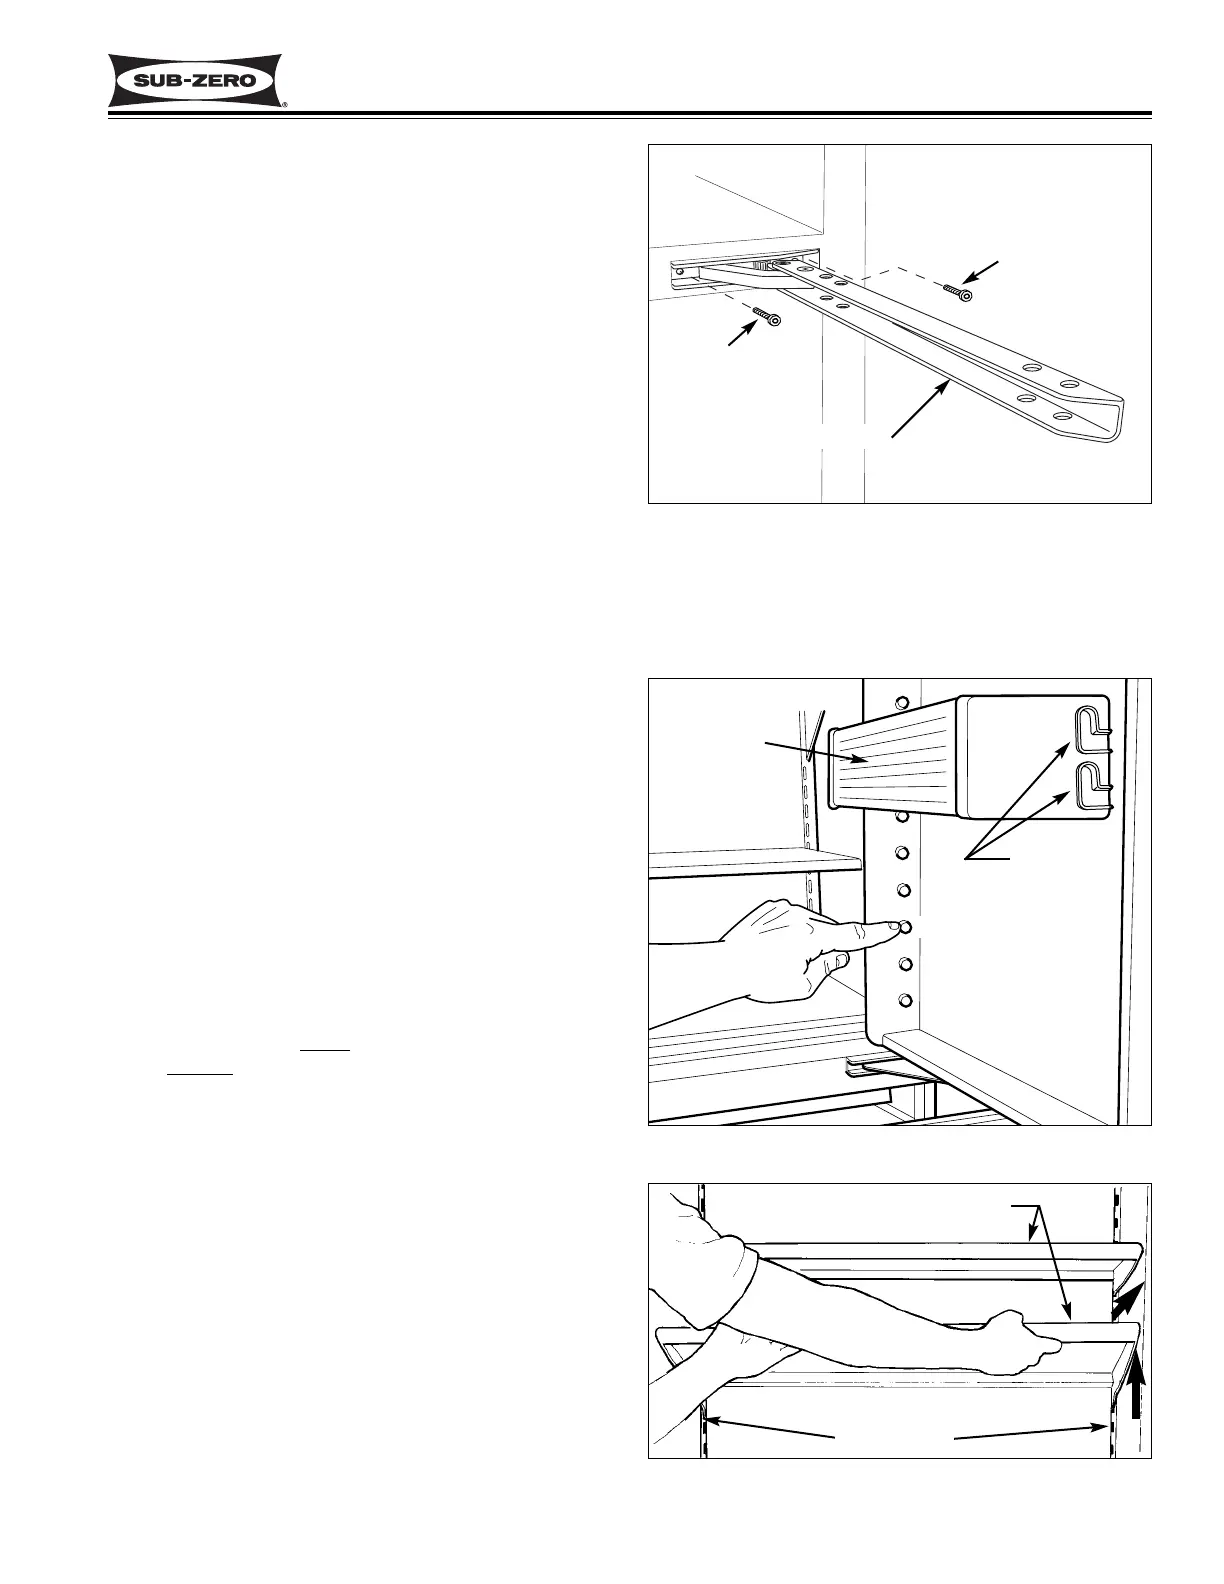
Upper and Lower Hinge Assembly Removal
(All Tall Units)
The hinge assemblies are attached to hinge mounting
brackets with Allen-head bolts.
To remove a hinge assembly, you will need to remove
the door assembly first. Then, extract the Allen-head
bolts from the appropriate hinge mounting bracket and
pull the hinge assembly from the unit. (See Figure 7-7)
700-2 TALL UNIT INTERIOR COSMETIC,
MECHANICAL AND ELECTRICAL
COMPONENTS
Door Shelf and Dairy Compartment Adjustment /
Removal (All Tall Units)
There are “L” shaped grooves in the end caps of the
door shelves and dairy compartment, and there are
knobs formed in the dikes of the door liner. (See Figure
7-8) The door shelves and the dairy compartment are
hung on the door by lining up the “L” shaped grooves
with the knobs.
Push in and down to inst
all a door shelf. Pull up and
out to remove a door shelf.
Compartment Shelf Adjustment / Removal
(All Tall Units)
Compartment shelf side rails have hooks at the back
that allow the shelves to be hung from the shelf lad-
ders.
To remove a compartment shelf, tilt the front of the shelf
up, then lift the back of the shelf up to disengage the
hooks from the shelf ladders and pull the shelf from the
unit. (See Figure 7-9.)
To reinstall a compartment shelf, tilt the front of the
shelf up and align the hooks with the slots the in shelf
ladders, then insert the hooks into slots and lower the
front of the shelf.
Figure 7-7. Hinge Assembly Removal
Hinge Arm
Bolt
Bolt
Shelf Ladders
Figure 7-8. Door Shelf
Figure 7-9. Compartment Shelf Removal
“L” Shaped
Grooves
Door Shelf
Knobs
Door Liner
Compartment Shelves