Panel Installation 35
subzero.com/specs
SIDE PANEL
MAIN
FRAMEREAR
BRACKET
FRONT
BRACKET
Side panel attachment
(top view).
Side Panels
IMPORTANT NOTE: S
ide panels will need to be installed
before the unit is placed in its final position.
When installing a built-in unit with a custom side panel,
an accessory kit is required. Stainless steel and white
enamel side panels are available through your authorized
Sub-Zero dealer. Refer to instructions included with the
side panel kit when installing these side panels. For local
dealer information, visit the find a showroom section of
our website, subzero.com.
IMPORTANT NOTE: The use of side panels may change
the width of your rough opening.
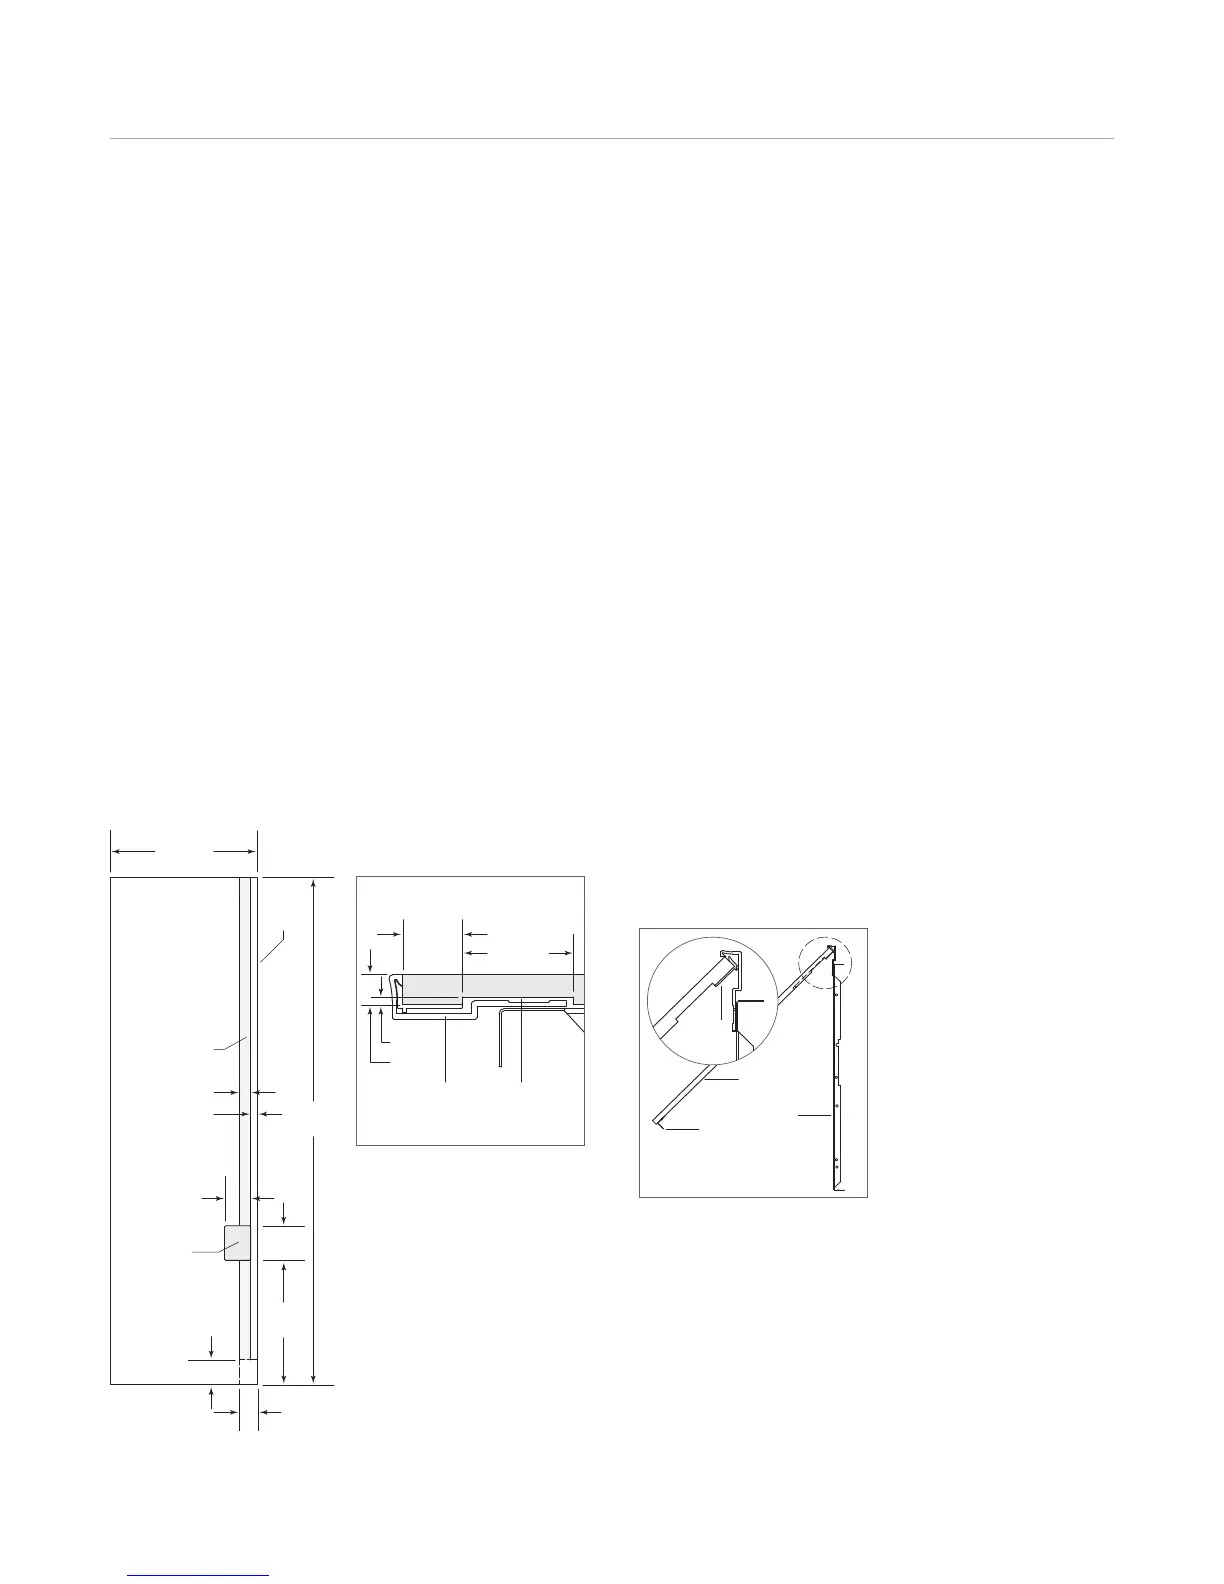
CUSTOM SIDE PANEL INSTALLATION
The custom side panel will need to be a minimum of 24"
(610) deep and
1
/2" (13) thick. Routing will be necessary for
the side panel to fit flush against the side of the unit. Refer
to the illustrations below.
IMPORTANT NOTE: T
he overall height on the side panel
will vary with the height of the grille being used. Make sure
you know your finished height before cutting any panels.
Install the brackets provided in the kit onto the side panel
in the locations shown in the illustration below. The front
brackets are meant to engage the mainframe and the back
brackets will wrap behind the unit when the panel is in
place. Screws are provided in the kit. If the provided
screws will not work for your installation, you will need to
provide the necessary screws to attach the brackets.
IMPORTANT NOTE: If you have a model BI-30U, BI-30UG,
BI-36U, BI-36UG or BI-36UFD, extra routing will be neces-
sary to avoid having the panel hit the refrigerator lower
hinge plate.
Place the panel at a 75° angle and engage the front
brackets into the mainframe. Swing the panel inward,
making sure that the front brackets engage the mainframe.
With the panel in position, attach the rear brackets to the
rear of the unit with the screws provided. Check to see
that the panel is secure. Refer to the illustration below.
Routing detail.
MAIN
FRAME
SIDE PANEL
ROUTING
1" (25)
1
7
/8" (48)
1
/8" (3)
1
/2" (13)
84"
(2134)
24" (610)
ROUT TO
3
/16" (5)
(OVER-AND-UNDER
MODELS)
OPTIONAL
TOE KICK
CUT-OUT
4" (102)
20
1
/2"
(521)
5
3
/4"
(146)
1
7
/8"(48)
1" (25)
4
1
/4" (108)
ROUT TO
1
/8" (3)
FRONT
OF SIDE
PANEL
2
5
/8"
(67)
Side panel dimensions.