8
|
Cove Customer Care 800.222.7820
INSTALLATION
INSTALLATION
Insert the unit into the opening and pull the excess water
and drain lines through the access hole as the unit is being
installed.
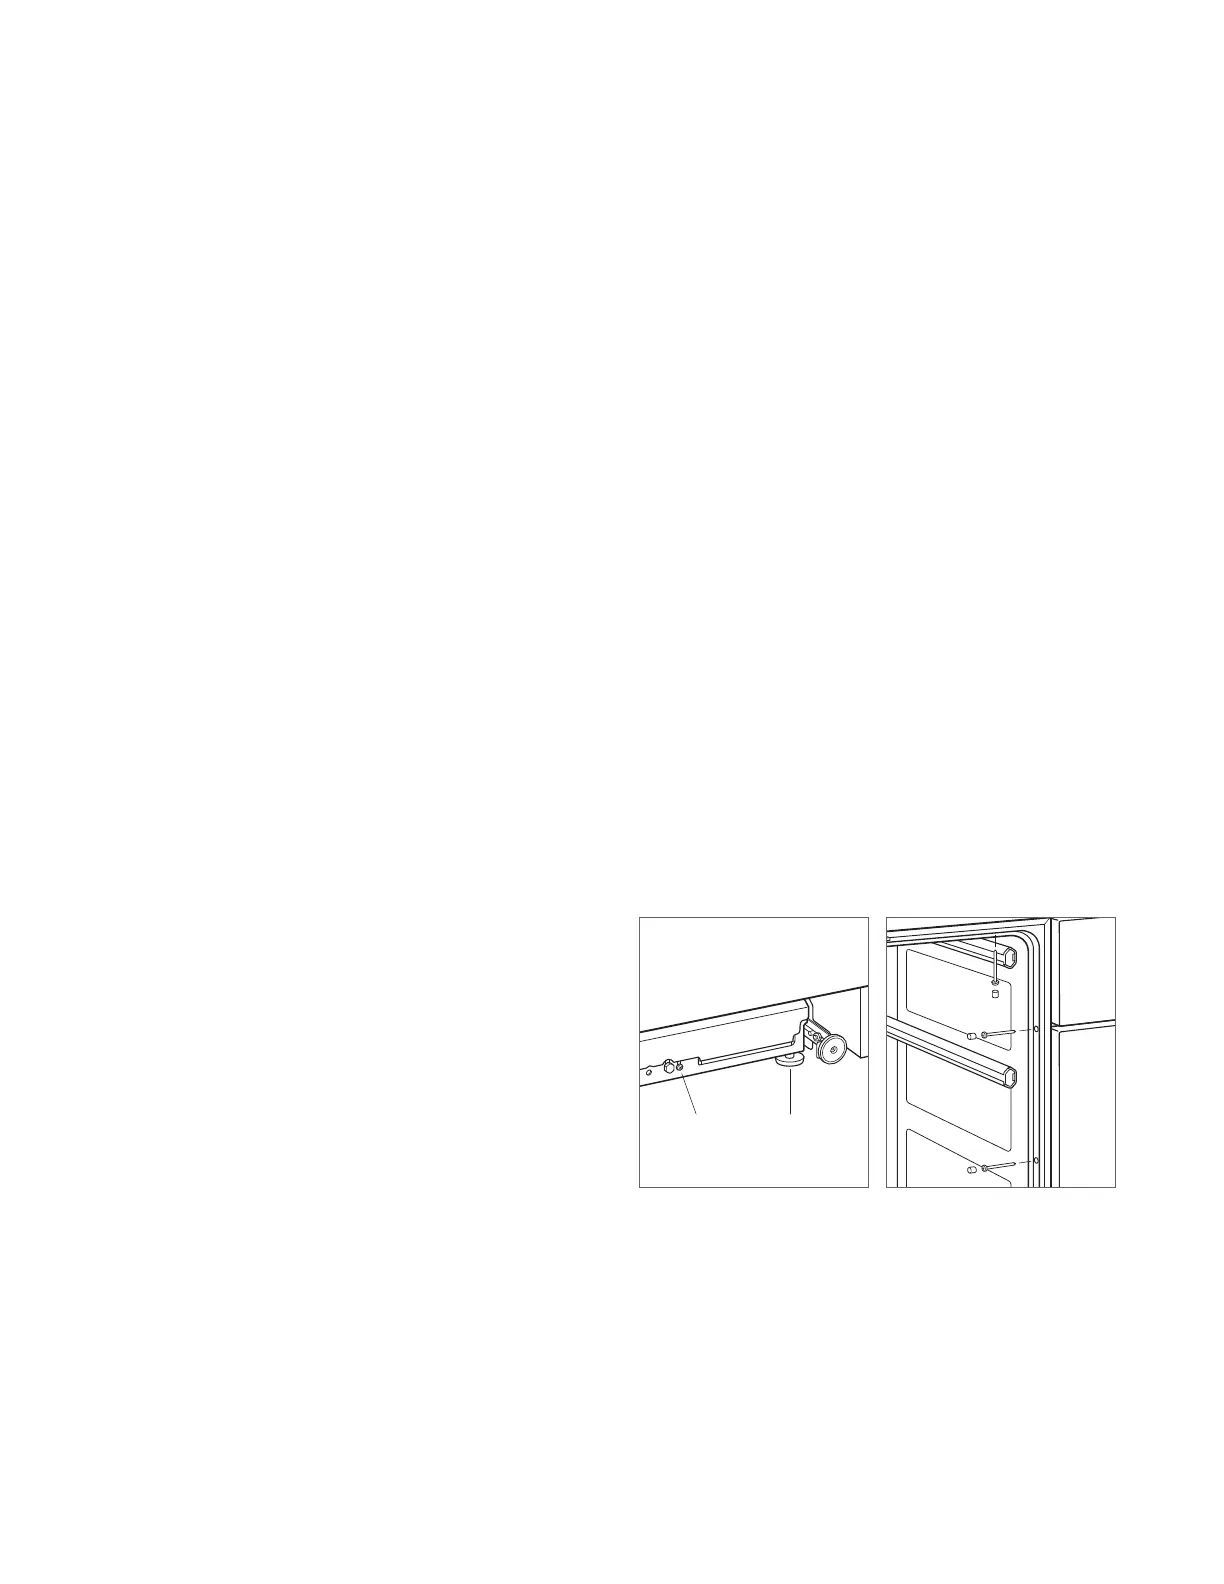
LEVELING
To adjust the front, turn the leveling legs clockwise to raise
and counterclockwise to lower the unit. Refer to the illustra-
tion below.
To adjust the rear, turn the rear adjustment screw counter-
clockwise to raise and clockwise to lower the unit.
ANCHORING
Secure the unit to adjacent cabinetry using the screws
provided. Do not over tighten. Over tightening could distort
the unit causing issues with the door seal. If applicable,
secure the top of the unit to the countertop using the screws
provided.
Verify proper door closure, then install the hole plugs in each
mounting hole location. Refer to the illustration below.
Installation
PLUMBING CONNECTIONS
1 Connect the drain line following local code. The drain
connection will accommodate 1"
(25),
3
/4" (19) and
5
/8"
(16)
drain connections. The connection must be cut to t
3
/4" (19) and
5
/8" (16) connections. If connecting to a food
waste disposer, remove the knockout prior to making the
drain connection.
2 Connect the water connection to the water supply with
the tting provided.
REAR
ADJUSTMENT
SCREW
FRONT
LEVELING
LEG
Leveling
Anchoring