400 Series
400 Series
Component Access and Removal
6-5
Exterior Wrap Components (Model 424FS ONLY)
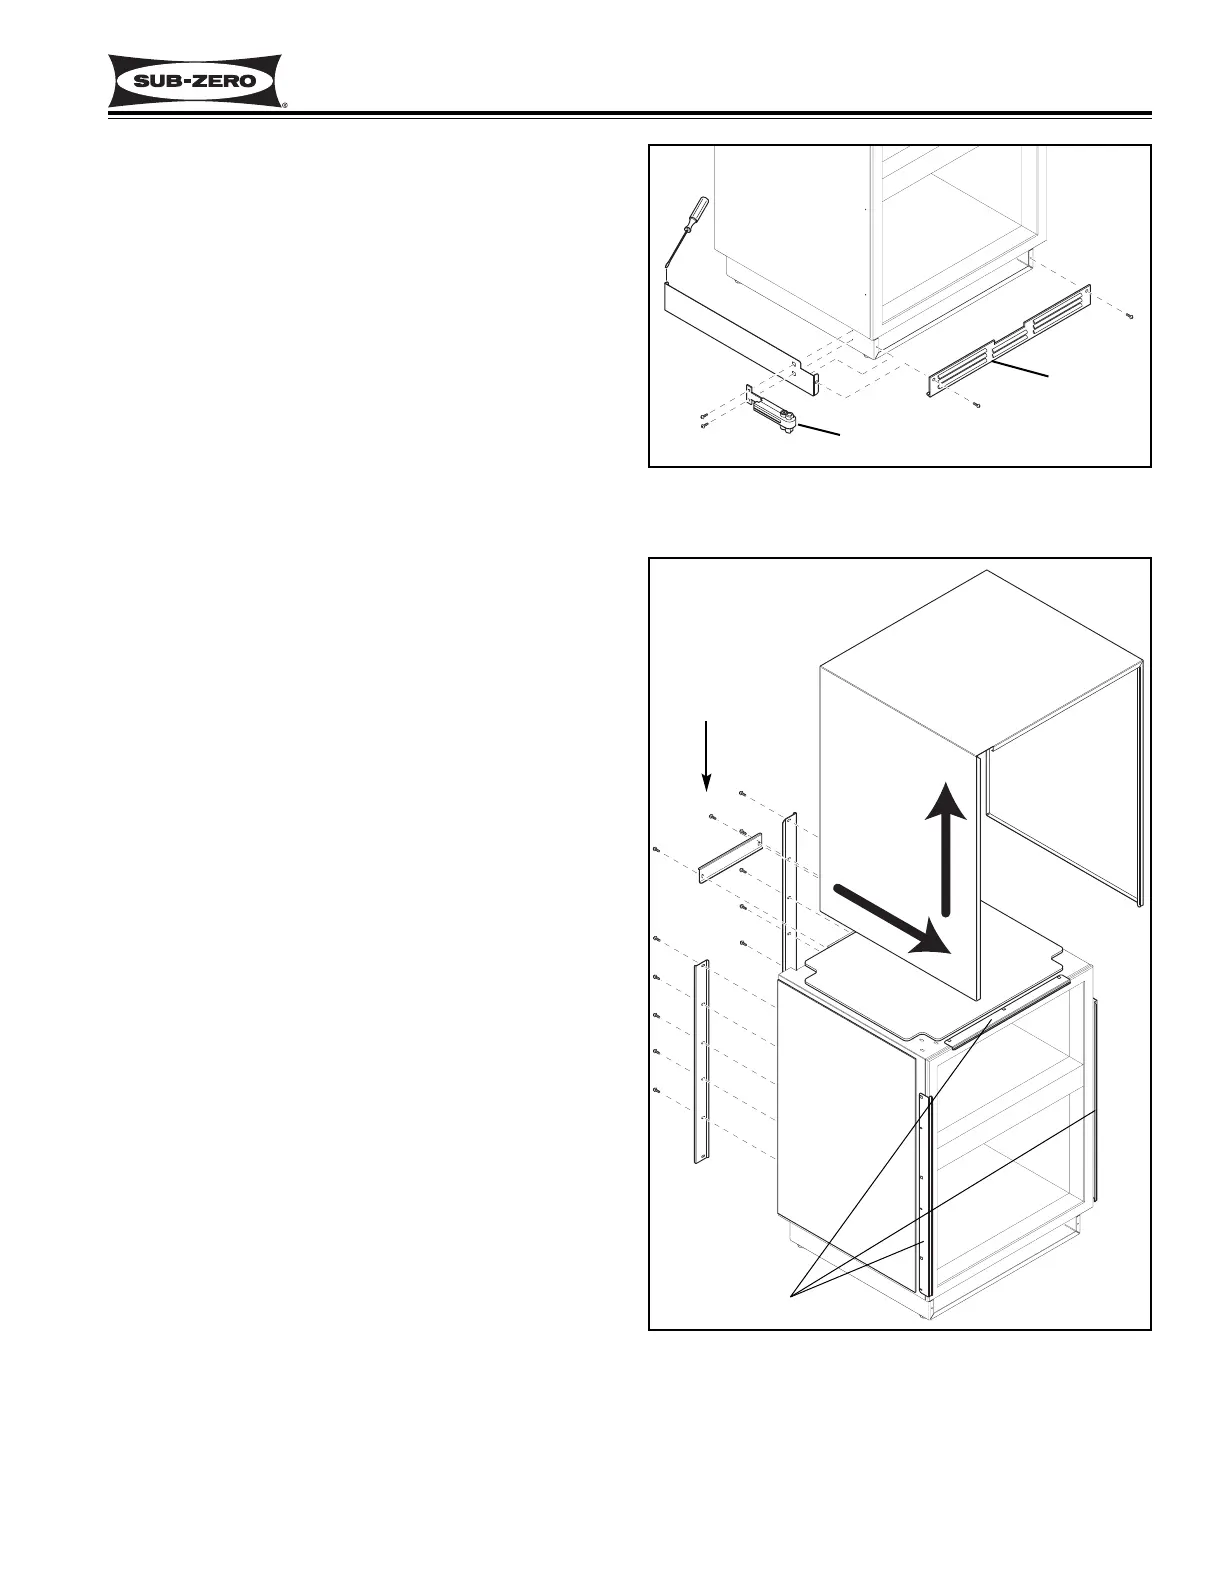
Stainless Steel Base Cover Assemblies - The base
cover assemblies are stuck to the sides of the unit base
with double-stick tape. Screws passing through the
ends of the kickplate and the base cover front flanges
secure the kickplate and covers to the unit base. On
the hinge side of the unit, screws pass through the door
closer bracket and the base cover into the door closer
mounting holes in then unit base.
To remove the base cover assemblies, first remove the
kickplate. If a door closer is mounted on the side of the
base cover being removed, remove the door closer too.
Then, at the back of the unit, insert a flat-blade screw-
driver between the base cover and unit base and pry
the base cover off. (See Figure 6-5)
Stainless Steel Overlay Unit Wrap - There are
brackets riveted at the front of the top and sides of the
unit. Flanges at the front of the unit wrap hook over
these brackets. Brackets at the back of the unit hook
under the back flanges of the unit wrap. When the
mounting screws are tightened down on the back
brackets, the brackets pull the wrap backward, which
holds the wrap tight between the front and back brack-
ets.
To remove the unit wrap, extract the back bracket
mounting screws and remove the back brackets, then
shide the wrap forward to disengage the front brackets
and lift the wrap up and off of the unit. (See Figure 6-6)
Kickplate
Door Closer
Base Cover
Figure 6-5. Base Cover Removal
Figure 6-6. SS Unit Wrap Removal
Slide SS
Overlay Unit
Wrap for-
ward, then
lift up
Front Brackets
Remove
Back
Brackets