6
NOTE: Be certain to refill water heater with water and remove all air from tank and
lines before re-lighting.
ODOR FROM HOT WATER SYSTEM
Odor from the hot water system is not a service problem and many water supplies
contain sufficient amounts of sulphur to produce an odor. The odor is similar to
rotten eggs and is often referred to as "sulphur water". It is not harmful - only
unpleasant to smell. Sulphur water can be caused by a chemical action or by
bacteria. The solution to eliminate is chlorination of the water system. Add about
six (6) ounces of chlorinated common household liquid bleach to each 10 gallons
in the water tank. Then run the chlorinated water throughout the system, opening
each faucet one at a time until you sm ell the chlorine. Let the RV sit for a few days
and the chlorine should take care of the problem. Then you will need to take care
of the chlorine. Rem ove the chlorine by flushing the system with fresh water. This
may take several attempts. You may consider adding a filtering system that
removes chlorine and prevents sulphur water. If the sulphur or rotten egg sm ell
continues, flush the system once again as described above and replace anode rod
as necessary.
.
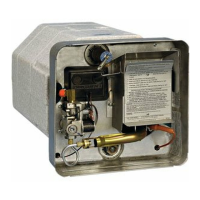
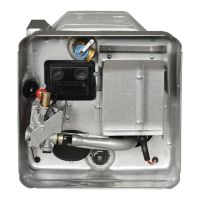
REMOVING WATER HEATER
1. Shut off gas supply and disconnect gas supply line from water heater.
2. Shut off water supply. Drain water from tank following instructions under
“Draining and Storage”.
3. Disconnect hot and cold water lines from water heater.
4. Remove screws or nails securing control housing to framed opening.
5. Slide heater out. To reinstall, follow instructions in manual under “Installation
Instructions”.
WINTERIZING
If your water heater plumbing system is equipped with a bypass kit, use it to close
off the water heater, drain the water heater completely and leave the water heater
closed off (out of the system) in the bypass position particularly if you are
introducing antifreeze into the plumbing system. Antifreeze can be very corrosive
to the anode rod creating premature failure and heavy sediment in the tank. If the
plumbing system is not equipped with a bypass kit, and you intend to winterize by
adding antifreeze to the system , remove the anode rod (storing it for the winter)
and replace it with a 3/4" drain plug.
FOR YOUR SAFETY READ BEFORE LIGHTING
WARNING! If the user of this appliance fails to maintain it in the condition in which is was shipped from the factory or if the appliance is not used solely
for its intended purpose or if appliance is not maintained in accordance with the instructions in this manual, then the risk of a fire and/or the production
of carbon monoxide exists which can cause personal injury, property damage or loss of life.
OPERATING AND LIGHTING INSTRUCTIONS
WARNING! If you do not follow these instructions exactly, a fire or
explosion may result causing property damage, personal injury or loss of
life.
WARNING: Before operating water heater, be sure tank is filled with water.
See, “Safety Warnings”.
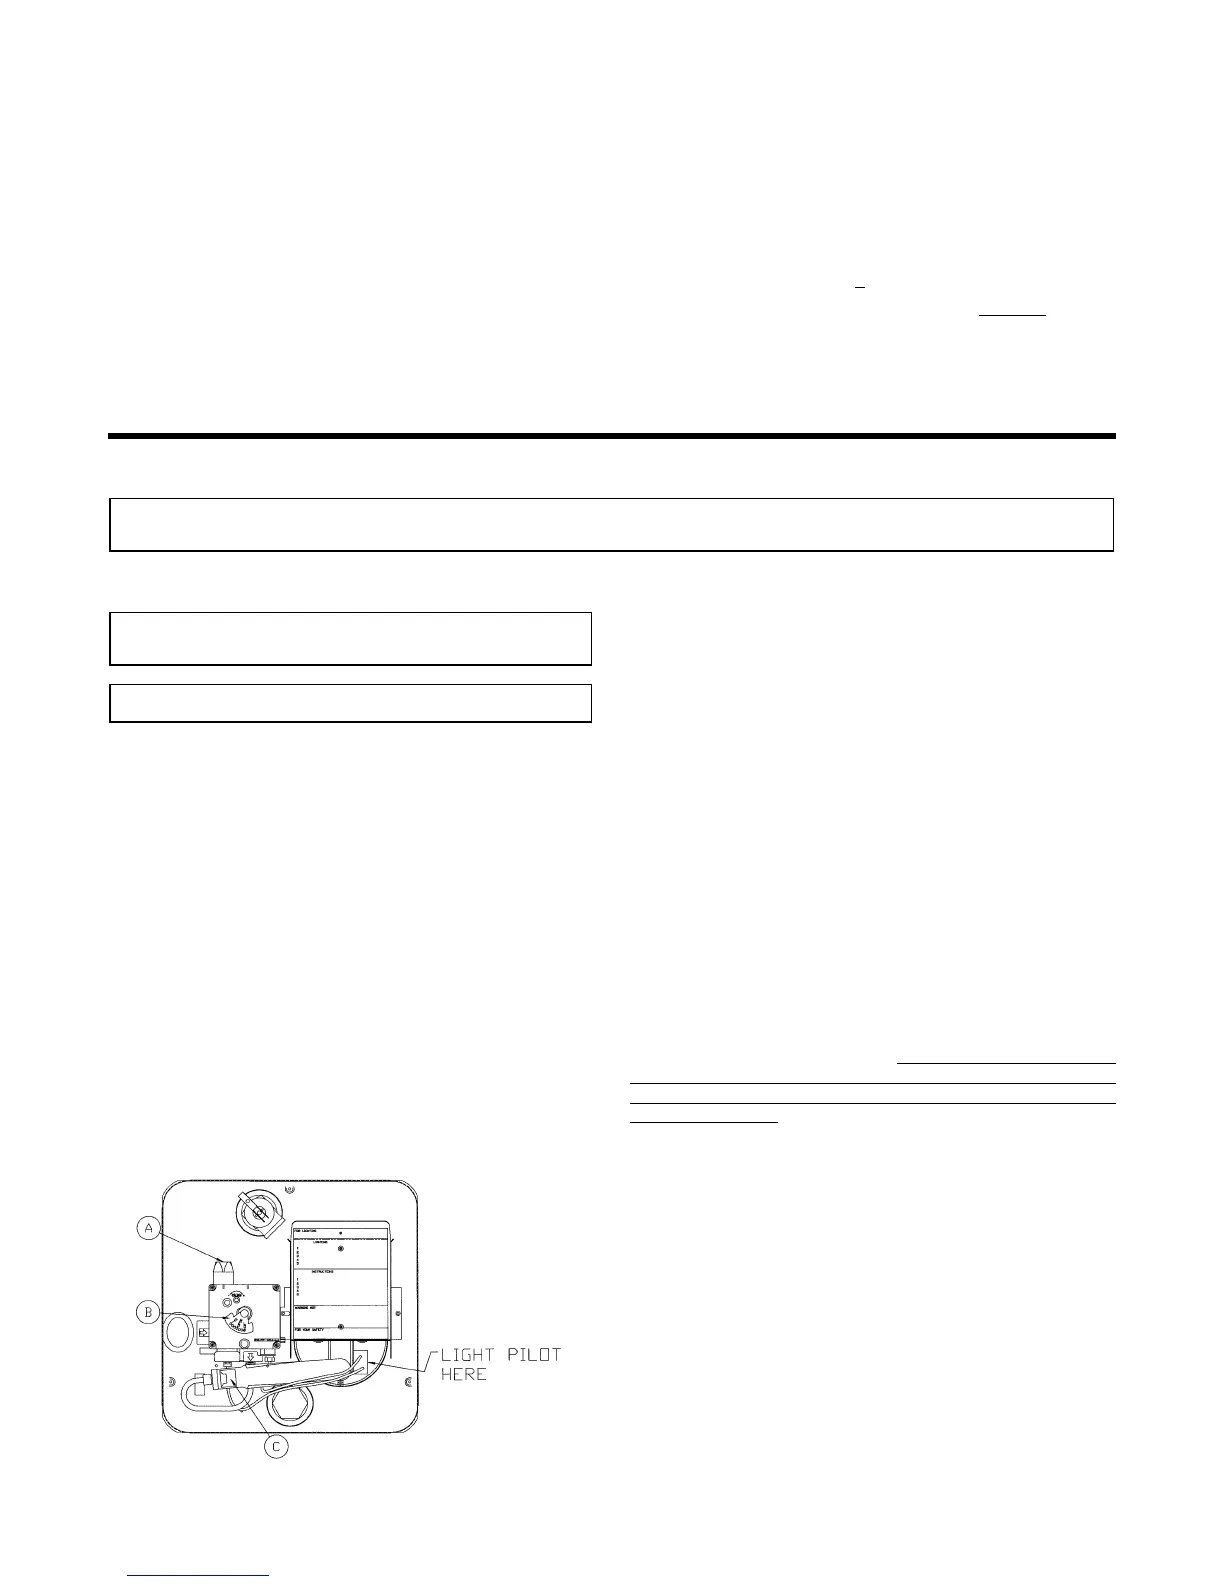
A. This appliance has a pilot which must be lighted by hand. When lighting the
pilot, follow these instructions exactly.
B. BEFORE LIGHTING smell all around the appliance area for gas. Be sure to
smell next to the floor because some gas is heavier than air and will settle on the
floor.
WHAT TO DO IF YOU SMELL GAS
C Do not try to light any appliance.
C Do not touch any electric switch.
C Do not use any phone in your building.
C Immediately call your gas supplier from a neighbor’s phone. Follow the gas
supplier’s instructions.
C If you cannot reach your gas supplier, call the fire department.
C. Use only your hand to push in or turn the gas cock or reset button. Never use
tools. If the knob will not push in or turn by hand, do not try to repair it; call a
qualified service technician. Force or attempted repair may result in a fire or
explosion.
D. Do not use this appliance if any part has been under water. Immediately call a
qualified service technician to inspect the appliance and to replace any part of the
control system and any gas control which has been under water.
E. Before operating water heater, check the location of the vent to make sure it
will not be blocked by the opening of any door on the trailer. If it can be blocked,
do not operate the water heater with the door open.
LIGHTING INSTRUCTIONS
If the water heater comes equipped with a reignitor control, see “Lighting
Instructions for Reignitor Control”.
1. STOP! Read the safety information provided.
2. Depress and turn knob (A) clockwise º to “OFF” position.
3. Turn off all electric power to the appliance (gas/electric m odels only).
4. W ait five minutes for gas to clear the area. If you smell gas then STOP! Follow
instructions in items B above in the safety information. If you do not smell gas, go
to the next step.
5. Depress and turn knob (A) counter clockwise » to “Pilot” position, press down
and light pilot where indicated. (See illustration).
CAUTION: Do not attempt to light at main burner orifice (C) in illustration.
6. Hold knob depressed until pilot remains on.
7. Depress and turn knob (A) counter clockwise » to “ON” position. The control
knob has a straight line designation beyond the “ON” position. Turn to this position
when moving the valve from the “Pilot” position to the “ON” position. Knob will
automatically snap back to the “ON” position when released.
8. If pilot goes out, repeat steps 2 through 6. On initial start-up, this may take
several minutes in order to purge the air from the gas lines and the pilot rem ain
on.
9. Turn on all electrical power to appliance if the combination gas/electric feature
is a part of the water heater.
10. Set temperature dial (B) to desired setting.
CAUTION: Temperature setting on control was factory set at low
(120°F/49°C) to reduce risk of scald injury. Setting the temperature dial
past the low position will increase the risk of scald injury.
Children, disabled, elderly and diabetics are at highest risk
of being scalded.
11. Feel water before bathing or showering.
TO TURN OFF WATER HEATER
1. Turn temperature dial (B) clockwise º to the lowest setting.
2. Turn off electrical power to the appliance.
3. Depress and turn knob (A) clockwise º to the “OFF” position.
4. If vehicle is to be stored or heater is going to be turned off while subject to
freezing temperature, drain water heater. (See “Draining and Storage Instruction.”)
 Loading...