1
2
3
4
5
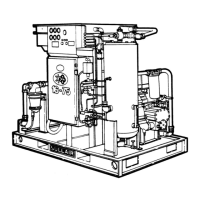
Figure 6-3: Air/fluid separator
1. Capscrew
2. Washer
3. Cover
4. Separator element (with gaskets)
1
5. Receiver tank
1
Separator element replacement P/N: 250034-112
WARNING
Fire hazard.
If the separator element’s staples are removed, a
static electrical charge
can create sparks that ignite
the atomized oil in the compressed air stream.
Do not remove the staples from the separator
element.
6: Maintenance 185 T4F Kubota User Manual
02250216-781 R02
48 Subject to EAR, ECCN EAR99 and related export control restrictions.
1. Disconnect all receiver tank cover piping
connections to permit removal (return line,
service line, etc.).
2. Remove the fluid return line from the fitting
on the cover.
3. Remove the eight (8) cover bolts and wash-
ers and lift the cover off the receiver tank.
4. Remove the separator element.
5. Scrape the old gasket material from the
cover and the flange on the receiver tank. Do
not allow the scrapings to fall into the tank.
6. Install the new element.
7. Replace the receiver tank cover and bolts.
Lightly tighten all the bolts and then gradually
tighten them alternating between bolts which
are diagonally opposite each other. Torque
the bolts to 60 ft-lbs (81 N•m).
8. Reconnect all piping. The fluid return line
tube should extend to the bottom of the sep-
arator element which will ensure proper
return line flow.
9. Clean the fluid return line strainer and clear
the orifice before starting the compressor.
10. After 24 hours of operation, tighten the receiver
tank cover bolts to the value given in step 7.
6.9.5 Fuel/water separator maintenance
Refer to Figure 6-4 for all fuel/water separator mainte-
nance procedures.
6.9.5.1 Draining water from the fuel/water
separator
1. Shut down the compressor.
2. Open the compressor canopy.
3. Place a container for collecting the fluid
under the drain.
4. Open the drain valve by turning it two turns to
the left. Any water in the separator bowl will
flow out through the drain.
5. When the fluid flowing from the drain changes
from water to fuel, close the drain valve by
turning the valve to the right until tight.
6. Close the compressor canopy.
 Loading...