4 Hyponic® Operating and Maintenance Manual
Hyponic® Operating and Maintenance Manual 5
www.SumitomoDrive.com
Transportation
Ambient temperature:
Humidity:
Altitude:
Atmosphere:
14°F to 104°F (-10°C to 40°C)
85% or less
Lower than 3300 ft (1000 m) above sea level
Free from corrosive gases, explosive gases or steam. It should also be free from dust and well
ventilated.
Do not stand directly under a unit suspended by a crane or other lifting mechanism; otherwise, injury or
death may result.
• Exercise ample care so as not to drop the unit.
When a hanging bolt or hole is provided, be sure to use it. After mounting a unit to a machine, do not hoist the
entire machine using the hanging bolt or hole; otherwise, personal injury or damage to the equipment and/or
lifting device may result.
• Before hoisting, refer to the rating plate, crate, outline drawing, catalog, etc. for the weight of the unit. Never hoist
a unit that exceeds the rating of the crane or other mechanism being used to lift it; otherwise, personal injury or
damage to the equipment and/or lifting device may result.
• Use an appropriate hanging bolt or hole, and make sure that the eye-bolt and/or nut is not loose before hoisting.
• Inspect the input shaft hollow bore and the motor shaft for debris or other material that may prevent the insertion
of the motor shaft into the hollow quill input shaft – carefully clean if necessary.
• To enable easy installation and removal of the motor, apply anti-seize paste to both the reducer hollow bore and the
motor shaft.
• Hollow input shaft units for the Food and Beverage Industry have either an o-ring or gasket material (solid or
liquid) for installation between the motor and reducer.
• Place the motor key into the motor shaft and carefully insert the motor into the quill high-speed shaft of the
reducer. Do not force the assembly if the shafts are slanted or misaligned or if the key is only partially engaged.
• Ensure that the motor flange bolts are aligned with the through holes of the reducer flange, and also ensure that the
motor is properly aligned with the reducer.
• Bolt the motor into place. Refer to the motor operating instructions for proper bolt tightening torque. Important: If
the bolt is tightened when the fitting is not inserted, uneven tightening will result, causing damage to the internal
bearing and other components.
• After wiring the motor as recommended in the Wiring section, the motor shaft rotates to the right as seen from
the fan cover side. Figure 1 shows the direction of rotation for the output shaft depending on the size and ratio
combination.
• After corroborating direction of rotation, the gearmotor can be connected to the driven machine. It is
recommended to do a test run with no load, and increase load gradually. Observe precautions listed in Table 8 Trial
Run Precautions in the Operation section during test run.
Installation
Standard Operating Conditions
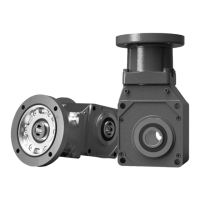
Mounting Angle
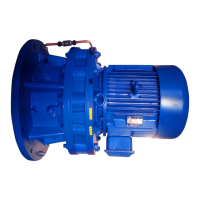
Motor Mounting (Quill Input Shaft)
Direction of Rotation
There is no limit on a mounting angle.
Do not remove the motor’s eye-bolt. In the rare case that it is removed, insert a bolt or other appropriate material
into the screw hole to prevent water or other substances from entering the motor through the screw hole.
Reducer Supplied with Motor (assembled):
Some units may come from the factory with the motor attached. In this case, no additional preparation is required.
Customer Supplied Motor or Motor Supplied Separately (disassembled):
Note: Swapping two of the three input power leads of a three-phase induction motor will cause the motor direction to reverse.
Model
Counter Clockwise Reduction Ratio (:1)
Model Clockwise Reduction Ratio (:1)
1120 5, 7, 10, 12, 15, 20, 25, 30, 40, 50, 60 1120 –
1220 5, 7, 10, 12, 15, 20, 25, 30, 40, 50, 60 1220 –
1230 – 1230 80, 100, 120, 150, 200, 240
1320 5, 7, 10, 12, 15, 20, 25, 30, 40, 50, 60 1320 –
1330 – 1330 80, 100, 120, 150, 200, 240
1340 300, 360, 480, 600, 720, 900, 1200, 1440 1340 –
1420 5, 7, 10, 12, 15, 20, 25, 30, 40, 50, 60 1420 –
1430 – 1430 80, 100, 120, 150, 200, 240
1440 300, 360, 480, 600, 720, 900, 1200, 1440 1440 –
1520 5, 7, 10, 12, 15, 20, 25, 30, 40, 50, 60 1520 –
1521 5, 7, 10, 12, 15, 20, 25 1521 –
1522 5, 7, 10, 12, 15 1522 –
1530 – 1530 80, 100, 120, 150, 200, 240
1531 – 1531 40, 50, 60, 80
1540 300, 360, 480, 600, 720, 900, 1200, 1440 1540 –
1630 10, 12, 15, 20, 25, 30, 40, 50 1630 60, 80, 100, 120
1631 – 1631 150, 200, 240
1632 10, 12, 15, 20, 25, 30 1632 40, 50, 60
1633 20, 25 1633 30, 40
1634 5, 7, 10, 12, 15 1634 20, 25
1640 300, 360, 480, 600, 720, 900, 1200, 1440 1640 –
Fig. 1 Rotating Direction of the Output Shaft
CCW
CW
CW
CW
 Loading...