4
9
SET UP & USE:
Table Top or Wall Mounting:
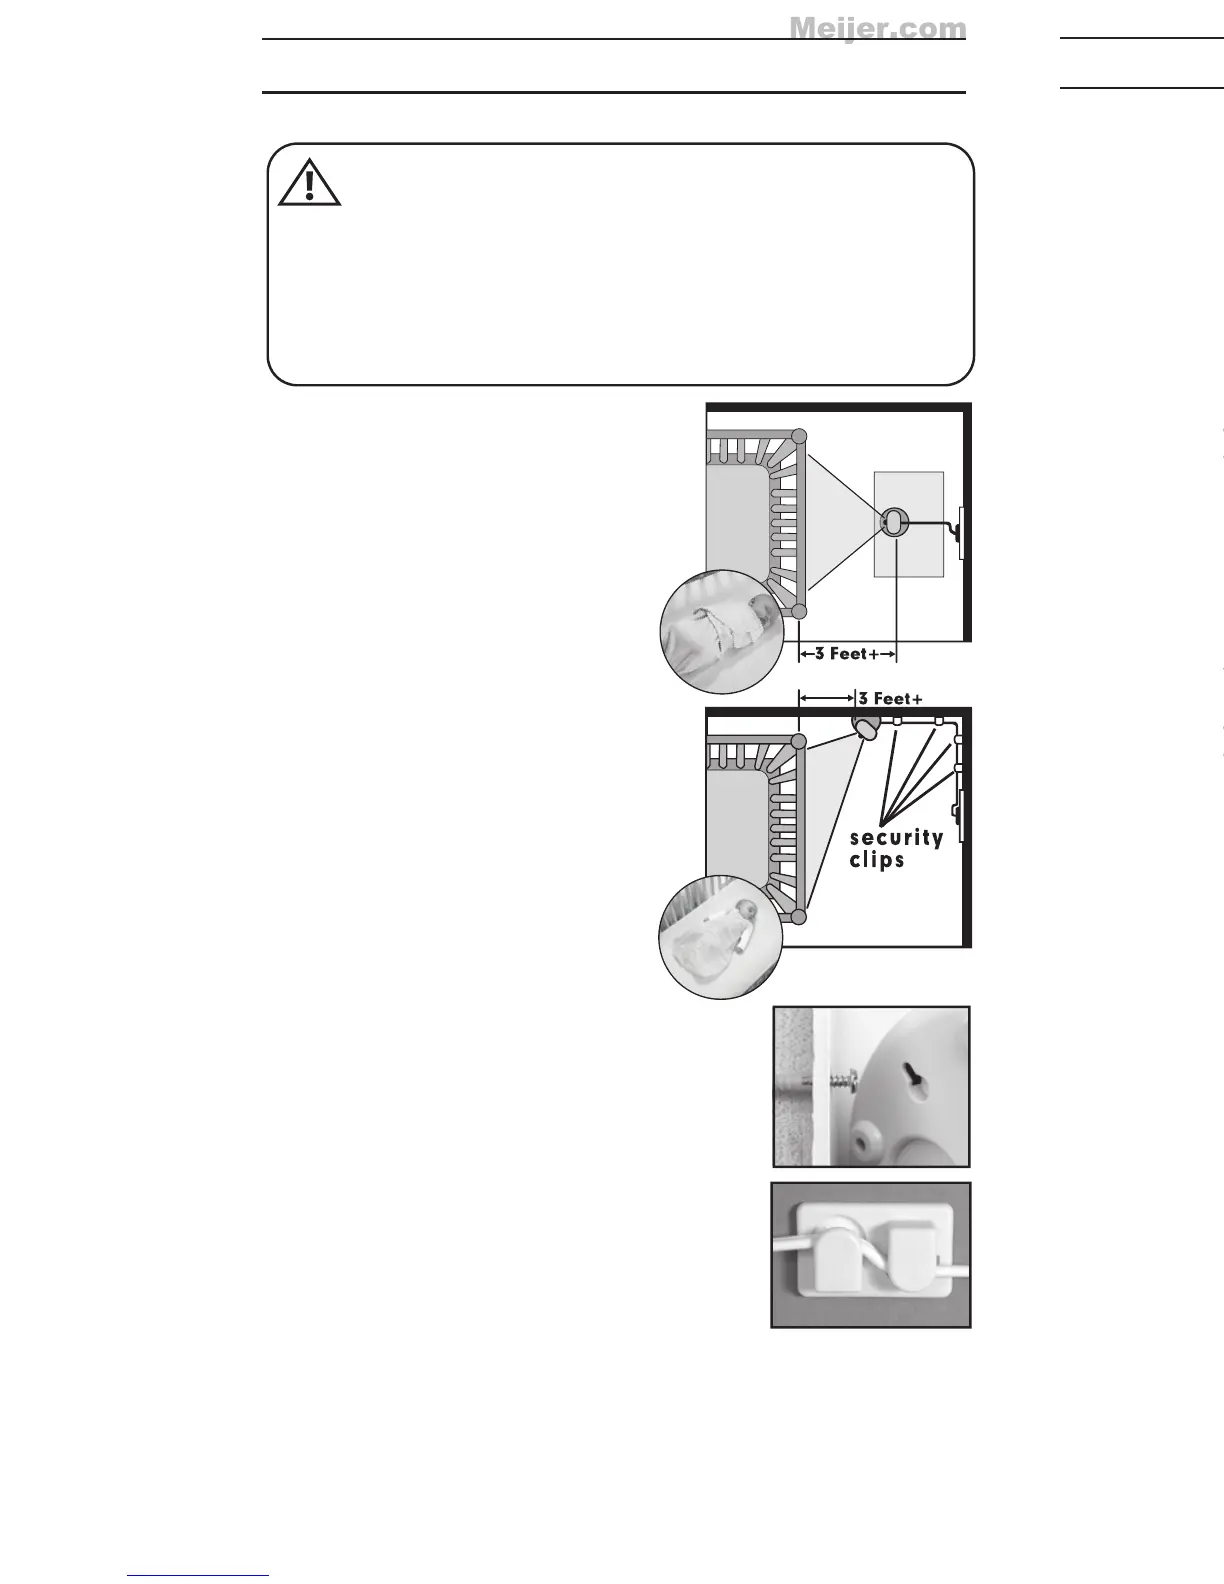
Determine a location for the CAMERA
that will provide the best view of your
baby in his crib. Place the CAMERA
on a flat surface, such as a dresser,
bureau, or shelf (Figure A). Or mount
the CAMERA on a wall (Figure B).
NEVER place camera or cords
within 3 feet of the crib. Secure
the cord to the wall using the
6 Security Clips included to keep
cord away from baby’s reach.
Be sure to test reception and
CAMERA positioning before
mounting to a wall (see "Testing
Your Initial Set Up" section).
To Wall Mount:
a) Pre-drill a hole in the wall (3/16",
4.8mm, drill bit) (Figure C).
b) Insert the wall anchor
(included) into the hole and
with a hammer, tap gently on
the end until the wall anchor is
flush with the wall.
c) Insert the screw (included) into the
wall anchor and tighten screw
until only 1/4" (6.2mm) of the
screw is exposed.
d) Insert smaller AC Adapter into
the CAMERA’s AC Adapter Jack.
e) Slide the back of the CAMERA
down onto the screw until the
CAMERA is secure to the wall.
f) Plug the AC Adapter into a
standard electrical outlet.
g) Secure the cord to the wall using the
6 Security Clips included to keep cord
away from baby's reach (Figures B & D).
h) Slide switch on side of
Camera
to ON and the
POWER ON LED will illuminate solid green.
C
D
STRANGULATION HAZARD - Keep cord out of baby’s reach.
NEVER place camera or cords within 3 feet of the crib.
Use enclosed Security Clips to help secure cord away from
baby’s reach. Never use extension cords with AC Adapters.
Only use the AC Adapters provided.
WARNING:
CAMERA
B
A
PROBLEM SOLVING:
No picture or sound on Monitor
• Make sure the Monitor is turned on
• Make sure the AC Adapters are plugged in
• Make sure the outlets are working
• Make sure Monitor and Camera are SYNCHED up.
(refer to “Synching MONITOR and CAMERA” section on
page 7)
Sound but no picture on Monitor
• Press the Quick View/Video On/Off Button once to turn on
video mode
• Try adjusting the Brightness Control on the Monitor
• Test reception by moving the Monitor and/or CAMERA to
different locations
Picture but no sound
• Turn up the volume on the Monitor using the Volume Control
Picture not clear
• Position the Monitor closer to the CAMERA if necessary
•
Move Monitor away from other monitors, cordless phones,
walkie-talkies, etc.
• Try adjusting the Brightness Control on the Monitor
• Test reception by moving the Monitor and/or CAMERA to
different locations
Squealing sound
• Move the CAMERA and the Monitor further away from
each other