This document is an instruction manual for Summit Ceramic Glass Electric Cooktops, covering models CR2110, CR2110TK15, CR2110WH, CR2110WHTK15, CR2220, CR2220TK15, CR2220WH, and CR2220WHTK15. It provides comprehensive information on product specifications, safety instructions, installation, operation, and maintenance.
Function Description:
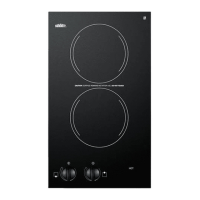
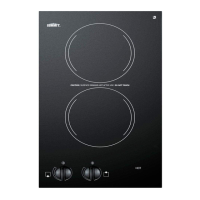
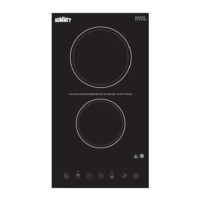
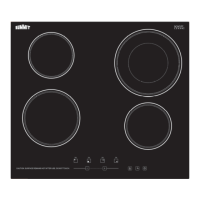
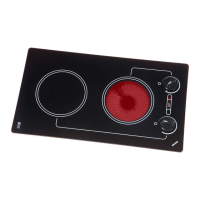
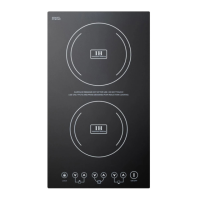
The Summit Ceramic Glass Electric Cooktops are designed for household cooking, featuring radiant heating elements beneath a smooth ceramic glass surface. These cooktops are available in various models, all equipped with double burners for efficient cooking. The ceramic glass surface allows for easy cleaning and maintenance.
Important Technical Specifications:
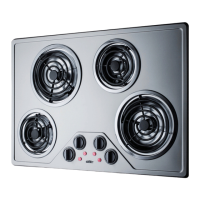
All models feature double burners.
- CR2110 and CR2110WH models: Operate on 120V AC and have two 6" (140 mm) burners, each rated at 1200 watts.
- CR2220 and CR2220WH models: Operate on 220V AC and have two 6" (140 mm) burners, each rated at 1200 watts.
- Overall dimensions for all models: 11¾" x 19⅝" x 2⅛" (300 mm x 500 mm x 55.3 mm).
- Cutout dimensions for all models: 11⅛" x 19¼" (282 mm x 490 mm).
- Model Suffixes:
- "WH" indicates a white ceramic glass cooktop; otherwise, the cooktop is black.
- "TK15" indicates the model includes a Trim Kit, allowing the unit to fit into a 15" wide cutout.
- Electrical Supply Requirements:
- CR2110/WH/TK15: Maximum Connected Load of 2400 Watts, requiring 120V AC/25A/60Hz input and a minimum #12 AWG wire size.
- CR2220/WH/TK15: Maximum Connected Load of 2400 Watts, requiring 220V AC/10A/60Hz input and a minimum #16 AWG wire size.
- The cooktop is supplied with a 40-inch long conduit for connection to an accessible junction box. 120V units have a hot lead (black), ground (green), and neutral (white) conductor. 240V units have two hot leads (red, black) and a ground (green) conductor.
- The appliance must be installed on an individual grounded circuit protected by a circuit breaker.
Usage Features:
- Controls & Indicators: Each cooking area has an infinite selection of heat settings. Turning the knob clockwise increases heat output by cycling the heating elements between OFF and full power. A red light adjacent to each control knob indicates when a burner is ON and is too warm to touch.
- Heating Elements: The cooktop utilizes radiant heating elements that "light up" approximately 4-5 seconds after activation. These elements direct heat efficiently through the ceramic glass. Temperature limiters are integrated into each element to prevent the ceramic glass top from exceeding safe operating temperatures.
- Cookware Compatibility: The cooktop works well with most existing cookware. For optimal efficiency, cookware should have a flat bottom and a diameter similar to the cooking zone. Metal cookware with thick, smooth, flat bottoms generally conducts heat best. Cookware with shaped, rounded, or warped bottoms should be avoided.
- Safety Precautions:
- Proper installation and grounding by a qualified technician are essential.
- Never use the appliance for room warming.
- Children should not be left unattended near the cooktop or allowed to sit/stand on it.
- Loose-fitting clothing should not be worn while using the appliance.
- Do not repair or replace any parts; service should be performed by authorized personnel.
- Flammable materials, plastic utensils, and items with low melting temperatures should be kept away from or stored beneath the cooktop.
- Heating elements should never be immersed in water.
- Do not use water on grease fires; smother flames or use a dry chemical/foam extinguisher.
- Use dry potholders to avoid steam burns and ensure they do not touch heating elements.
- Do not cook on a broken cooktop; contact service immediately if the surface breaks.
- Clean the cooktop with caution to avoid steam burns from hot surfaces.
- Do not touch heating elements until they have cooled sufficiently.
- Use proper pan size to cover heating elements and prevent clothing ignition.
- Never leave surface units unattended at high heat settings to prevent boil-overs and fires.
- Turn utensil handles inward, away from adjacent surface units, to reduce the risk of burns and spills.
- Cabinet storage space above surface units should be avoided or reduced by installing a range hood that projects at least 5” beyond the bottom of the cabinets.
Maintenance Features:
- Cleaning Before First Use: A thorough cleaning with a recommended cooktop cleaner is advised before the first use to provide a protective coating.
- Regular Cleaning:
- Always remove food spills, grease spatters, and metal rub-off from cookware. A razor blade scraper can be used for stubborn spills.
- Clean the cooktop with a paper towel or a clean, soft cloth and a recommended cleaner.
- After cleaning, wipe the cooktop with a clean, damp cloth to remove cleaner residue, then wipe dry.
- Avoid using dish towels or sponges, as detergent film may cause discoloration.
- Do not use abrasive scouring cleaners, plastic, nylon, or metal cleaning pads, as they can scratch or melt onto the surface.
- Avoid chemical cleaners like chlorine bleach, ammonia, hydrofluoric acid, or chemical oven cleaners, which can etch or discolor the surface.
- Handling Melted Substances: If anything that melts (plastic, aluminum foil, sugar, etc.) comes into contact with the hot cooktop surface, immediately move it to a cool area with a razor blade scraper and remove it as soon as possible.
Installation Instructions:
- Unpacking: Carefully unpack the cooktop and retain original packaging for potential service returns. Verify all components are present: ceramic glass cooktop, 2 mounting brackets, 2 mounting screws, 4 cooktop carriers, 8 mounting screws for carriers, and a self-adhesive sealant strip. TK15 models also include a 15-inch wide stainless steel frame.
- Countertop Preparation:
- Ensure a maximum depth of 13 inches for overhead cabinets.
- Maintain a minimum countertop height of 36 inches above the floor.
- The flat countertop surface supporting the cooktop must be equal to or greater than the overall cooktop dimensions.
- Provide a minimum clearance of 30 inches between the top of the cooking surface and the bottom of an unprotected wood or metal cabinet, or 24 inches if protected by ¼-inch-thick flame retardant millboard covered with specific metal sheets.
- Maintain a minimum of 1 inch from the countertop backsplash to the edge of the glass.
- Do not install closer than 1½ inches (12 mm) from any adjacent surface.
- Allow a 2-inch (51 mm) minimum clearance between the bottom of the cooktop's metal pan and any combustible surface below (e.g., a drawer).
- Ensure adequate ventilation below the countertop to prevent overheating.
- When making the countertop cutout, radius the corners (1/4” typical) to prevent cracking.
- Installing the Cooktop:
- Attach the cooktop carriers using screws.
- Apply the self-adhesive sealant strip to the cooktop's underside, ensuring it perfectly matches the outer peripheral edge and ends fit without overlapping. Press firmly to secure.
- For TK15 models, apply a thin bead of bedding compound along the cutout edge, then lay the stainless steel frame over it, pressing down to create a seal and ensure it is flush with the countertop.
- Position the cooktop in the cutout opening and press firmly on all sides to seal it into the bedding compound (or frame).
- Attach the two mounting brackets to the inside bottom surface of the cutout on opposing sides, centering them flush with the countertop, and secure with long self-tapping screws.
- Secure the cooktop to the brackets from underneath with small sheet metal screws. Do not overtighten screws.
- Electrical Connection:
- Ensure power supply is disconnected.
- Connect the cooktop's conductor wires to residence wiring in accordance with national, state, and local electric codes.
- Grounding Warning: The appliance must be grounded at all times. Connect red to red, black to black, and green to ground. Do not ground with the neutral house supply wire; a separate ground must be used.
Limited Warranty:
- Duration: One year from the date of purchase within the 48 contiguous United States for factory-specified parts and repair labor for defects in materials or workmanship. Outside the 48 states, parts are warranted for one year from manufacturing defects. Plastic parts, shelves, and cabinets are warranted to commercially acceptable standards and are not covered for damage during handling or breakage.
- Exclusions: Service calls for installation correction, user instruction, light bulb/glass shelf replacement, consumable parts (filters), damage from accident, alteration, misuse, abuse, fire, flood, acts of God, improper installation, non-approved product use, replacement parts/labor costs for units operated outside the U.S., repairs due to unauthorized modifications, and removal/reinstallation if installed in an inaccessible location or not per instructions.
- Disclaimer: Customer's sole remedy is product repair. Implied warranties (merchantability or fitness for a particular purpose) are limited to one year. Warrantor is not liable for incidental or consequential damages. State laws may affect these limitations.
- California Proposition 65 Warning: This product can expose you to chemicals including Nickel (Metallic), known to cause cancer. (Note: Nickel is a component in stainless steel and other metal components).