12 Sun Blade 150 CD-ROM, DVD-ROM, and Hard Drive Installation Guide • June 2002
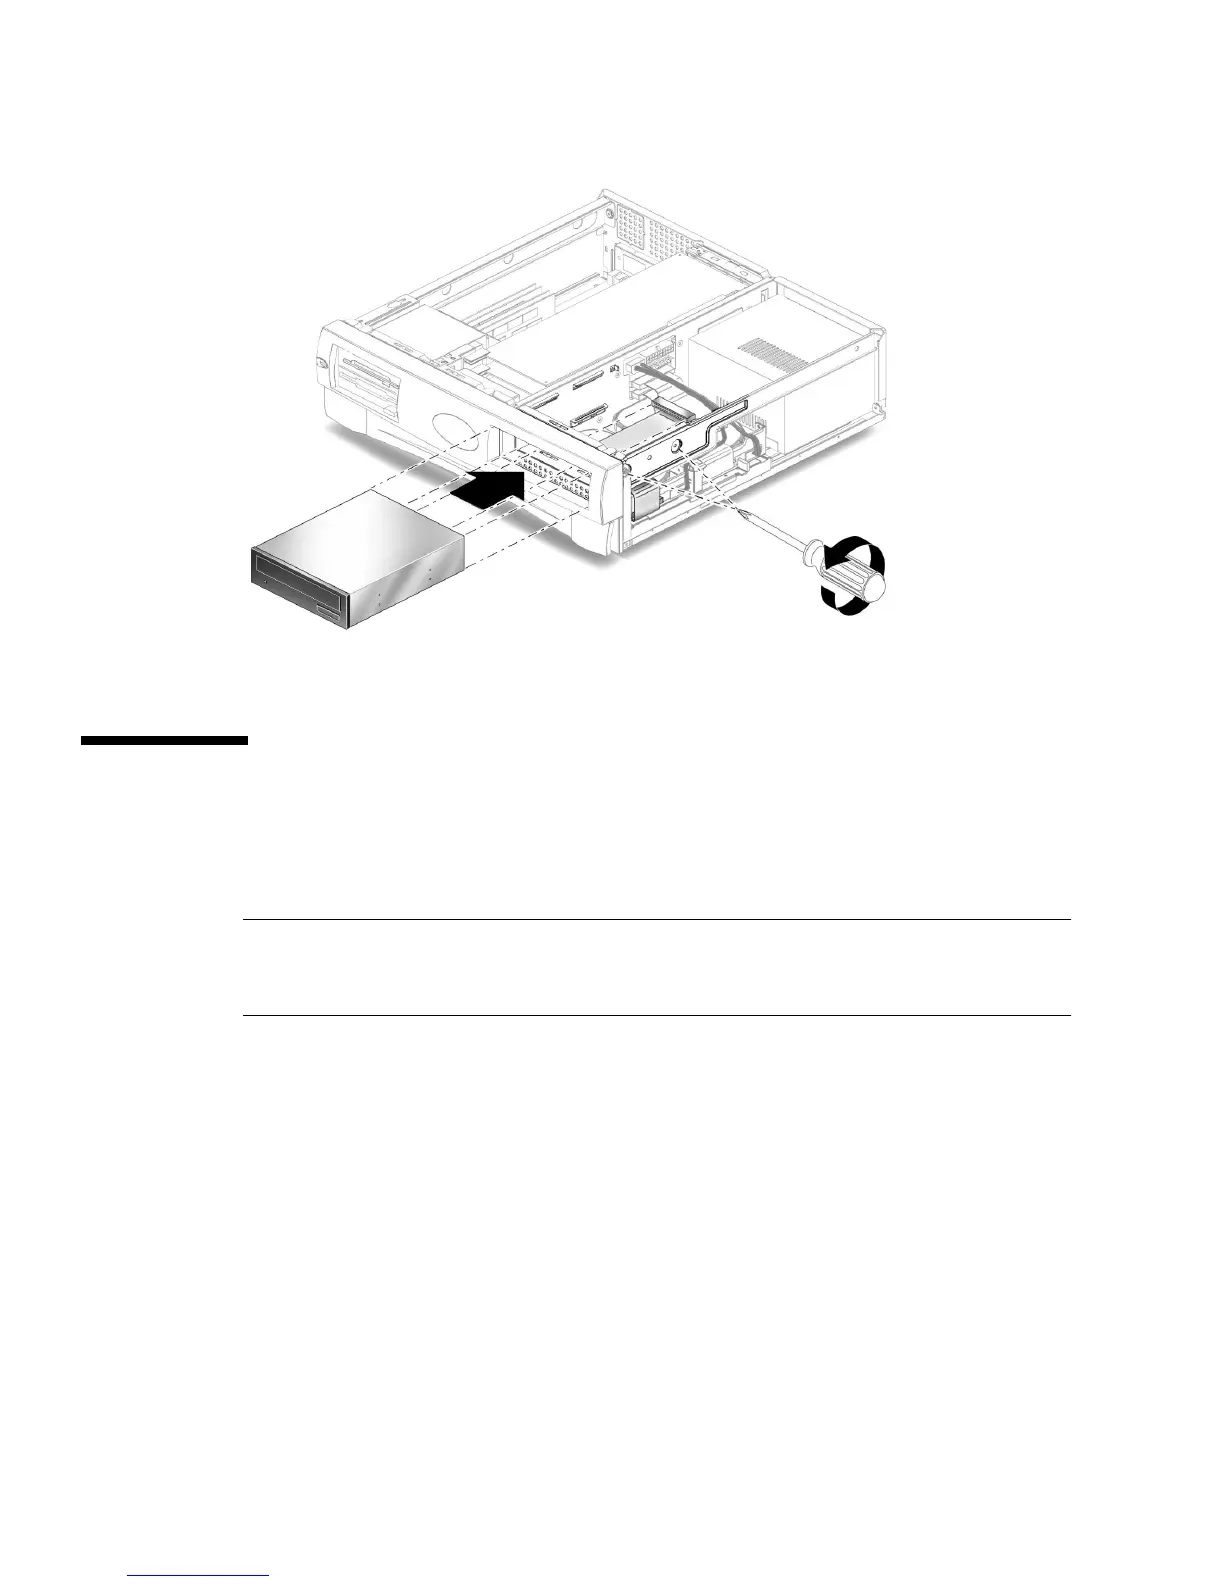
FIGURE 8 Removing and Replacing a CD-ROM or DVD-ROM Drive
Replacing a CD-ROM or DVD-ROM
Drive
Note – Before you replace the CD-ROM or DVD-ROM drive, verify that the
CD-ROM drive jumper (located on the CD-ROM drive back panel) is set to either
“CS,” “Cable Select” or “Enable Cable Select.”
1. Position the CD-ROM or DVD-ROM drive in the chassis (
FIGURE 8).
2. Push the CD-ROM or DVD-ROM drive toward the chassis rear.
3. Connect the following to the rear of the CD-ROM or DVD-ROM drive:
■ CD-ROM or DVD-ROM drive cable connector
■ Power cable connector
4. Ensure that the cable assembly connectors are properly oriented by aligning the
connector keys.
5. Using a No. 2 Phillips screwdriver, replace the two screws securing the CD-ROM
or DVD-ROM drive to the chassis.
 Loading...


