3
HOW TO INSTALL
1. Identify the wall-sleeve brand you have from the chart below:
Brand Wall Sleeve Dimensions ( HxWxD)
White-Westinghouse 15 1/4” x 25 1/2” x 16, 17.5, or 22”
Frigidaire/Sunbeam 15 1/4” x 25 1/2” x 16, 17.5, or 22”
Carrier (52F series) 15 1/4” x 25 1/2” x 16, 17.5, or 22”
General Electric/Hotpoint 15 5/8” x 26” x 16 7/8”
Whirlpool 16 1/2” x 25 7/8” x 17 1/8 or 23”
Fedders/Emerson 16 3/4” x 27” x 16 3/4 or 19 3/4”
Sears/Kenmore 16 7/8” x 25 3/4 x 18 5/8”
Emerson/Fedders 15 3/4” x 26 3/4” x 15”
Carrier (51S series) 16 7/8” x 25 3/4” x 18 5/8”
Friedrich 16 3/4” x 27” x 16 3/4”
Notes:
All wall sleeves used to mount the new air conditioner must be in sound structural condition and
have a rear grille that securely attached to the sleeve or rear fl ange that serves as a stop for the air
conditioner.
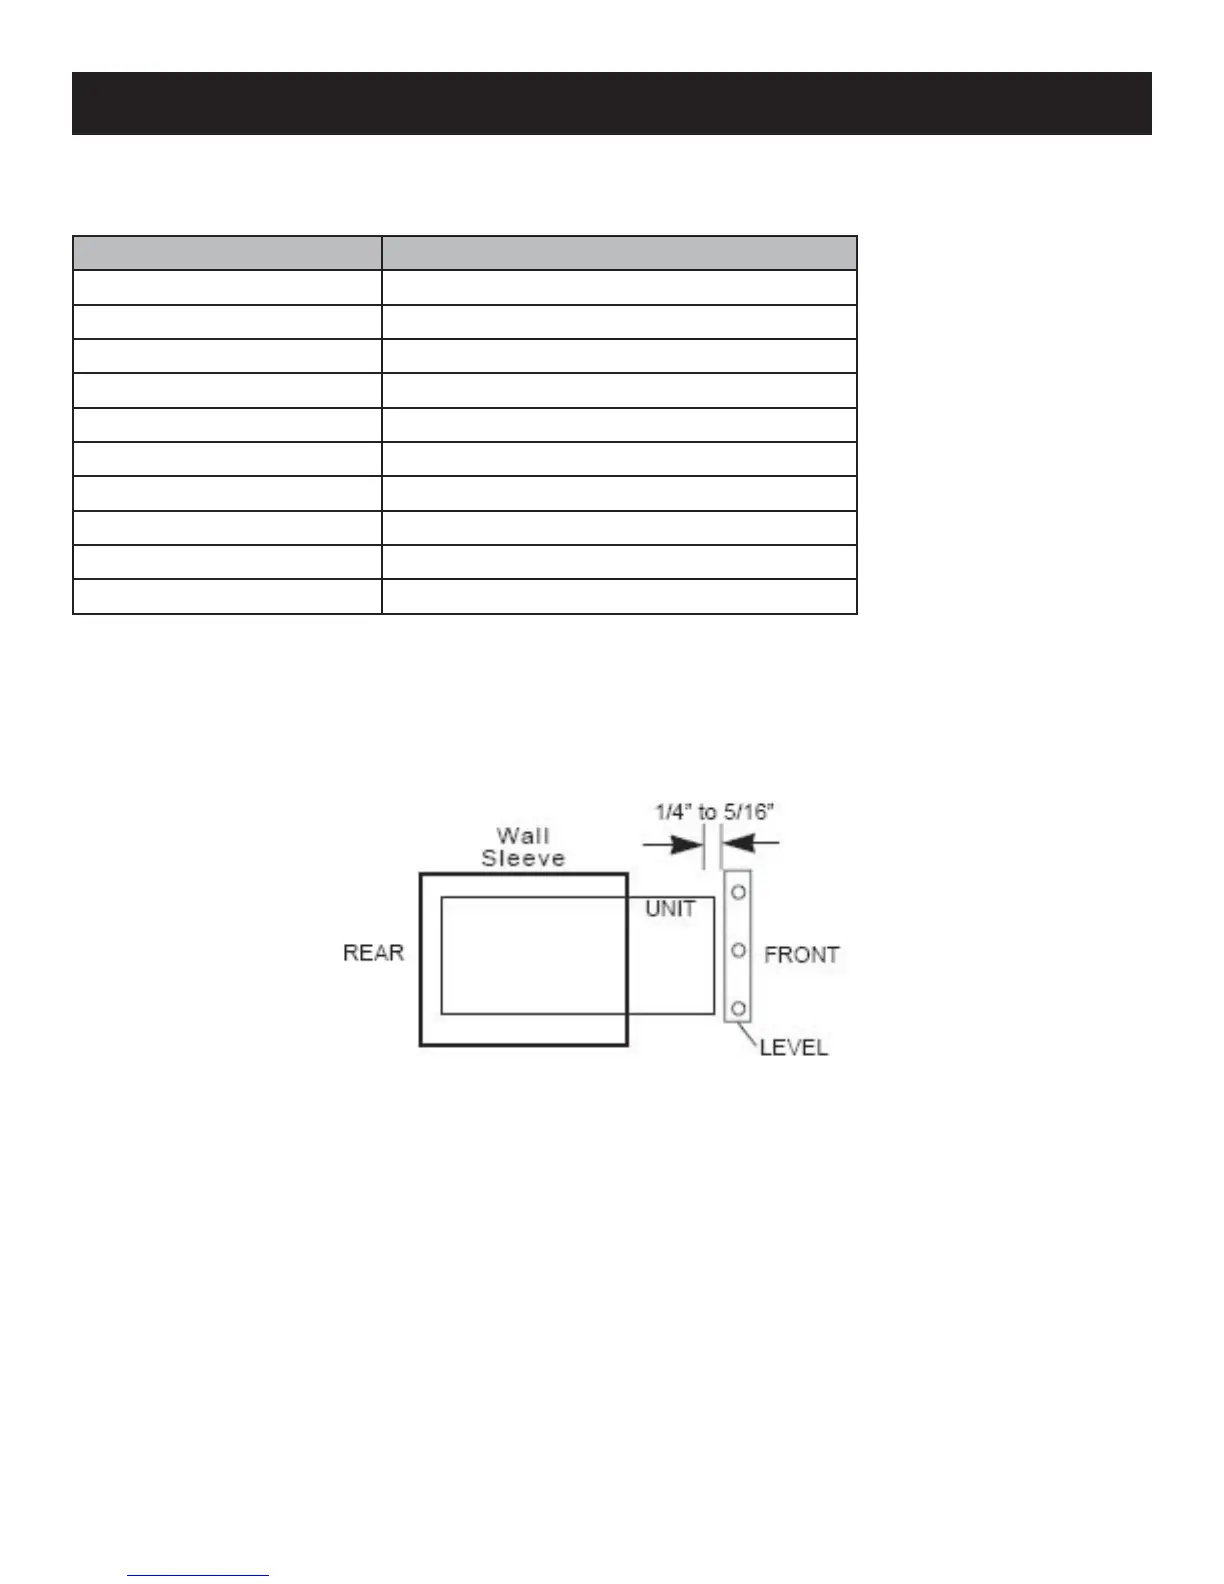
When the installation is complete, the replacement unit must have a rearward slope as shown.
•
•
2. Remove the old air conditioner from the wall sleeve and prepare wall sleeve as follows:
Clean interior
Wall sleeve must be securely fastened in the wall before installing your new air conditioner.
Drive more nails or screws through the sleeve and into the wall if necessary.
Repair paint if needed.
•
•
•