7
WALL SLEEVE BRAND: Fedders (19 3/4” deep)
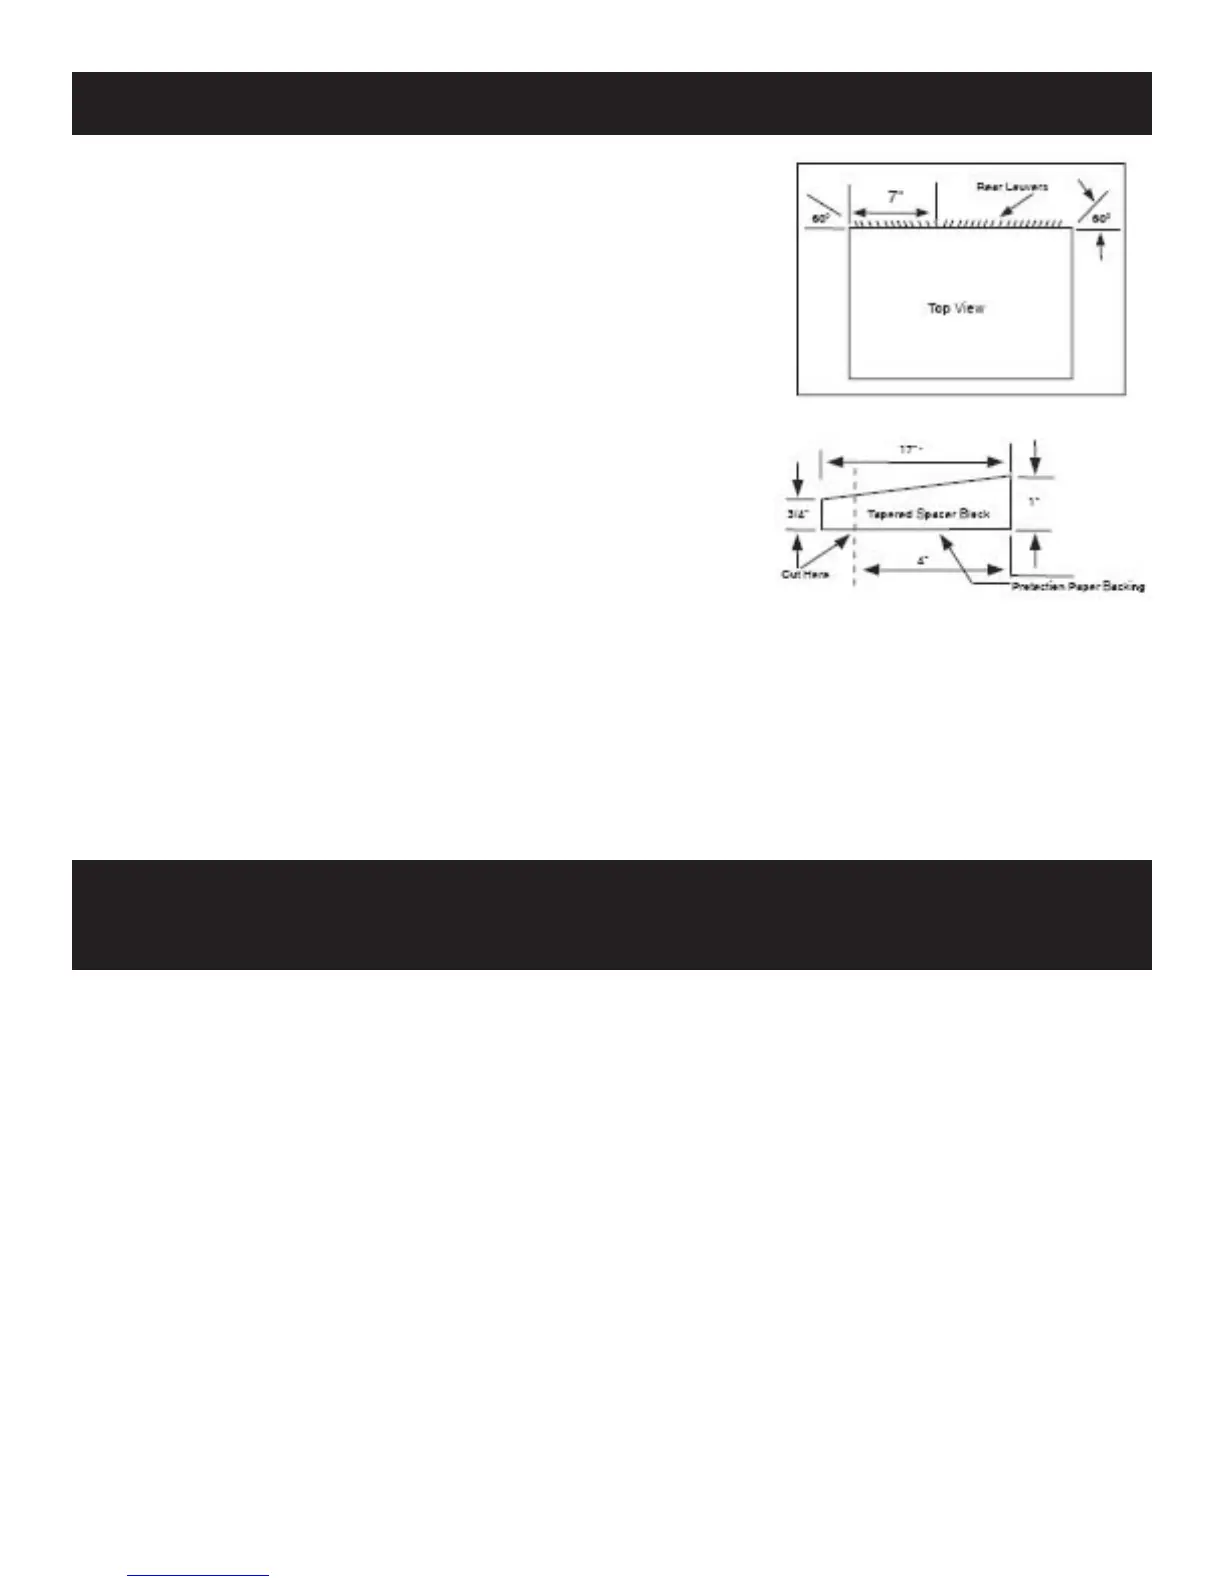
Redirect the louvers at the back of the wall sleeve.
Attach the (2) 4 1/2” x 3 1/2” x 1 1/2” centering/support
blocks, one on each side wall. Place in the center of the side
wall with the tapered end facing the sleeve opening.
Cut (2) 17” tapered spacer blocks into two pieces, 4” and 13”
each.
Place the 4” section in front of the rib on the base, with the
tapered end facing the back of the sleeve. The remaining
portion should be placed behind the rib again, sloping toward
the rear of the unit.
Attach (1) 1 1/2” x 3/8” x 25” seal in the center at the top of
the sleeve. Remove the backing paper and press into position.
Attach (2) 1 1/2” x 3/8” x 25” seals to the left and right sides
of the sleeve.
Cut the 1 1/2 x 3/8” x 25” seal to 14” and attach it to the
vertical section of the rear grille.
1.
2.
3.
4.
5.
6.
7.
WALL SLEEVE BRAND: White-Westinghouse, Frigidaire,
Sunbeam, Carrier 52F series (22” deep)
If the wall sleeve does not have a rear grille or louvered panel, install the plastic grille included in the
kit. The plastic grille is mounted to the inside of the wall sleeve at the rear fl anges. There are (4)
plastic nuts in the fl anges of the wall sleeve. If your sleeve is missing these nuts or they are damaged,
use the supplied replacement nuts and grill in the kit. The nuts are installed from the inside of the
sleeve and are pressed into the square holes of the rear fl anges. Place the grille against the rear
fl anges and use the (4) washer screws to secure the grille to the sleeve.
Attach (1) 1 1/2” x 3/8” x 25” seal in the center at the top of the sleeve. Remove the backing paper
and press into position.
Attach (2) 1 1/2” x 3/8” x 25” seals to the left and right sides of the sleeve.
Attach (1) 1” x 3/4” x 14” seal vertically 7” from the left side of the sleeve.
Gently slide the air conditioner into the sleeve.
Before sliding the unit all the way in, remove the second screw and washer from the front-left side of
the unit.
Screw and attach the other end of the ground wire to the unit, making sure the toothed washer is
against the cabinet.
Install the 1” x 1 1/2” x 84” stuffer seal between the wall sleeve and the air conditioner.
Assemble and install the trim frame (see “Trim Frame Assembly” section of manual).
1.
2.
3.
4.
5.
6.
7.
8.
9.
Gently slide the air conditioner into the sleeve.
Before sliding the unit all the way in, remove the second screw and washer from the front-left side of
the unit.
Screw and attach the other end of the ground wire to the unit, making sure the toothed washer is
against the cabinet.
Install the 1” x 1 1/2” x 84” stuffer seal between the wall sleeve and the air conditioner.
Assemble and install the trim frame (see “Trim Frame Assembly” section of manual).
8.
9.
10.
11.
12.