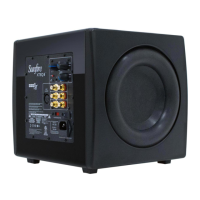
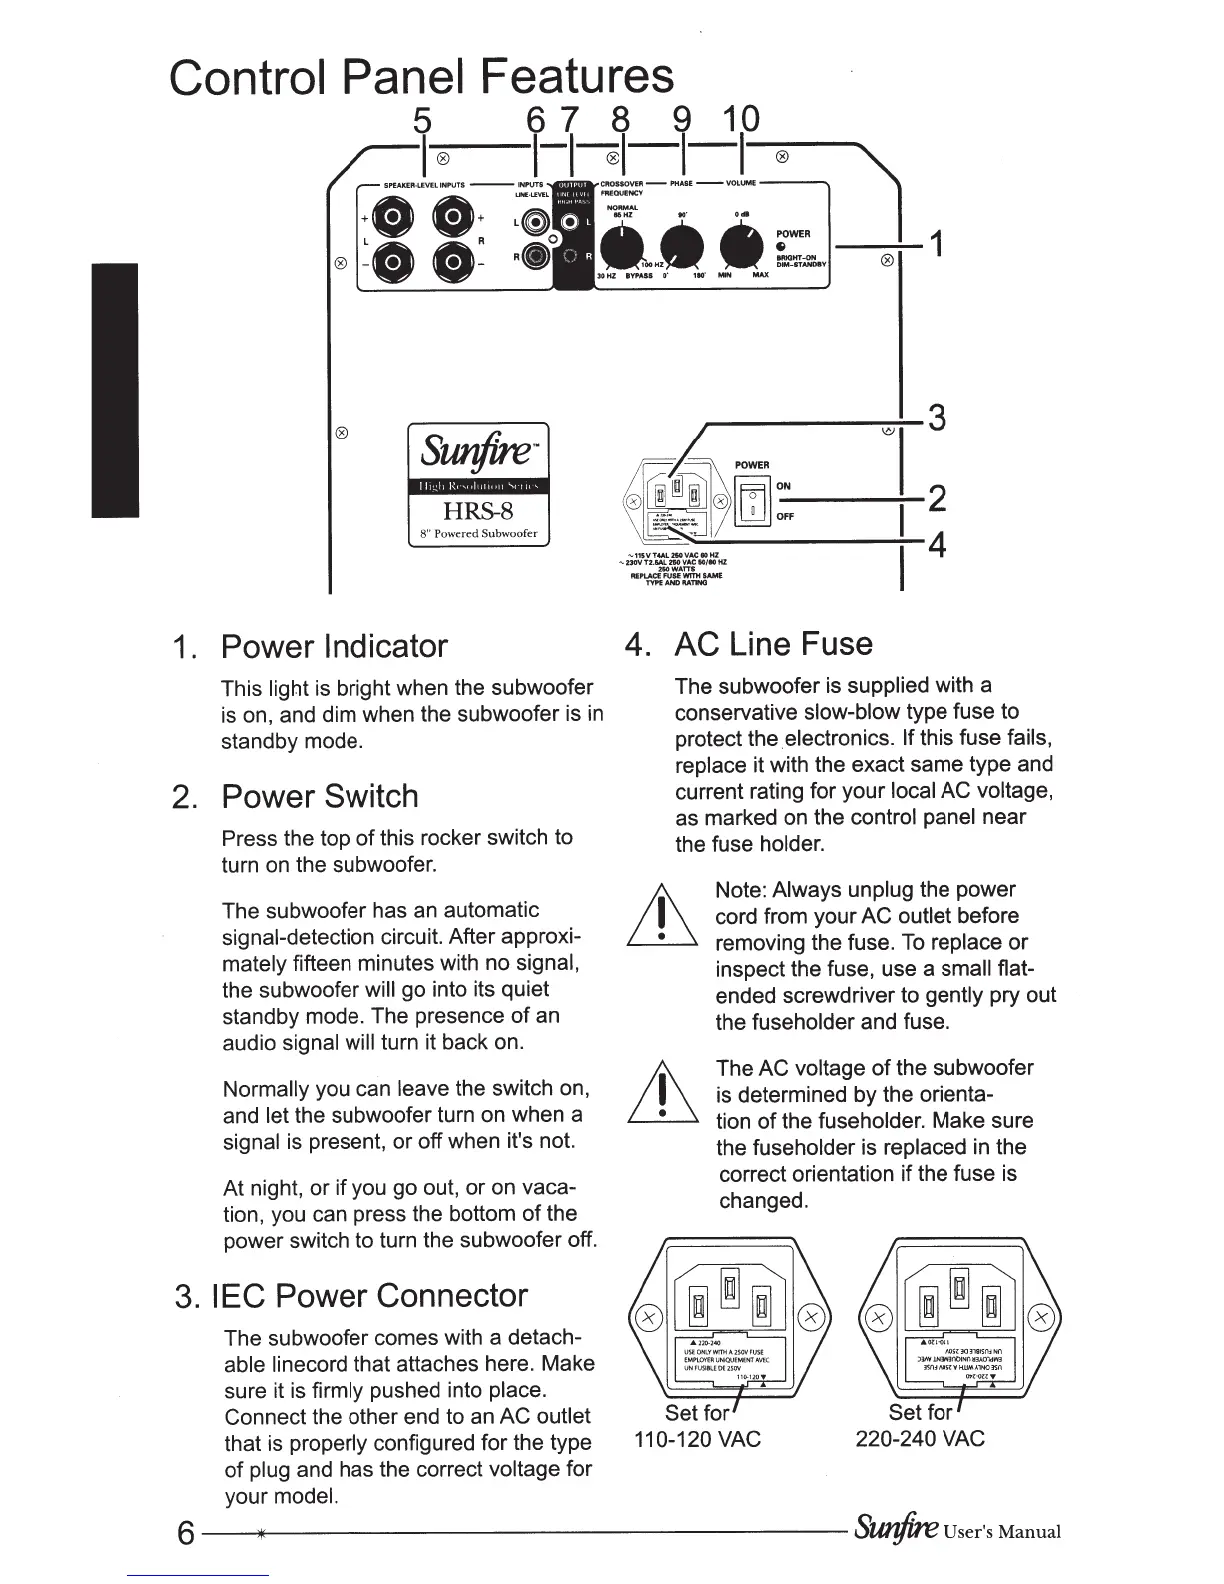
Control Panel Features
5 6 7 8 9
10
1°
1-1®1_1_1_®
------....
SPEAKER-LEVEL
INPUTS
--INPUTS
-PHASE-
VOLUME---
NORMAL
·CDCD·
0
~e
e:
•••
;::
__
')(\....;.._
1
-OOH-
-
DIM-ST~Y
\C)
30HZ
BYPASS
o·
110"
MIN
MAX
®
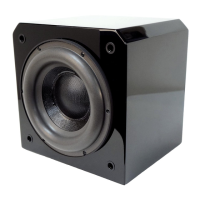
Sw?fire·
HRS-8
8" Powered
Subwoofer
1.
Power Indicator
This
light
is bright when the subwoofer
is
on, and dim when the subwoofer is
in
standby mode.
2.
Power Switch
Press the top
of
this rocker switch to
turn on the subwoofer.
The subwoofer has
an
automatic
signal-detection circuit. After approxi-
mately
fifteen minutes with no
signal,
the subwoofer
will
go into its quiet
standby mode. The presence
of
an
audio
signal will
turn it back on.
Normally you can
leave
the switch on,
and let
the subwoofer turn on when a
signal is present, or off when it's not.
At night, or if you go out, or on vaca-
tion, you can press the bottom
of
the
power switch to turn the subwoofer off.
3.
IEC
Power Connector
The subwoofer comes with a detach-
able linecord that attaches here. Make
sure it is
firmly
pushed into place.
Connect the other end to an AC outlet
that is properly configured for the type
of
plug and has the correct
voltage for
your model.
3
~~·
\C)
~
®[DJ:,
2
4
~ nsVT4AL210VACIOHZ
~
230V
TZ.&AL
250
VAC
50/BO
HZ
250WATTS
REPLACE
FUSE
W1TH
SAME
TYPE
AND
RATING
4. AC Line Fuse
The subwoofer is supplied with a
conservative
slow-blow
type fuse to
protect the .electronics.
If
this fuse
fails,
replace
it with the exact same type and
current rating for your
local AC
voltage,
as marked on the control panel
near
the fuse
holder.
Note:
Always unplug
the power
cord from your
AC outlet
before
removing the fuse.
To
replace
or
inspect the fuse, use a
small
flat-
ended screwdriver to gently
pry out
the fuseholder and fuse.
The
AC voltage
of
the subwoofer
is determined by the orienta-
tion
of
the fuseholder. Make sure
the fuseholder is replaced
in
the
correct orientation if the fuse is
changed.
6
--*""""---------------------
SUJ?/ire
User's
Manual