SunFounder GalaxyRVR Kit for Arduino, Release 1.0
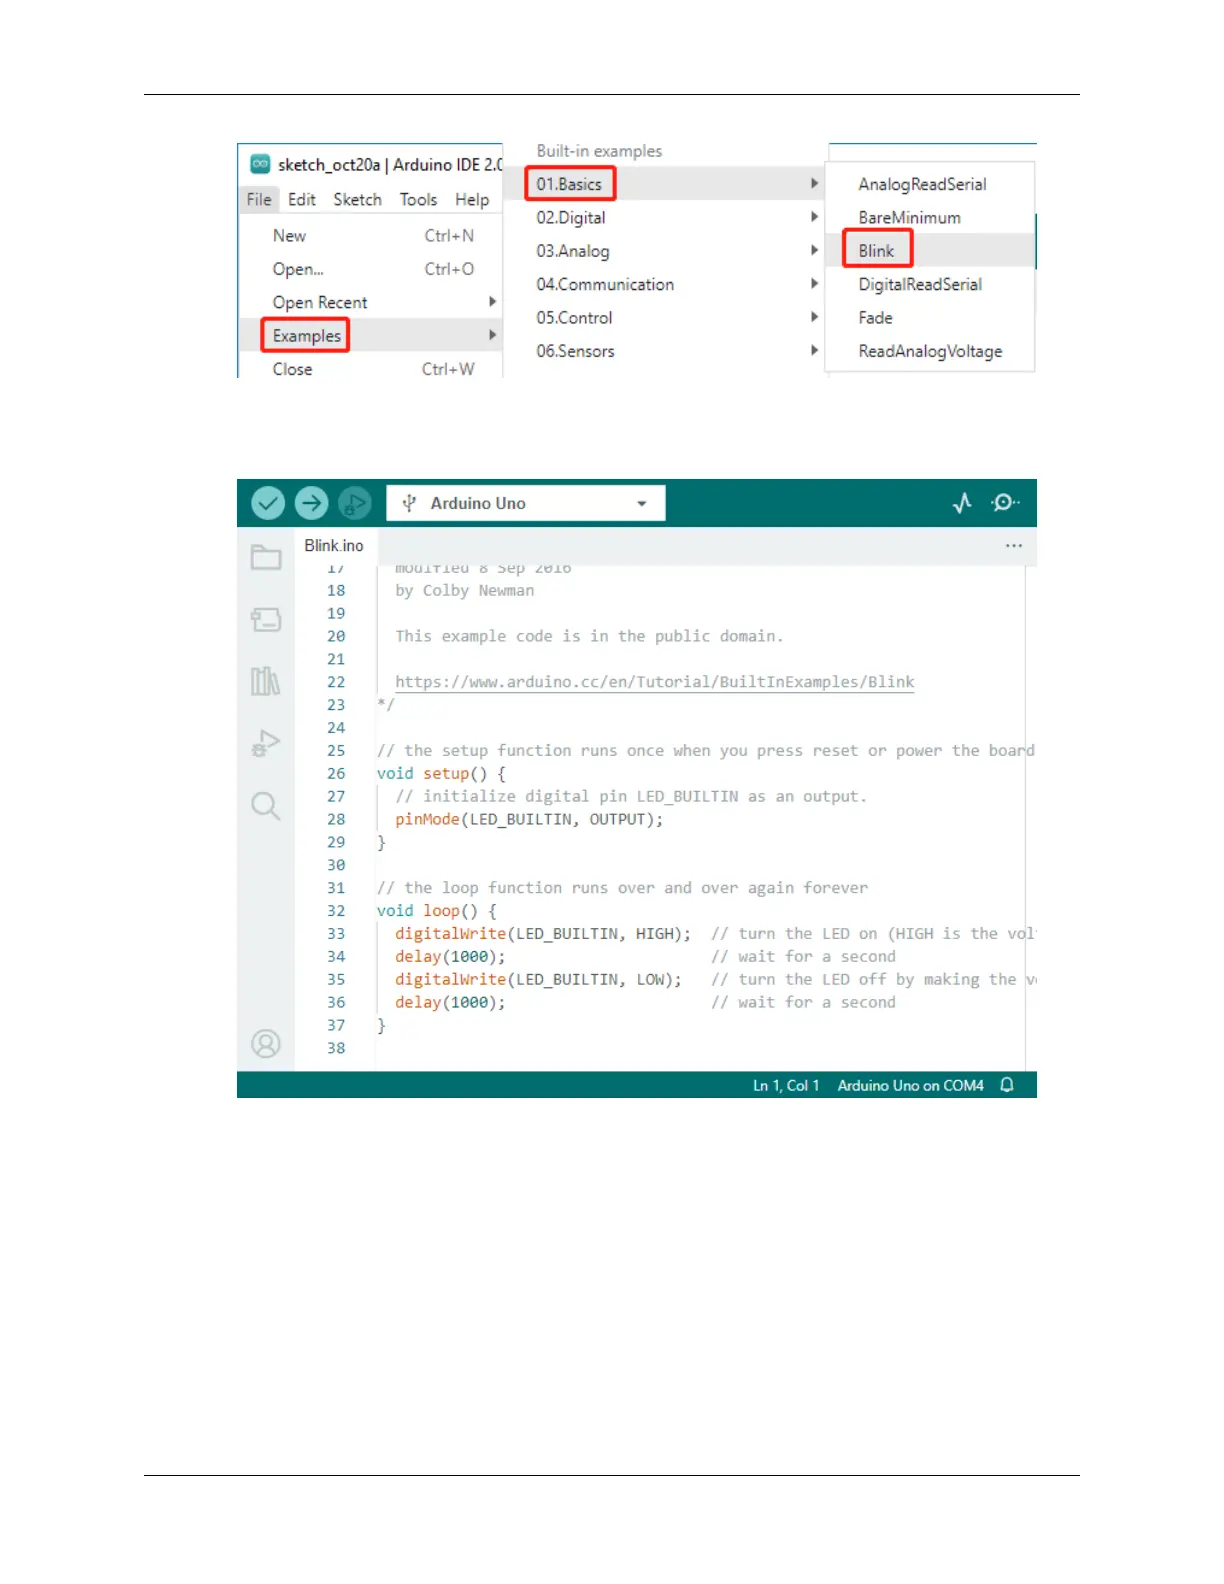
3. Understand the sketch: Look at the code in this new window. It tells Arduino to turn on the built-in LED (which
is on pin 13) for one second, then turn it off for one second, and then repeat. It’s like sending Morse code, but
with light!
4. Upload the sketch: Once you’ve selected the correct board and port, just click the upload button. It’s as easy
as sending a letter; you’re delivering your instructions to the Arduino board! Most of the time, the system will
automatically detect the board and port for you.
5. Watch it work: If all goes well, you’ll see the LED on your Arduino board start to blink on and off. It’s like your
Arduino is winking at you!
You’ve done a great job! You’ve just run your first Arduino program, making you a bona fide programmer! So what’s
next? We’re just scratching the surface of what Arduino can do. Ready for the next challenge?
Step 6: Some Fun Arduino Programming Facts
30 Chapter 3. Course Mode
 Loading...