SunFounder GalaxyRVR Kit for Arduino, Release 1.0
character in our story speaks (OUTPUT) or listens (INPUT).
– digitalWrite(): This function can set a pin HIGH (on) or LOW (off), much like switching
a magic light on and off.
2. Once you’ve selected the correct board(Arduino Uno) and port, click on the Upload button. It’s like putting
a letter in a mailbox - you’re sending your instructions off to Arduino!
3. Once the code has been successfully uploaded, you will see the motor start to rotate clockwise.
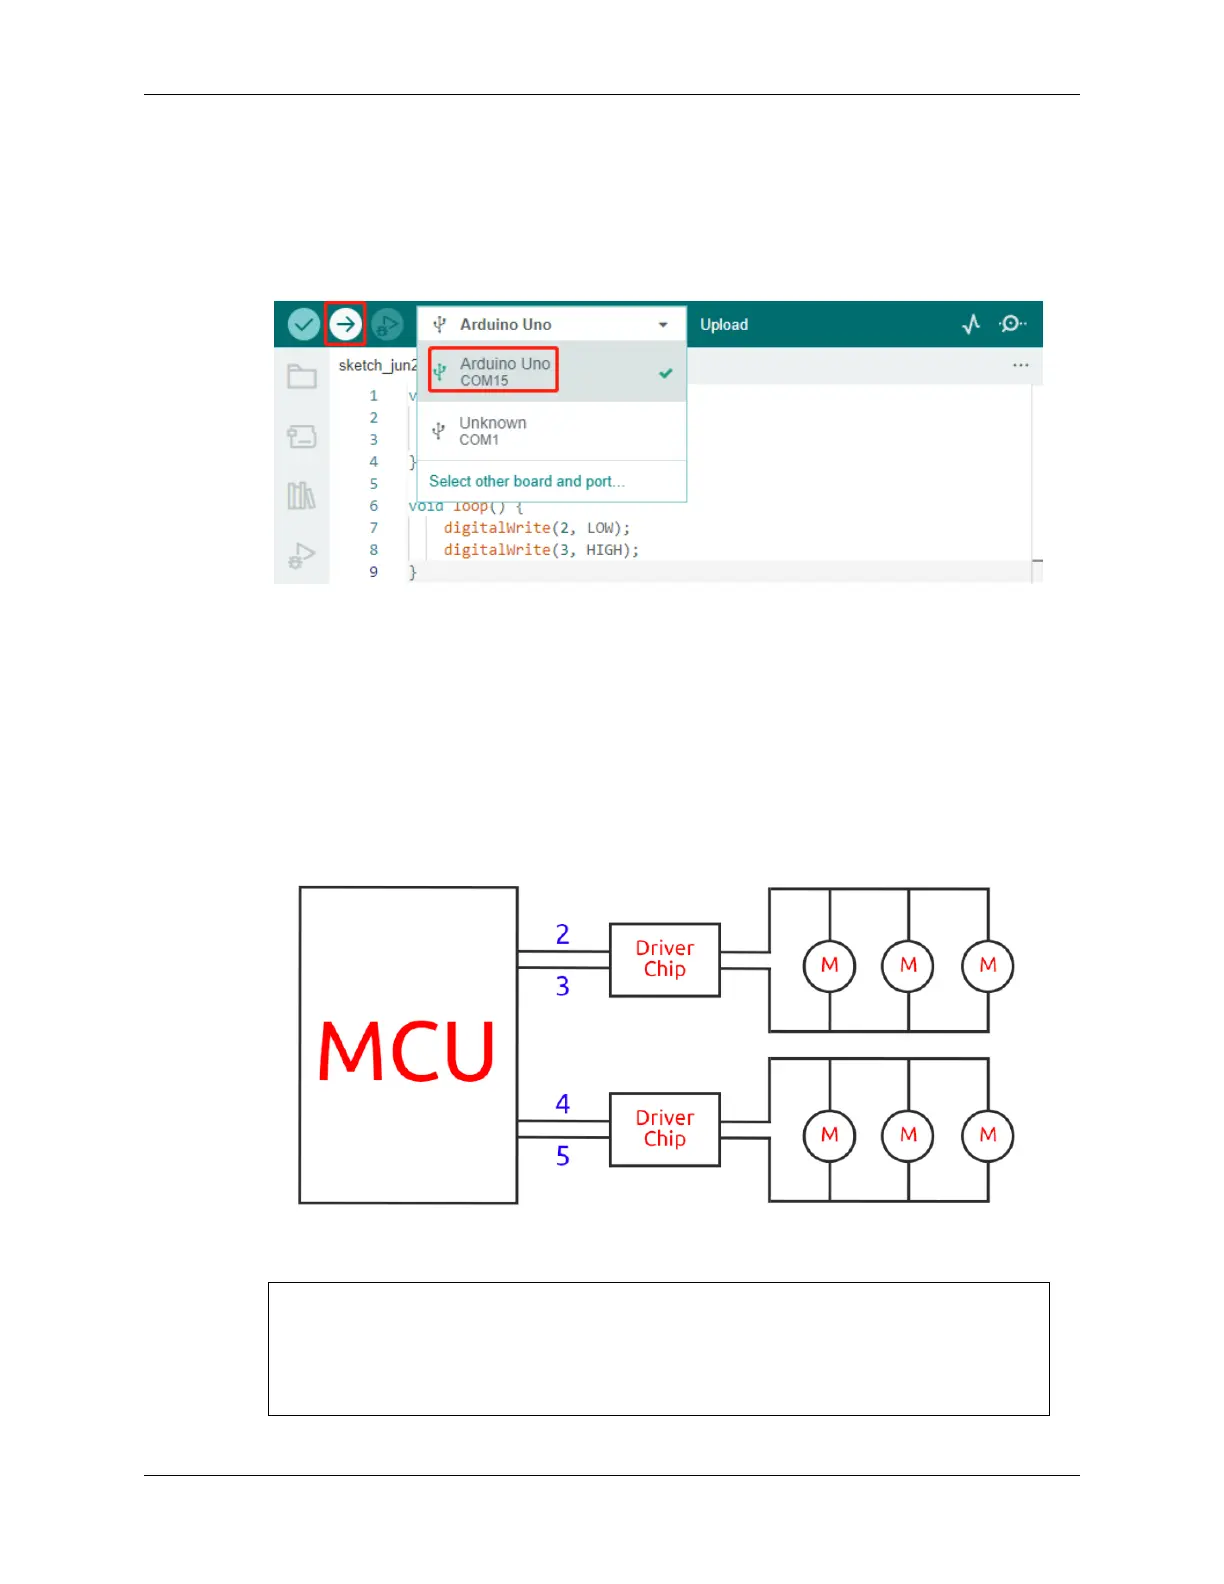
• 3. About Circuit Internal Connection
1. You can plug two more motors into the “Left” marked motor ports. You will see them rotate simultaneously.
2. Now, let’s understand the simple principle of how the two drive chips control the six motors. Pins 2 and
3 on the Arduino board output signals to the motor drive chip, and the other end of the chip is connected
to three motors in parallel. Similarly, pins 4 and 5 output signals to another drive chip, which in turn is
connected to another three motors in parallel.
3. If you want to test another drive chip, you just need to change the pins to 4 and 5.
const int in3 = 4;
const int in4 = 5;
void setup() {
pinMode(in3, OUTPUT);
(continues on next page)
3.4. Lesson 4: Mastering the TT Motor 39
 Loading...