SunFounder GalaxyRVR Kit for Arduino, Release 1.0
In the next step, we will go on a fascinating journey inside a servo motor to understand how it works. Excited? Let’s
go!
Step 2: How does a Servo Work?
So how does a servo work its magic? Let’s go on an exciting journey inside a servo!
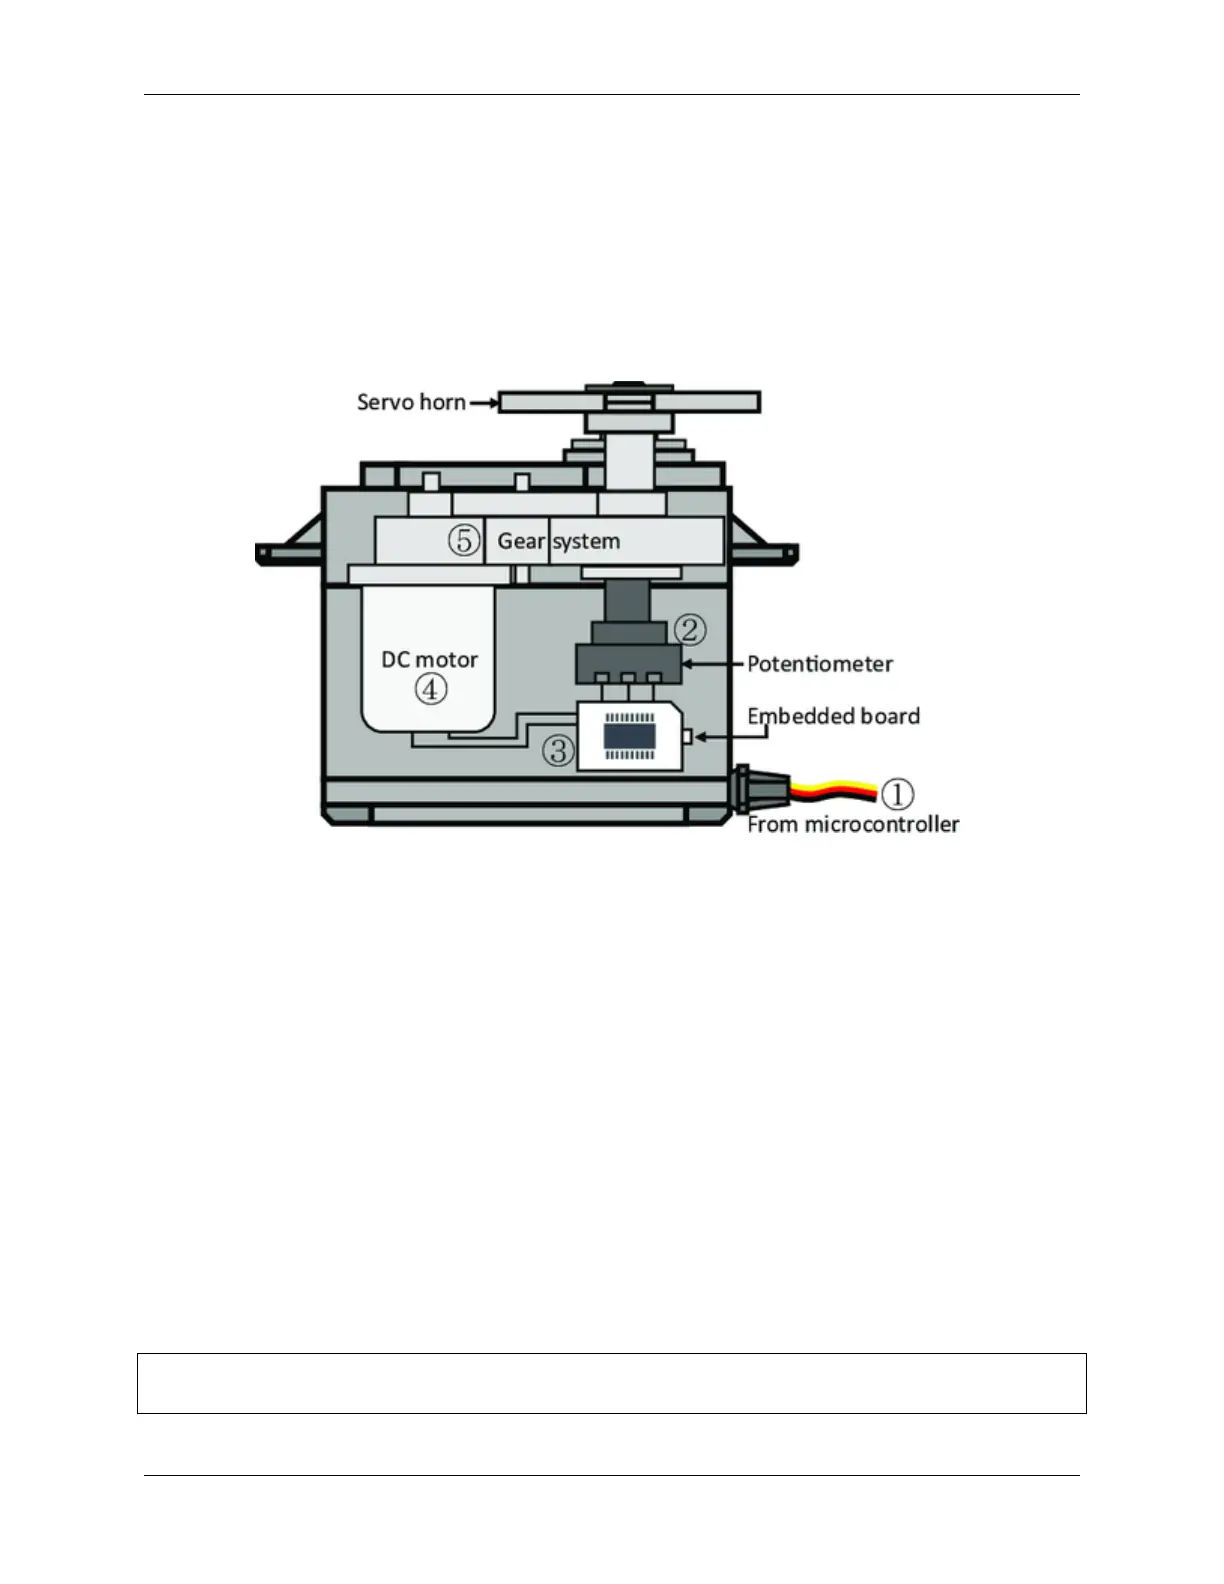
If we were to peek inside a servo, we would see a few parts. At the heart of a servo is a regular motor, very similar
to the motors that spin our Mars Rover’s wheels. Wrapped around the motor, there is a big gear that is connected to a
smaller gear on the motor shaft. This is how the motor’s fast, circular motion gets transformed into slower but stronger
motion.
But that’s not what makes a servo special. The magic happens in a tiny piece of electronics called a “potentiometer” and
the “control circuitry”. Here’s how it works: when the servo moves, the potentiometer turns and changes its resistance.
The control circuitry measures this change in resistance and knows exactly what position the servo is in. Clever, isn’t
it?
To control a servo, we send it a special kind of signal called a “pulse-width modulation” signal or PWM. By changing
the width of these pulses, we can control exactly how much the servo moves and hold it in that position.
In the next step, we’ll learn how to control a servo using an Arduino. Ready for some magic spells in the form of code?
Let’s go!
Step 3: Controlling a Servo using Arduino
Alright, explorers, now that we know how a servo works, let’s learn how to control it using our magic wand, the
Arduino!
Controlling a servo is like giving it directions. Remember the pulse-width modulation (PWM) signals we mentioned
earlier? We are going to use those to tell the servo where to move.
Luckily, Arduino makes this task easy for us with a built-in library called Servo. With this library, we can create a
Servo object, attach a pin to it (the pin that our servo is connected to), and then use a simple command, write(), to
set the angle.
Here’s a snippet of what the code looks like:
#include <Servo.h>
(continues on next page)
78 Chapter 3. Course Mode