SunFounder GalaxyRVR Kit for Arduino, Release 1.0
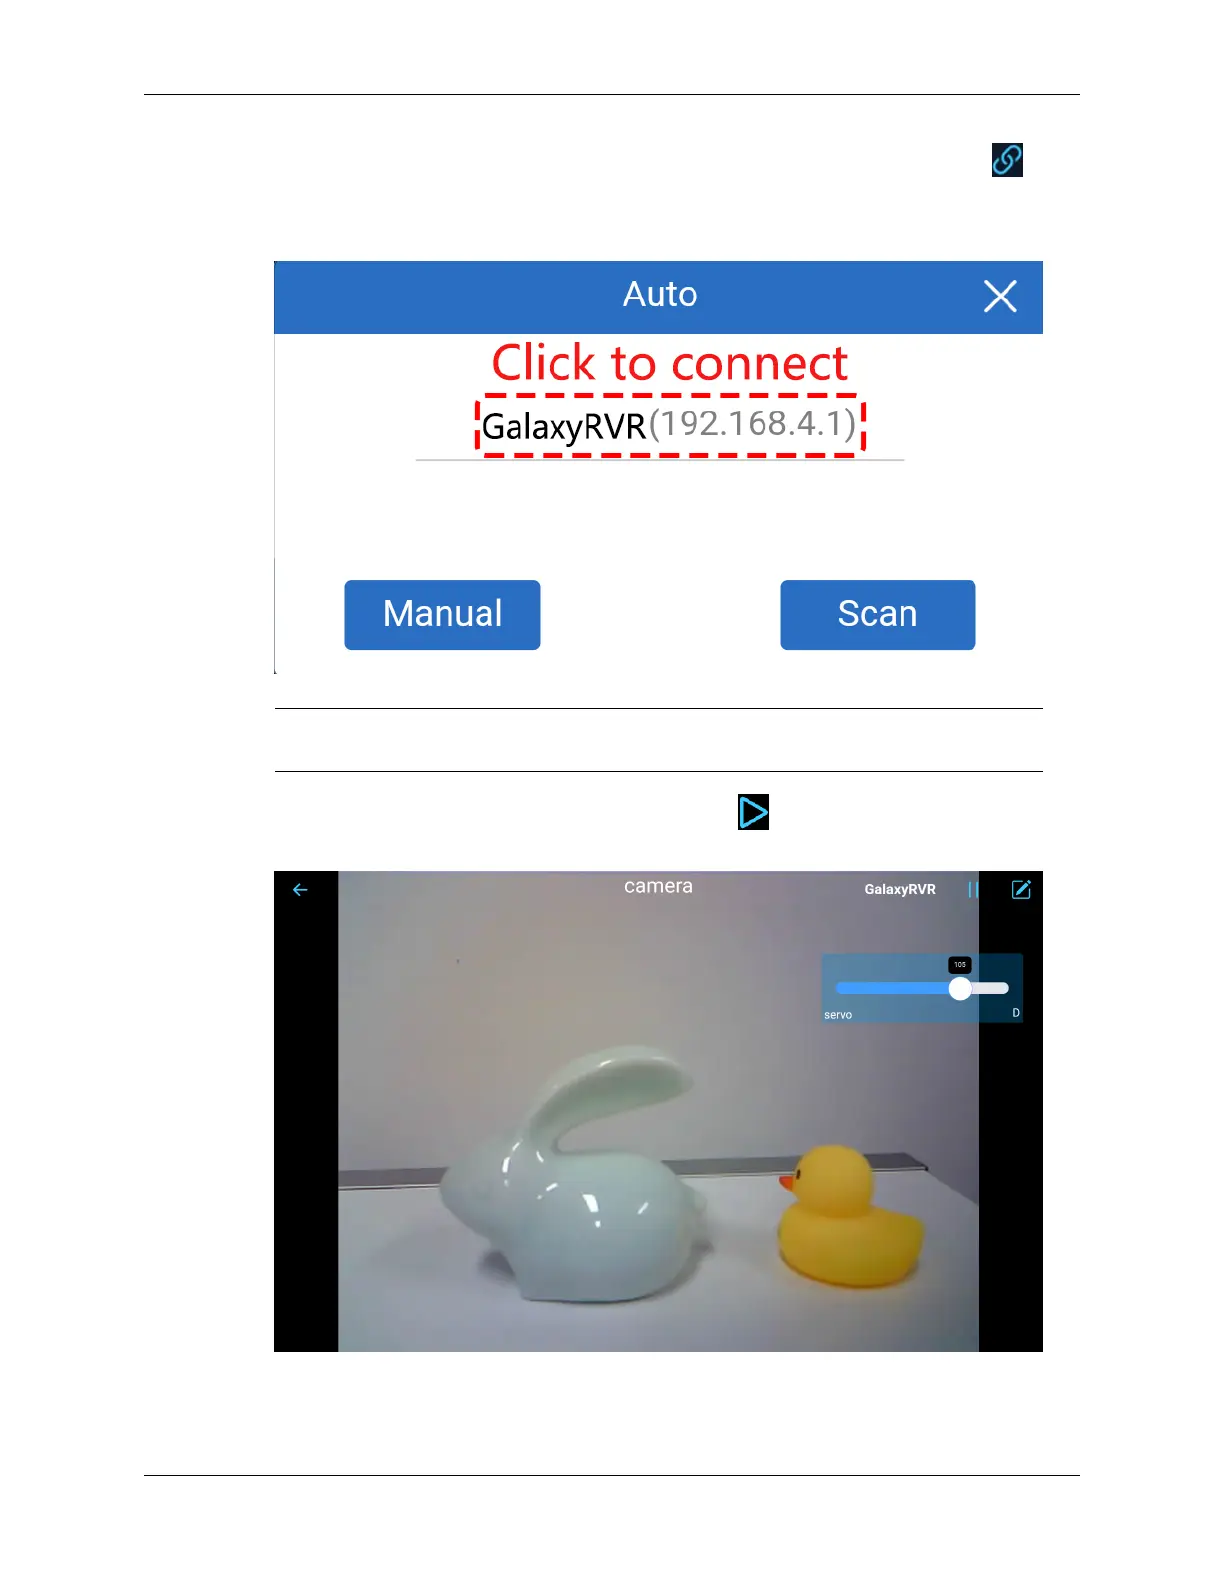
• Now, return to the controller you created earlier (in my case, it’s named “camera”). Use the button
to link the SunFounder Controller to the Rover and establish a line of communication. After a brief wait,
GalaxyRVR(IP) (the name you assigned in the code with #define NAME "GalaxyRVR") will appear.
Click on it to establish a connection.
Note: Please verify that your Wi-Fi is connected to GalaxyRVR if you don’t see the above message
after some time.
• Once you see the “Connected Successfully” message, press the button. This will bring up the camera’s
live footage on the app.
• Now, move the slider and open Arduino IDE’s serial monitor simultaneously. You should see similar data
like below.
92 Chapter 3. Course Mode