26
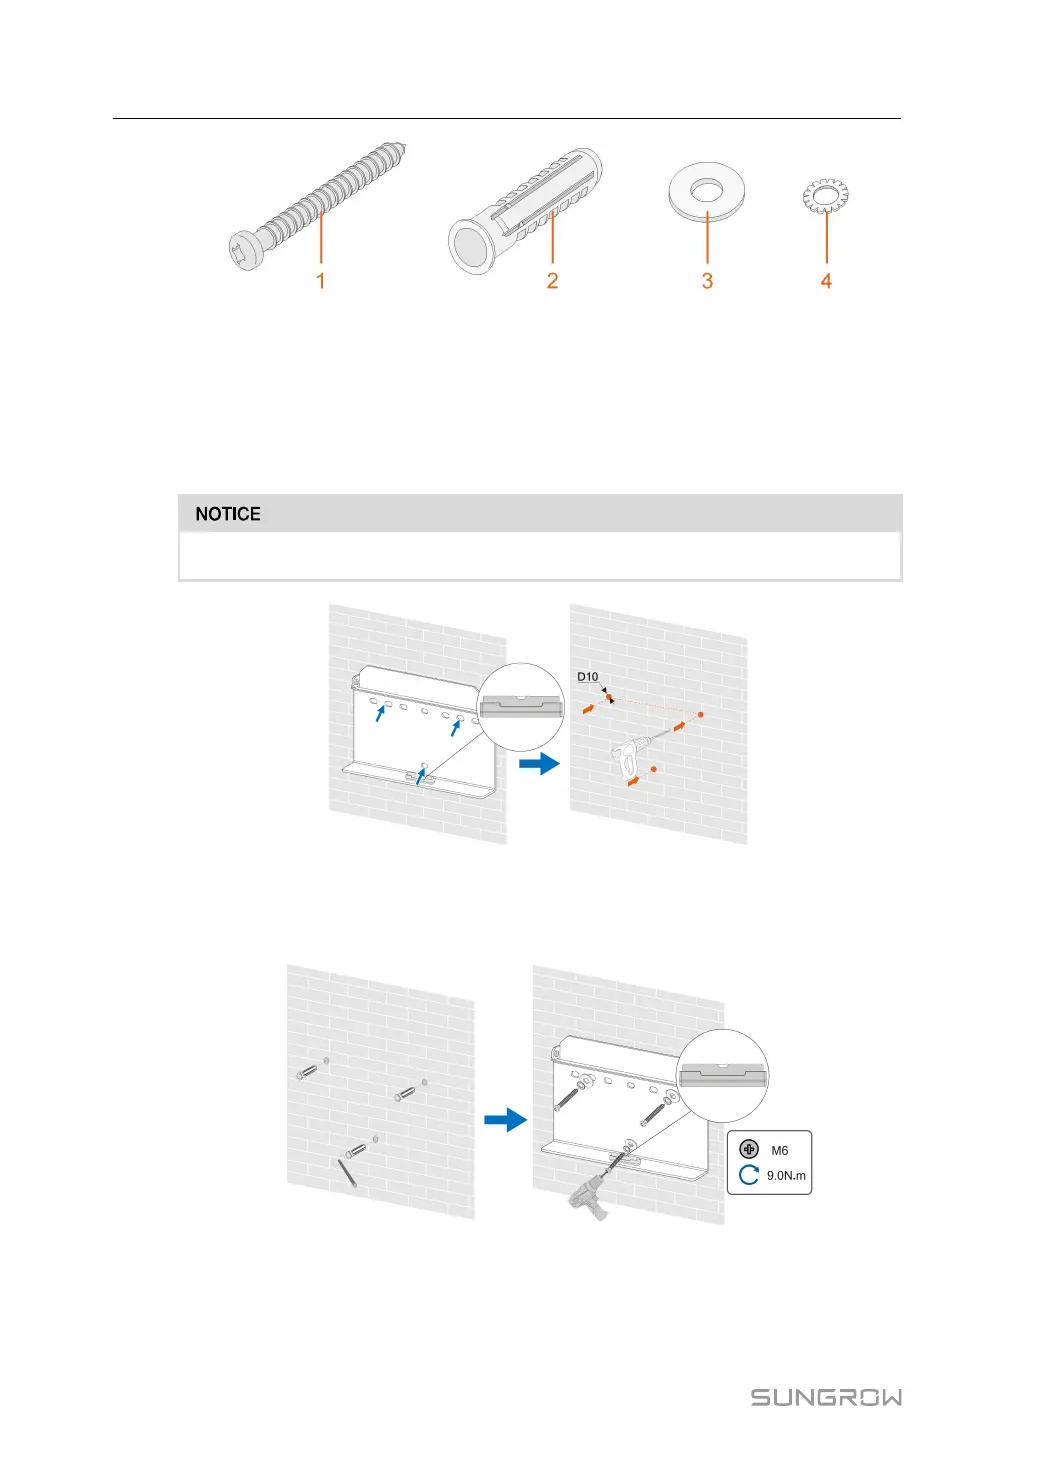
(1) Self-tapping
screw M6
(2) Expansion tube (3) Fender washer (4) Spring washer
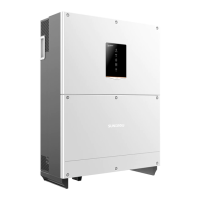
step 1 Place the wall-mounting bracket to a proper position on the wall. Observe the level on the
bracket and adjust until the bubble is in the middle position. Mark the positions and drill the
holes.
The depth of the holes should be about 70 mm.
* The image shown here is for reference only. The actual product received may differ.
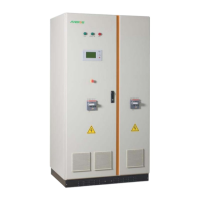
step 2 Place the expansion tubes into the holes. Then secure the wall-mounting bracket to the wall
firmly with the expansion bolt sets.
step 3 Lift the inverter and slide it down along the wall-mounting bracket to make sure they match
perfectly. Use the fastener set to lock the device.
4 Mechanical Mounting User Manual