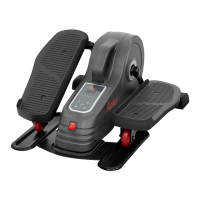
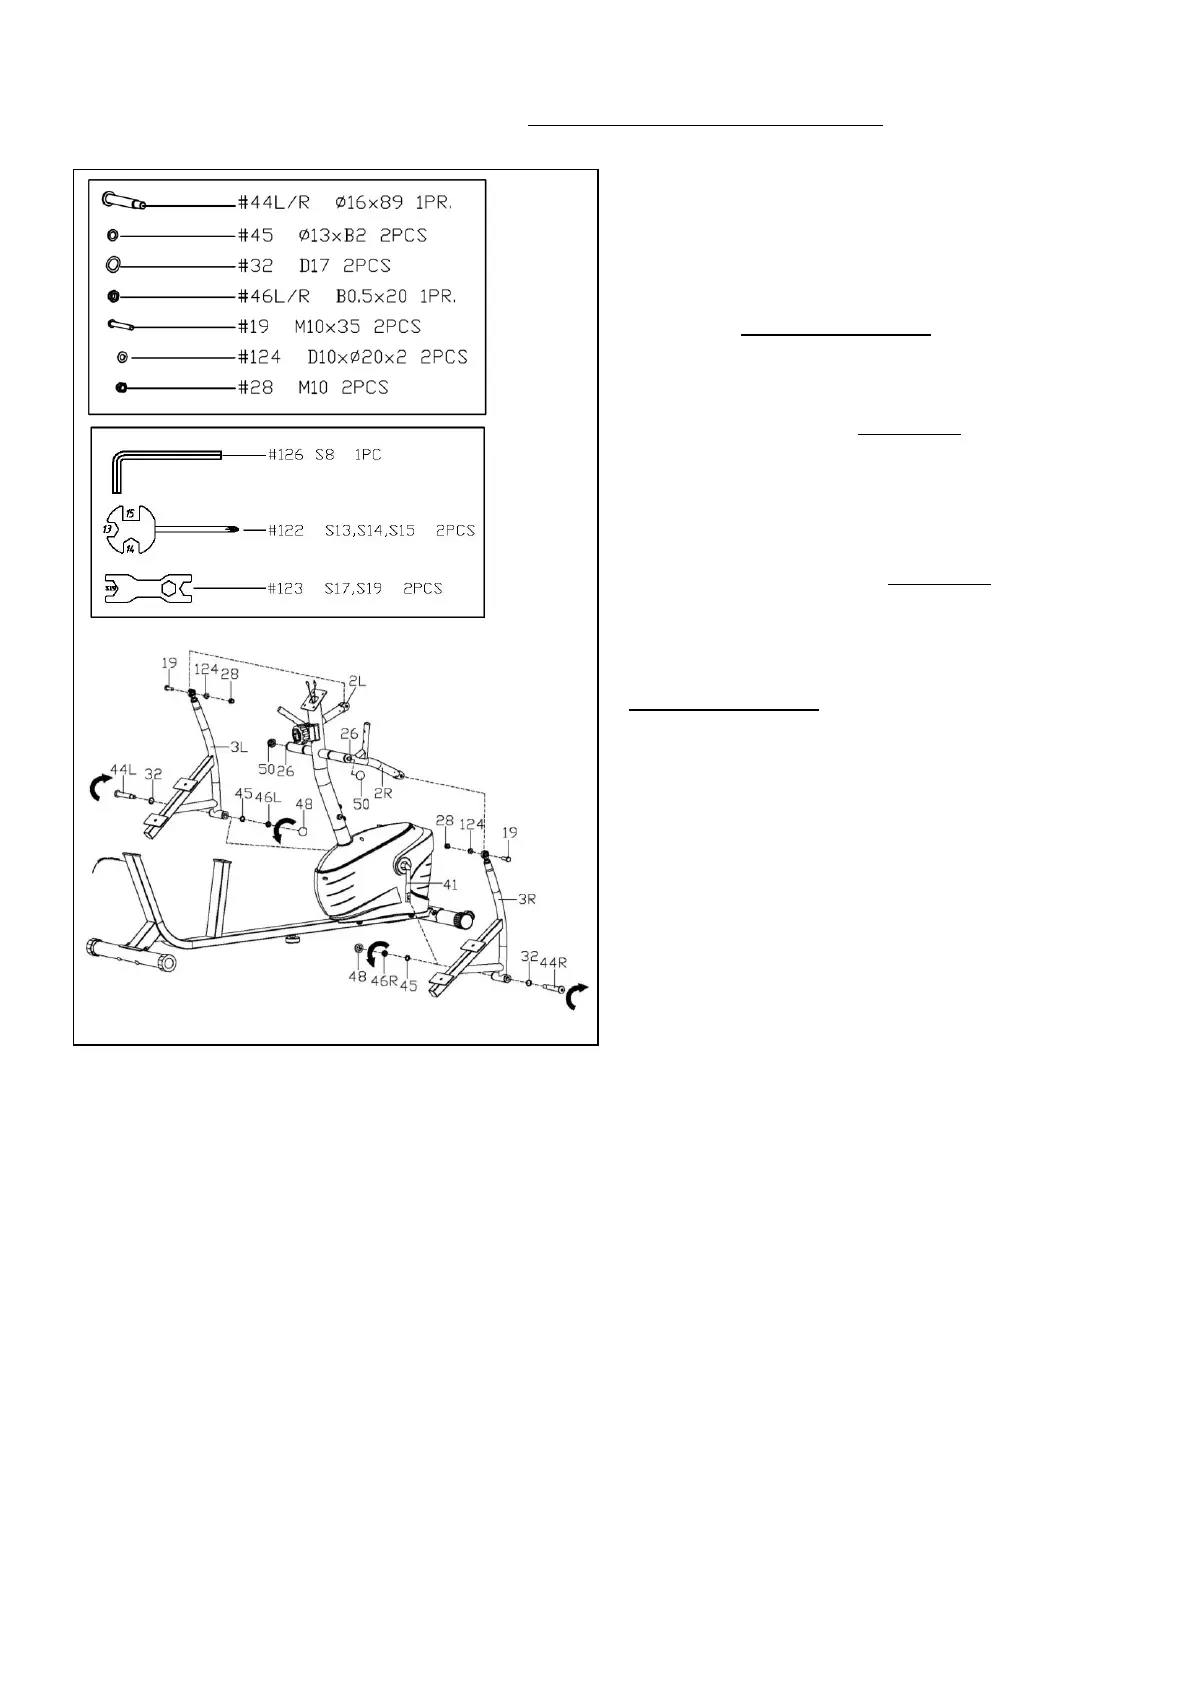
STEP 4:
Attach the Left Pedal Support Tube (No.
3L) to the left side of the Crank (No. 41) with
1 Left Hinge Bolt (No. 44L) and 1 Wave
Washer (No. 32). Turn the Left Hinge Bolt
(No. 44L) counter-clockwise with your hand.
Then attach 1 Spring Washer (No. 45) and
1 Left Nylon Nut (No. 46L) to the end of
Left Hinge Bolt (No. 44L) and turn the Left
Nylon Nut (No. 46L) clockwise.
Attach the Right Pedal Support Tube (No.
3R) to the right side of the Crank (No. 41)
with 1 Right Hinge Bolt (No. 44R) and 1
Wave Washer (No. 32). Turn the Right
Hinge Bolt (No. 44R) clockwise with your
hand. Then attach 1 Spring Washer (No.
45) and 1 Right Nylon Nut (No. 46R) to the
end of Right Hinge Bolt (No. 44R) and turn
the Right Nylon Nut (No. 46R)
counter-clockwise.
The Left Hinge Bolt (No. 44L) is labeled L,
while the Right Hinge Bolt (No. 44R) is
labeled R. The Left Nylon Nut (No. 46L) is
BLACK and Right Nylon Nut (No. 46R) is
WHITE.
NOTE: Please do not fully tighten at this
time.
Attach 2 Swing Bars (No. 2L/R) to 2 Pedal
Support Tubes (No. 3L/R) with 2 Bolts (No.
19), 2 Flat Washers (No. 124) and 2 Nylon
Nuts (No. 28) and pre-secure by 2
Spanners (No. 123).
NOTE: Please do not fully tighten at this
time.
Firstly, fasten 2 Nylon Nuts (No. 46L/R) and
2 Hinge Bolts (No. 44L/R) using Allen
Wrench (No. 126) and Spanner (No. 123).
Secondly, fasten 2 Bolts (No. 19) and 2
Nylon Nuts (No. 28) using 2 Spanners (No.
123)
Then fasten 2 Hex Screws (No. 26) for
STEP 3 using 2 Spanners (No. 122).
Finally, cover 2 Nut Caps (No. 50) and 2 Nut
Caps (No. 48).
NOTE: Ensure that all bolts and washers are
in place and partially threaded in before
completely tightening any of them.