14
3
ADJUSTMENT OF THE SEWING MACHINE
Caution
▶When installing a needle, be sure to turn the power switch off. If the user mistakenly steps
on the foothold, the machine will automatically start and can cause injuries.
▶T
he clutch motor will continue to run for a while due to inertia even after you turn the power
switch off. Be sure to work with the sewing machine after the motor comes to a complete stop.
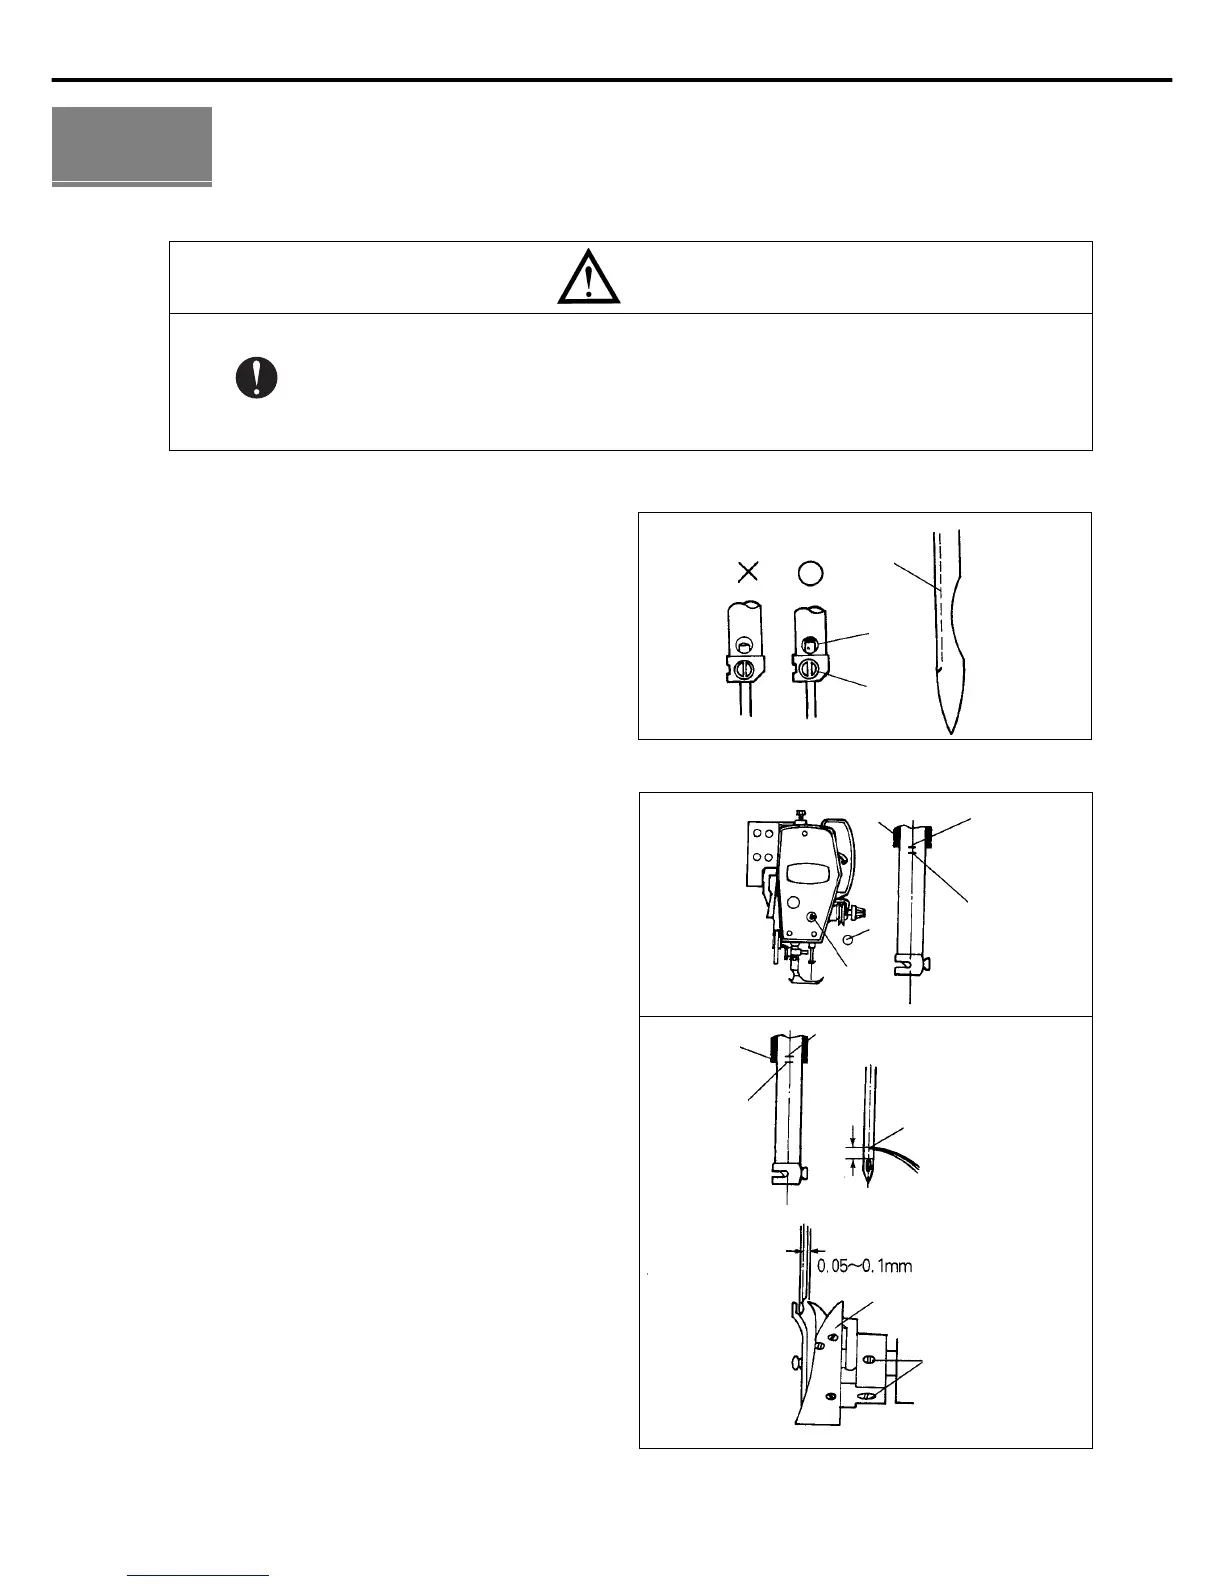
1) Inserting a needle
With the groove ① of the needle facing inwards, press
the needle tip against the upper side of the stopper hole
②. Fix the needle with a tightening screw ③. (Refer to
Figure 13)
As shown in Figure 14, take out the rubber cap ④ of the
needle bar-adjusting hole in the faceplate. Turn the
pulley to bring the needle bar to its lowest point and
loosen the screw ⑤ of the needle bar holder. Adjust the
needle bar to bring the lower side of the needle bar rear
bushing ⑥ to align at a carved mark ⑦ where the lowest
point of the needle bar comes to. Then, fix firmly with
the screw ⑤ and cover with the rubber cap ④.
2) Adjusting a needle bar
As shown in Figure 14, align the lower side of the needle
bar bushing ⑥ with a carved mark ① in the needle bar.
Loosen three screws ② of the hook.
Turn the loose hook to align the upper tip ③ of the hook
with the needle center. Set the distance from the inside
of the groove to the upper tip of the hook ③ at
0.05~0.1mm. Re-tighten with the three screws ②.
3)
Timing adjustment of the needle and hook
[ Figure 13 ]
[ Figure 14 ]
①
⑥
⑦
④
⑤
⑦
③
②
①
⑥
Hook
about 0.5mm
①
②
③

 Loading...