15
Caution
▶When checking lubrication of the thread take-up unit and the hook, keep your hands or oil
check paper away from peripheral feeding devices in order to prevent injuries.
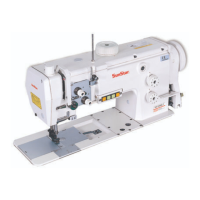
5) Adjusting the oil supply of the hook
As shown in Figure 16, the level of oil will increase as
you turn the screw ① inserted in the lower shaft front
bushing, in a clockwise direction (+). Turn it
counterclockwise (- ) to reduce the oil supply.
[ Figure 16 ]
Less
More
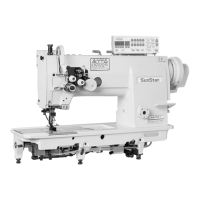
4) Adjusting the oil supply of thread
take-up unit
As shown in Figure 15, the level of oil supply will increase
when a dot ② in the lubrication-adjusting pin ① aligns with
the center hole of the thread take-up lever crank shaft ③.
When you adjust the dot closer to a carved dot ⑤ in the link
cam ④, the level of oil supply will decrease. Also, no oil
will come out when you adjust the carved dot ② to move
pass the carved dot ⑤. (The left/right adjustment range of
the lubrication-adjusting pin ① is 90°.)
[ Figure 15 ]
①
②
④
⑤
③
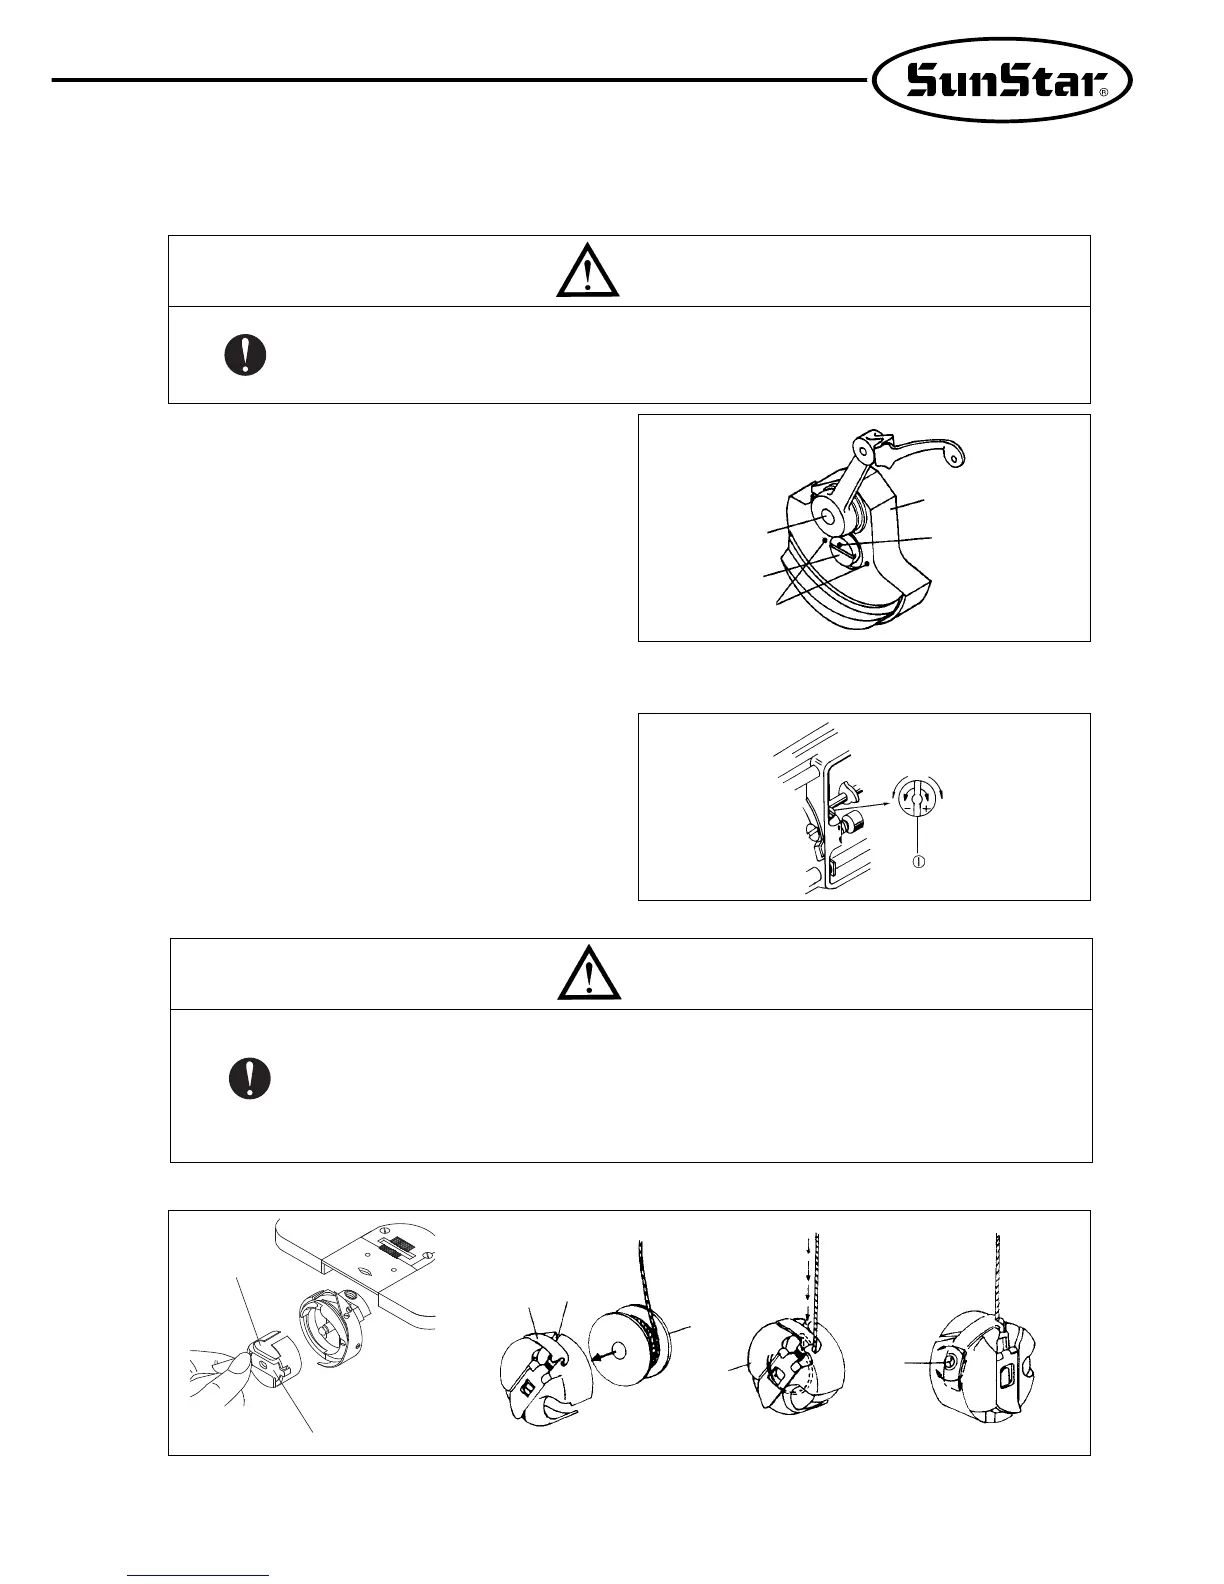
[ Figure 17 ]
⑤
6) Placing lower thread and adjusting tension
④
③
②
①
①
⑥
Caution
▶When adjusting lower thread tension, be sure to turn the power switch off.
If the user mistakenly steps on the foothold, the machine will start automatically and can
cause injuries.
▶
The clutch motor will continue to run for a while due to inertia even after you turn the power
switch off. Be sure to work with the sewing machine after the motor comes to a complete stop.
Strong
Weak