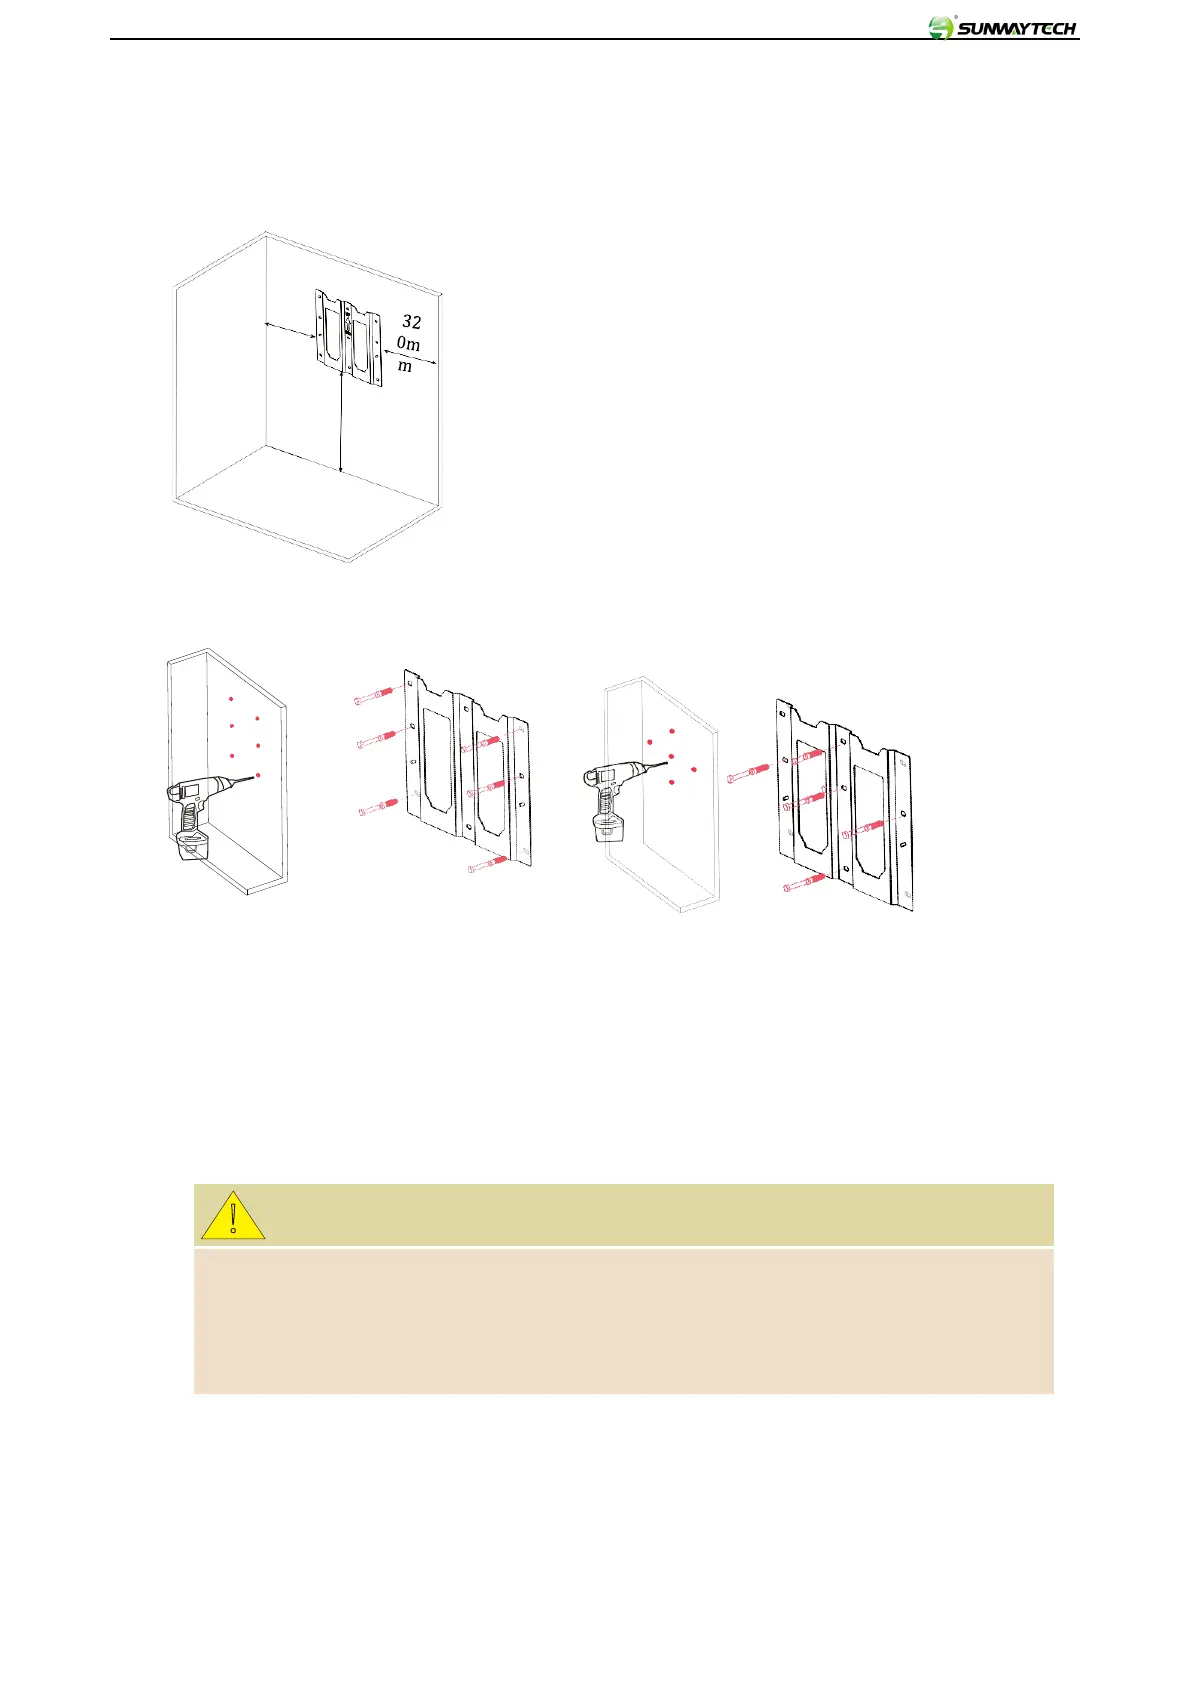
5.2 Wall Mountable Installation
Step 1
:Put bracket on wall and mark drilling spots
Note
:
1.
Keep a minimal distance of 320mm between wall and bracket;
a maximum distance of 765mm between bracket and ground. Leave a minimum
clearance of 133mm before the front surface of battery.
2.
The weight capacity of wall should exceed 4 times weight of batteries.
3.
At least two persons conduct the installation. One person places the
bracket on wall and ensure the gradienter horizontal; the other person
marks four spots of screw driving.
Step 2
: Drill in the spots for at least 60mm. Clean the soil and drive expansion
tube into the hole
Note:
1.Choose alloy drill bit with a diameter of 12mm.
2.One person puts the bracket on wall and minds to keep gradienter horizontal.
The other person drives M8 screw through the bracket into holes.
!
CAUTION
There are two spot drilling proposals available.
For installation on a wall with its main supporting beams at a distanceof 16 inches,
it is recommended to adopt the first drilling spots.
For wall with its main supporting beam at a distance of 24 inches, it is recommended to
adopt the second drilling spots.