3.DISASSEMBLING AND ASSEMBLING
2.Assembling
1.Disassembling
1.Cam and Screw
(
SCC0.5, SCC0.3W
)
3.Cam
2.Pad
2.Pad
3.Shackle
1.Shackle
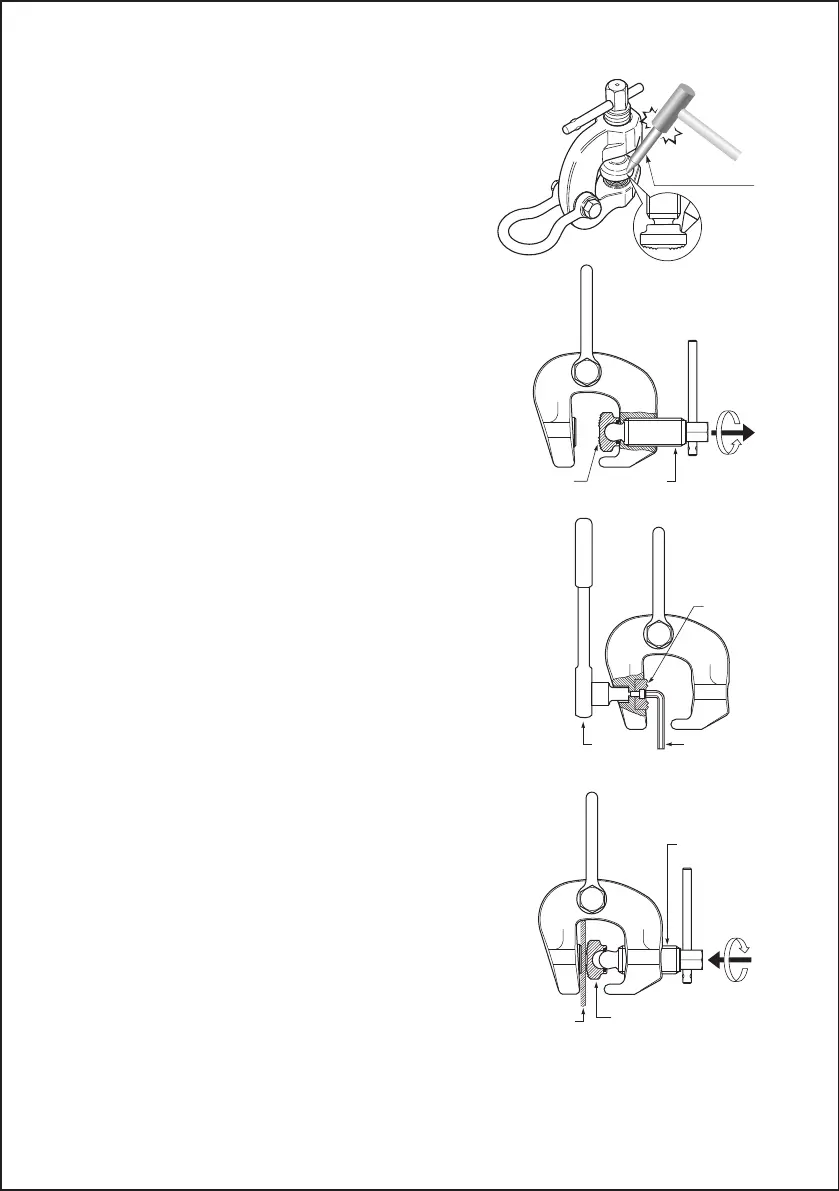
Tap the part of Cam shown in Fig. 1 with a
hammer or other tool to release Cam from
Screw.
(Note: Once released, Cam and Screw
cannot be reused. Be sure to replace them
with new ones.)
(Other sizes)
Turn Screw counterclockwise till Cam
touches the Body, and with further turning,
Cam will be taken off. (Fig. 2)
Insert hex key into Hex. Hole Head Bolt at the
center of Pad and turn with a socket wrench or
the like at the opposite side and take off Pad.
(Fig. 3)
Insert Bolt for Shackle after aligning holes of
Shackle and Body. Put Cotter Pin at the tip of
the Bolt for Shackle and bend the tip of Cotter
Pin to the left and right with long nose pliers or
the like.
Put a Stop Ring (2pcs for SCC0.3W〜1.5 and 3pcs for SCC3~6) at
female screw of Cam and lubricate the spherical hole. Put a wood
piece between Pad and Cam with Stop Ring and tighten Screw so that
Cam will be set at the tip of Screw.
Perform the reverse procedure of Disassem-
bling. Tighten Pad sufficiently to avoid its
rotation.
Take off Cotter Pin at Bolt for Shackle with long
nose pliers or the like, and take off the Bolt for
Shackle
( Fig.2)
( Fig.1)
( Fig.3)
( Fig.4)
Cam
Cam
Screw
Screw
Socket
wrench
Pad
Hex key
Wood piece or the like
16
Chisel or the like