This document is an operation manual for the SK/SL/GKD/SKH/GK/CL Chemical Filter, manufactured by SUPER. The product is marketed with claims of "Superior Performance," "Unbeatable Pricing," "Pride in Workmanship," "Energy Efficient," and "Rugged Construction."
Function Description
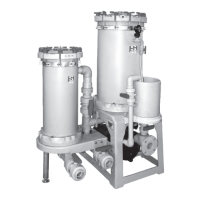
The SUPER Chemical Filter is designed for filtering chemical solutions. It can be configured for various filtration methods and includes models that allow for multi-stage filtration. For instance, some GKD models can utilize activated carbon in a first chamber to filter out particles and organic matter, while a second chamber handles further organic matter filtration. A key feature of these multi-chamber systems is the ability to replace the filter in one chamber while the other remains operational. The filter is suitable for use with different types of filter media, including paper, cartridge plate fixtures, strainer plate fixtures, and star cloth bags, depending on the specific chamber configuration.
Important Technical Specifications
The manual provides some technical specifications and operational limits:
- Pipe Material: For solutions exceeding 60°C, PP (Polypropylene) pipe material is recommended.
- Pressure: The working pressure should not exceed 1.5 Kg/Cm². Barrels are designed to withstand a maximum of 3kg of pressure, but operation should not exceed 80% of the pressure range.
- Temperature: The liquid temperature should not exceed 70°C.
- Power Supply: The filter requires an electromagnetic switch that automatically cuts off power if the motor overloads. When installing a fuse or motor protection device, it should allow current 10-20% higher than the rated current.
- Siphoning Prevention: A hole of 5-10 mm in diameter should be drilled on the outlet pipe, or a T-strainer installed (5 cm above water level) to prevent siphoning.
- Inlet Configuration: The pump inlet should be installed with a foot-valve or strainer to prevent leakage and ensure the inlet pipe is filled with water to avoid dry-running.
Usage Features
The manual outlines several important usage features and installation precautions:
- Installation:
- Pipelines must be fully secure and sealed.
- For pipelines with many bends, a water/solution inlet pipe should be installed.
- Outdoor installations require adequate covering.
- The machine must be placed in an upright position on a sturdy resting surface.
- If pump in/outlet are lower than the liquid level of the tank, valves should be installed on the in/outlet pipe to prevent siphoning.
- In/outlet connection flanges must be of equal diameter and all bolts/nuts, including wing nuts on the top cover, must be adequately tightened.
- Before connecting to the pump, pipes should be washed to remove extraneous matter.
- The inlet pipe should be secured to prevent movement or bending, especially if using soft pipes (stiff pipes inside the tank are recommended).
- Operation:
- Before starting, ensure the pump is filled with water, and air release valves and water injection valves are open to prevent dry-running.
- Check voltage and motor junction box for correct wiring.
- Before starting the motor, close the tube valve and allow air/water to escape from the air release valve.
- Verify correct in/outlet connections and ensure valves are open.
- After turning on the pump, confirm it's turning in the right direction; if not, switch the direction from the motor junction box.
- Ensure the tube valve is closed and the tube is empty to prevent air from entering the pump, which can cause cavitation or dry-running.
- Check the pressure gauge for oil before operating.
- Always wear protective clothing (gloves, boots, etc.) in hostile environments.
- Check all safety/protection switches, such as holding tank liquid level and power protection.
- Do not apply different chemical solutions with the same machine without consulting a technician.
- Periodically check the flow rate and clean the filter medium to prevent clogging.
- Operate the filter only during working hours and unplug it when not in use to prevent dry-running.
- Avoid placing the filter outdoors, as sunlight can weaken the barrel material.
Maintenance Features
The manual details several maintenance procedures:
- Precautions:
- Always turn off and disconnect power before maintenance.
- Drain all fluid from the filter and close in/outlet valves.
- Service personnel must wear protective clothing.
- Ensure the pump is not siphoning from the tank.
- Filter Part Inspection: Visually check the liquid discharge from the filter. If discharge is very low, disassemble the filter material for cleaning.
- Filter Maintenance:
- Cartridges and Tamis bags can be soaked in 5% HCl solution for 3-5 hours, then cleaned with water (do not scrub).
- Rinse the filter medium with clean water.
- A "Filter Maintenance Card" (Pg. 24) is provided for routine maintenance tracking.
- Cartridge Replacement:
- If pressure increases quickly after cleaning and re-installing a cartridge, it indicates the cartridge is seriously blocked, ineffective, and must be replaced.
- Before replacing, open the air release valve and fully drain the solution.
- Remove the top cover, then the C-clamp, and pull the cartridge vertically.
- The stanchion nut can be removed by turning counter-clockwise to access the filter media.
- Reverse the procedure for reassembly.
- Specific Filter Medium Maintenance:
- Cartridge Nut Type: Turn cover handles counter-clockwise to open. Drain air via the air release valve. Open cover, untie Tamis bag, turn nut counter-clockwise to loosen, remove nut and Tamis bags for cleaning/replacement. Reassemble in reverse.
- Cartridge Fixture Type: Similar to nut type, but involves removing the stanchion fastening screw and fixture plate to access the medium. Remove top washer, Tamis bag, and spring. Clean/replace Tamis bags and cartridges. Reassemble in reverse.
- Bag Type: Turn clockwise to secure, counter-clockwise to release the bag. Replace or clean with clean water. Reassemble in reverse.
- Star Cloth Bag Type: Similar to cartridge types, but involves lifting the filter handle to remove the filter. Diatomite can be used to increase filtration.
- Paper Filter Type: Involves rinsing the filter chamber and turning the filter handle counter-clockwise to loosen the filter medium for cleaning. Reassemble in reverse.
The manual also includes a troubleshooting guide for common issues such as insufficient filtration, no flow, bubbles from the outlet, pump leaking, burnt motor, inaccurate pressure gauge, and filter top cover leaking, providing causes and approaches for resolution. A "Part Reference Chart" lists all components with their descriptions and materials.