Do you have a question about the Supermicro Supero X9SRi and is the answer not in the manual?
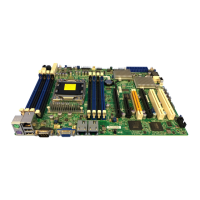
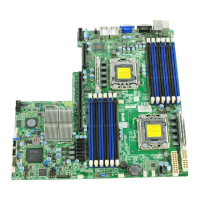
Provides overview of the motherboard's features, processor, chipset, and memory support.
Outlines the structure and content of each chapter in the manual for user navigation.
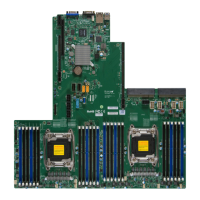
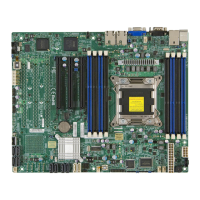
Introduces the motherboard and lists the retail box contents for new users.
Lists and defines the function of various jumpers on the motherboard for configuration.
Explains the meaning and status of onboard LED indicators for system monitoring.
Configures system behavior upon restoration of AC power after an outage.
Describes features for monitoring system voltages, fans, and temperature.
Monitors and controls fan speeds based on firmware settings.
Manages thermal control and alerts for overheating.
Notifies users of system events via Super Doctor III.
Provides precautions for handling static-sensitive components to prevent damage.
Step-by-step instructions for opening the CPU socket lever mechanism.
Step-by-step process for inserting DDR3 DIMMs into the slots.
Reverse steps for safely removing DIMM modules from the motherboard.
Lists the required tools for motherboard installation.
Shows the locations of mounting holes on the motherboard for chassis alignment.
Identifies and labels the ports on the motherboard's rear I/O panel.
Illustrates the pinout for the JF1 front control panel header.
Details the pin definitions for the 24-pin ATX main power and 8-pin CPU power connectors.
General explanation of how jumpers function to change board settings.
Describes jumpers to enable or disable LAN ports 1 and 2 for network connectivity.
Describes the Link and Activity LEDs for the Ethernet ports.
Details the LEDs for the IPMI dedicated LAN port.
General procedures to follow when troubleshooting system problems.
Checks and steps to perform before powering on the system for troubleshooting.
Steps to diagnose and resolve issues related to no power.
Step-by-step guide to safely remove the onboard battery.
Important warnings and guidelines for proper disposal of used batteries.
Step-by-step guide to securely install a new onboard battery.
Describes the AMI BIOS Setup Utility and how to update it.
Instructions on how to enter the BIOS setup utility during system boot.
Options related to boot behavior, including quiet boot and ROM display.
Configures the boot screen display between POST messages or OEM logo.
Sets the display mode for Option ROMs.
Controls the power-on state of the NumLock key.
Forces the system to wait for F1 key press on error.
Manages the software interrupt for boot disk function.
Displays information about the CPU, such as type, speed, and cores.
Selects the motherboard's power-saving scheme.
Enables/disables Enhanced Intel SpeedStep Technology for dynamic frequency adjustment.
Allows processor cores to run faster than marked frequency.
Enables/disables Enhanced Halt State for reduced CPU power consumption.
Enables/disables reporting of CPU power states for OS.
Sets the limit for C-State package registers.
Displays the current IO chipset revision.
Configures integrated I/O devices like VT-d, I/OAT, and DCA.
Enables Intel's Virtualization Technology for I/O devices.
Enables Intel I/O Acceleration Technology for reduced CPU overhead.
Accelerates I/O device performance using Direct Cache Access.
Controls PCIe port bifurcation for specific slots.
Sets the target link speed for Slot 6 PCI-E.
Sets the target link speed for Slot 4 PCI-E.
Shows details about installed memory, speed, and mode.
Provides general information about the installed memory modules.
Sets the memory mode, with 'Independent' as the only option.
Sets the DRAM Running Average Power Limit mode.
Forces system memory to run at a specific DDR speed.
Selects channel memory interleaving methods for performance.
Selects rank memory interleaving methods for performance.
Enables/disables Patrol Scrub for correcting memory errors.
Displays information about installed SATA drives on each port.
Selects the operating mode for installed SATA drives (IDE, AHCI, RAID).
Details settings when IDE Mode is selected, like Serial-ATA Controller activation.
Details settings when AHCI Mode is selected, like Link Power Management.
Enables or disables chipset SCU devices.
Enables or disables the onboard SAS option ROM.
Specifies which Option ROM to launch (Legacy or EFI).
Sets the latency timer for PCI devices.
Enables or disables onboard serial ports.
Specifies I/O port and Interrupt Request addresses for serial ports.
Enables console redirection for COM1, COM2, and SOL ports.
Configures terminal type, BPS, data bits, parity, stop bits, and flow control.
Configures the ACPI sleep state for system suspend mode.
Activates HPET for periodic interrupts and multimedia synchronization.
Enables/disables SmBIOS event logging and related features.
Enables or disables all features of Smbios Event Logging during boot.
Enables or disables runtime error logging.
Defines the system's memory correction error threshold.
Enables or disables runtime error logging for PCI devices.
Option to erase all logged events from the event log.
Configures automatic clearing of the event log when it becomes full.
Configures the System Event Log (SEL) settings.
Enables/disables SEL features and configures logging options.
Erases logged SEL events based on selected options.
Automatically clears SEL memory when it is full.
Enables or disables logging of Extensible Firmware Interface (EFI) status codes.
Configures the IPMI LAN adapter with network address settings.
Specifies boot devices and their priority for system startup.
Sets the order of boot devices like EFI Shell or detected devices.
Sets the order of legacy network devices for booting.
Allows deletion of previously defined boot devices.
Sets or changes the Administrator password for BIOS setup access.
Sets or changes the User password for system startup.
Quits BIOS setup without saving changes and reboots the computer.
Saves configuration changes and reboots the system for them to take effect.
Saves any made changes without rebooting the system.
Discards all changes made and returns to the BIOS utility.
Details beep codes and descriptions for fatal and non-fatal errors.
Instructions for installing system drivers after OS installation.
Shows the health information interface of SuperDoctor III.
Explains the Unified Extensible Firmware Interface (UEFI) concept.
Describes the process of recovering the main BIOS image if corrupted.
| Form Factor | ATX |
|---|---|
| CPU Socket | LGA 2011 |
| Chipset | Intel C602 |
| Memory Slots | 8 |
| Maximum Memory | 256GB |
| PCI-Express 3.0 x16 | 2 |
| PCI-Express 3.0 x8 | 1 |
| PCI-Express 2.0 x4 | 1 |
| PCI-Express 2.0 x1 | 1 |
| RAID Support | 0, 1, 5, 10 |
| Supported Memory Types | DDR3 1066/1333/1600 |
| SATA | 6 x SATA 3.0 Gb/s |
| LAN | Dual Gigabit LAN |
| Network | Intel 82574L |
| USB Ports | 4 x USB 2.0, 2 x USB 3.0 |