Do you have a question about the Supermicro SUPERO X10DRU-i+ and is the answer not in the manual?
Describes the X10DRU-i+ motherboard's features and intended use in next-generation data centers.
Outlines the structure of the user's manual, detailing the content of each chapter and appendix.
General introduction to the X10DRU-i+ motherboard, its design philosophy, and intended use.
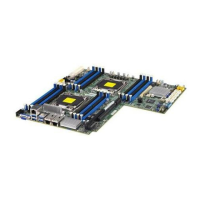
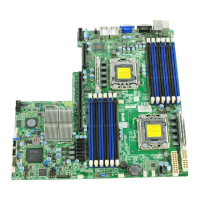
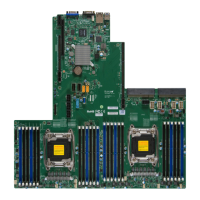
Diagram illustrating the physical layout of components, connectors, and headers on the motherboard.
Details the purpose and function of each connector on the motherboard for system assembly.
Explains the status and meaning of various onboard LEDs for system monitoring.
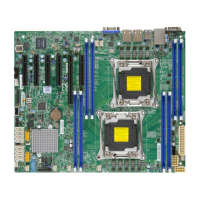
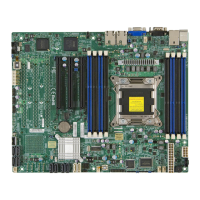
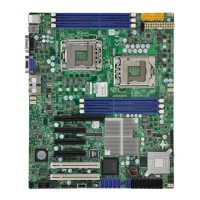
Details the core specifications and capabilities of the motherboard hardware.
Describes the various input/output ports, including SATA, IPMI, Serial, and USB connections.
Details the processor and chipset capabilities, and their integration for performance.
Explains features for monitoring system voltage, temperature, and fan status.
Discusses power supply requirements, configurations, and connection guidelines.
Describes Intel's Power Node Manager and Management Engine for system power optimization.
Presents essential industry-standard safety warnings for system installation procedures.
Provides precautions for handling components sensitive to electrostatic discharge (ESD).
Step-by-step instructions for mounting the motherboard in the chassis.
Guides on installing the CPU and its heatsink, including socket preparation.
Instructions on how to install the CPU heatsink correctly for optimal cooling.
Step-by-step guide for memory module installation and removal.
Identifies and describes various connectors on the front and back panels.
Information on USB ports, their locations, and pin definitions for front and rear connections.
Details the pin definitions for the front control panel header, including buttons and LEDs.
Provides guidance on connecting various cables to the motherboard's power and data connectors.
Explains how jumpers modify motherboard operation and lists specific setting configurations.
Explains the status and function of various onboard LEDs for system diagnostics.
Details LEDs indicating memory errors and their troubleshooting significance.
Describes the various SATA ports, their configurations, and connection types.
Outlines systematic steps to diagnose and resolve common system issues.
Steps to troubleshoot systems that do not display video output.
Procedures for diagnosing and resolving system boot failures.
Steps to identify and resolve memory-related issues.
Recommended steps to take before contacting Supermicro technical support.
Instructions for removing and properly disposing of the onboard battery.
Introduces the AMI BIOS setup utility, its interface, and navigation methods.
Describes the method to enter the BIOS setup utility during system boot.
Details the information presented on the main BIOS setup screen.
Overviews various advanced configuration options available in the BIOS.
Provides settings for configuring CPU-related parameters like cores, threads, and cache.
Options for configuring SATA ports, drive types (IDE, AHCI, RAID), and link power management.
Configuration options for system boot behavior and device order.
Options to save BIOS settings and exit the setup utility.
Detailed table of beep codes for motherboard and IPMI errors and their meanings.
Instructions on obtaining and installing drivers and utilities from Supermicro's website or FTP.
Instructions for installing the SuperDoctor5 hardware monitoring software.
Step-by-step guide for recovering the main BIOS block using a USB-attached device.
| Brand | Supermicro |
|---|---|
| Model | SUPERO X10DRU-i+ |
| Category | Motherboard |
| Language | English |