BASIC SETUP
BASIC SETUP
EN
BASIC SETUP
EN
BASIC SETUP
18 19
Setting up your PC
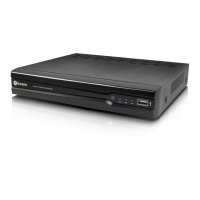
Logging on to SwannView Link
• To connect from your PC to your NVR, make sure your NVR is on and
all connections are ok.
• On your PC, open the email that your NVR sent when you were
setting up your email account during the Setup Wizard which should
look something like this image and locate the the UID:
• Copy the UID (highlight the text - right click with your mouse and
click “Copy”). In this example, start with the X and end with the T then paste it into the field marked UID as shown above
right. If you made a note of the UID on a piece of paper or saved it to a text file using NotePad application on your computer,
type or copy this into the UID field.
• Then, enter your Username (the default of admin is already entered) and Password (default is 12345), then click Login.
After a few seconds, you will see your cameras live on your PC.
Need more details?
Full explanation of the SwannView Link’s software interface and remote configuration options are detailed in the Appendix
from page 49 onwards. SwannView Link’s software interface is functionally very similar to the NVR’s menu system, and
you’ll find more detailed information about all menu options and settings there.
SwannView Link Interface
After you successful log on to SwannView Link, you will see the following screen:
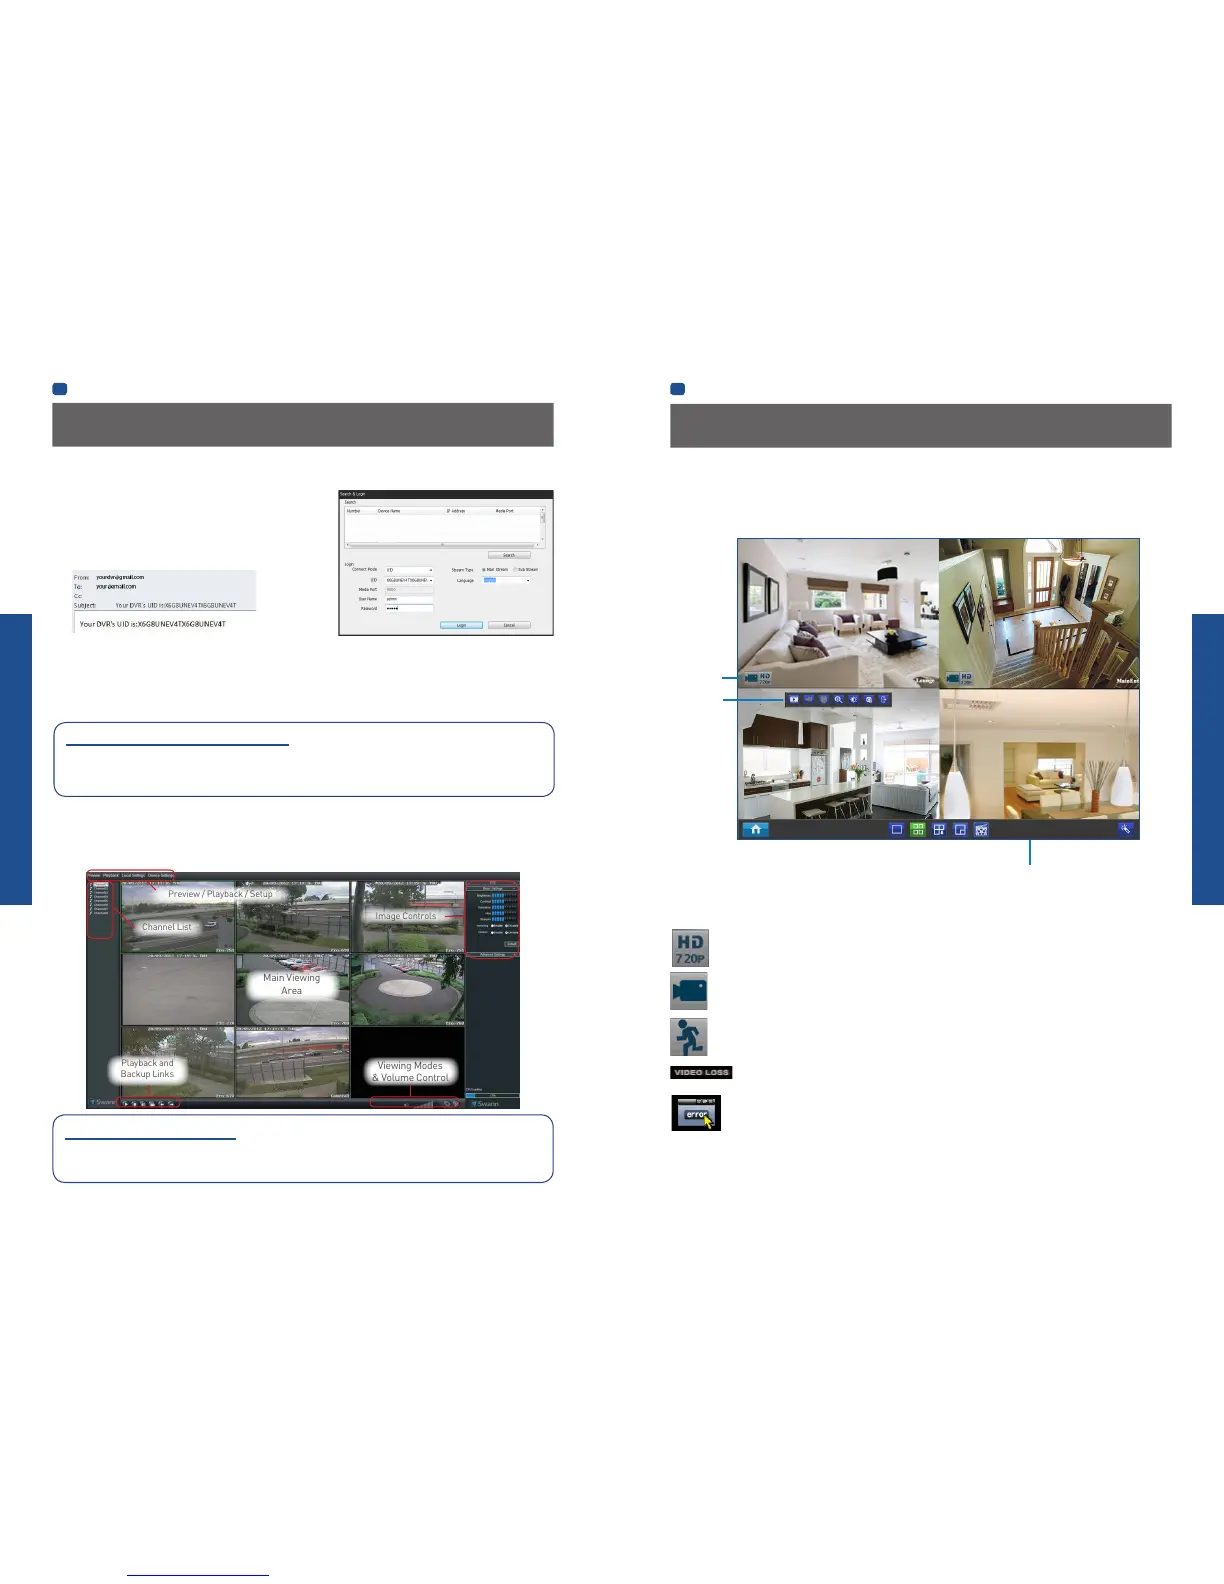
Basic NVR Operation
Live View is the default mode for the NVR. All connected cameras are displayed on-screen. The NVR can display video feeds
from up to four or eight cameras depending on model.
Status Icons
Information on the NVR and camera status is displayed as icons on the Live View screen. Each camera will show its own status
icons. Icons are there to give you a quick snippet of what’s going on with your cameras - whether your camera has detected
motion or even when your camera is having a connectivity issue. The following is a guide of what each icon represents:
This icon indicates that the camera can record at a 720p high definition resolution.
The camera icon indicates that this camera is currently recording. This icon will be the same whether the recording
was scheduled, initiated manually or triggered by motion (though the motion icon will also be present if there’s
motion detected).
The motion icon indicates that the NVR is detecting motion coming from this camera. It doesn’t necessarily mean it’s
recording (the camera icon will be there, too, if that’s the case!).
Video Loss indicates that the channel displaying this has lost the feed from its camera. This may be caused by a
disconnected/damaged cable, the camera may have lost power, the camera may have been de-registered from
the channel or the video standard might be wrong (PAL/NTSC).
If you see this icon on-screen (it’ll be lurking in the lower right corner by default) it indicates that something has
gone wrong. Click the icon to access the Event Log where you’ll get more information about exactly what has gone
wrong.
Status Icons
Quick Camera
Toolbar
Menu Bar
Using the Live View Screen
Main Stream or SubStream?
Each video feed of the NVR is comprised of two components, the Main Stream and the SubStream. Main Stream is the higher
quality of the two streams, and is what you’ll see on the NVR itself or via a local network. Substream is a fraction of the Main
Stream, and what you’ll see over the Internet or via a mobile device. Typically, the Substream will be of significantly lower
quality and bitrate than the Main Stream.
 Loading...