BASIC SETUP
BASIC SETUP
EN
BASIC SETUP
EN
BASIC SETUP
8 9
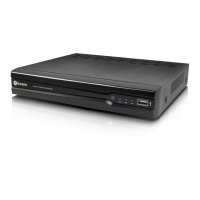
Name Function
DC 12V
Power Input
Where you connect the included DC12V power adapter.
USB 2.0
For connecting the USB mouse or a USB storage device.
HDMI
The primary video output of the NVR. For the highest possible video output quality, we suggest
using this output.
eSATA
For connecting an external hard drive with an eSATA port. It can be used to store video
recordings in the same way as the internal hard drive.
VGA
For connecting a television or PC monitor with a VGA input (make sure the monitor you use
supports the resolution you set in the menu).
Network (LAN)
Port
Where you connect the NVR to your router or network switch for Internet connectivity.
PoE Power Port
(Only for NVR-7082 model) For connecting the PoE power adapter to supply power directly to the
cameras connected on the Network Camera ports.
Network
Camera Ports
These are network ports to connect your IP network cameras. Unlike conventional DVR BNC-
type channel inputs, the numbers labelled on ports here have no bearing on the order in which
cameras will appear on the NVR’s Live View display. The 4-CH model will have four less inputs.
NVR Rear Panel
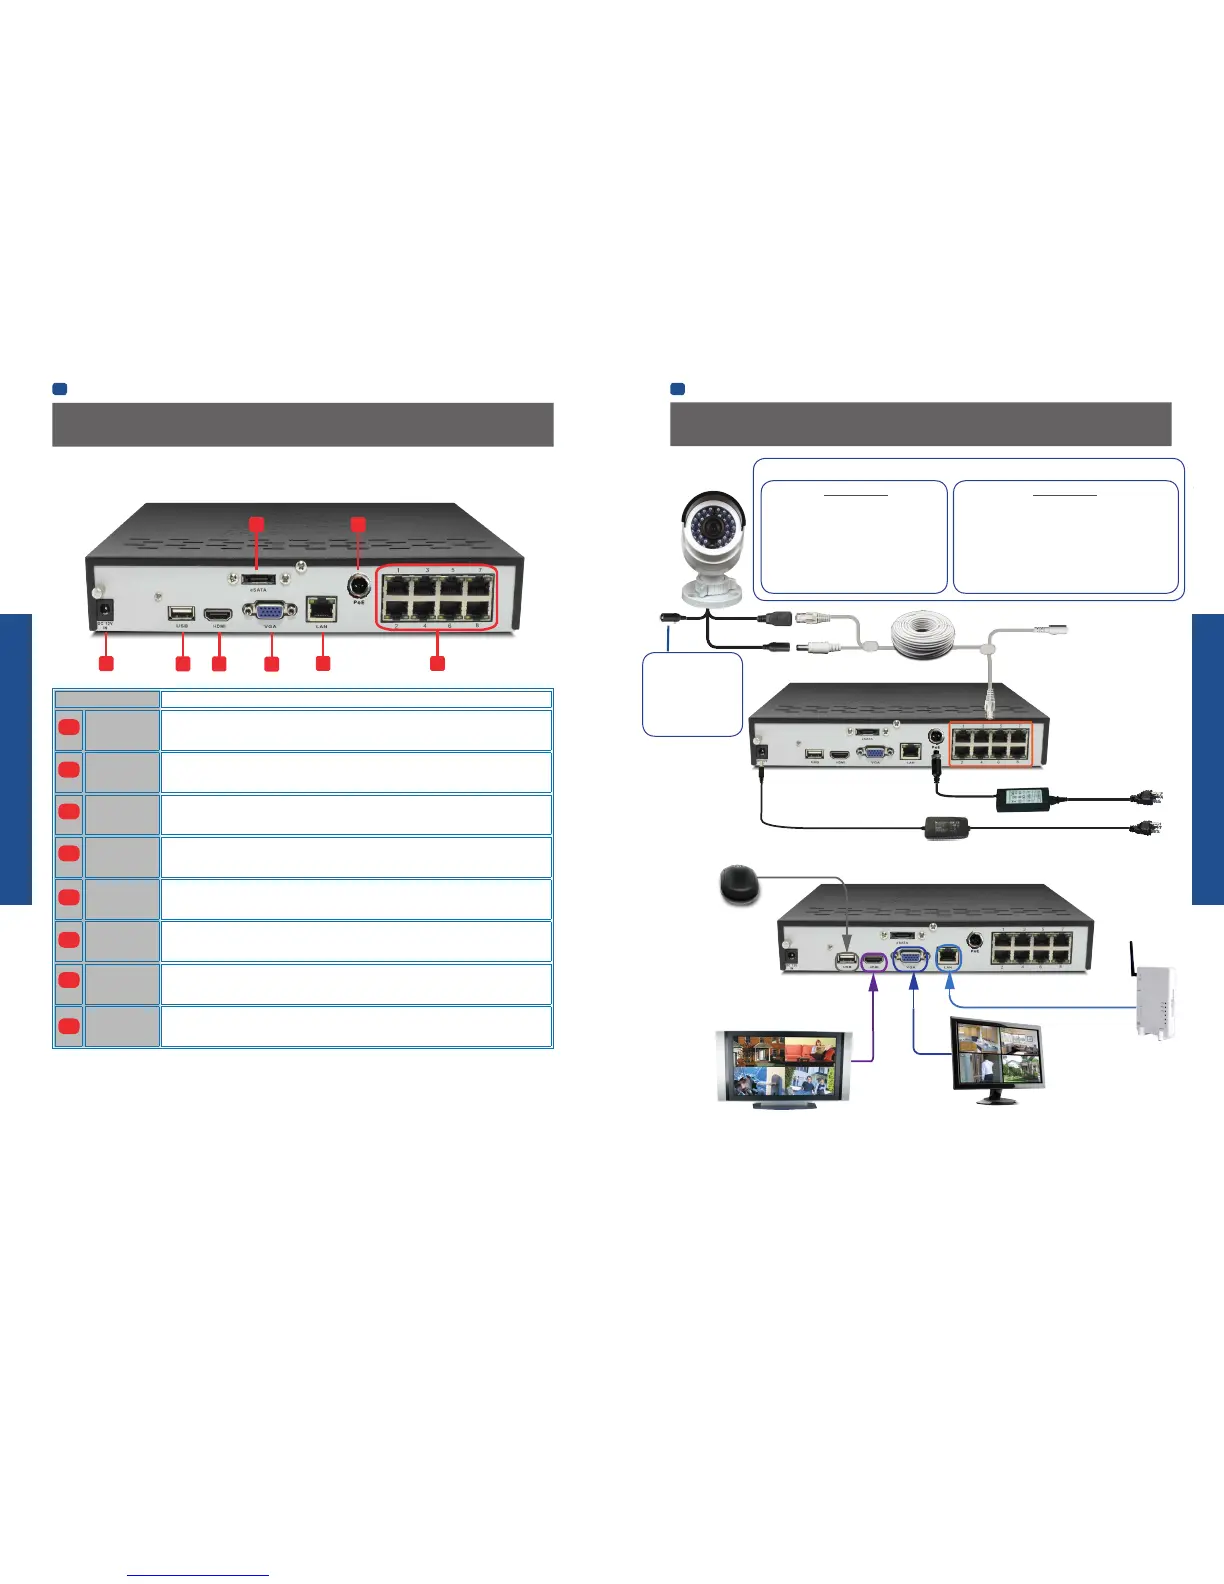
Connection Diagram
Supply power to the NVR using the
included power adapter.
If you’ve got a monitor with
VGA but not HDMI, connect
it to the VGA output on the
NVR.
If you’ve got a TV or monitor
with HDMI in, connect to the
HDMI port on the NVR.
Connect an Ethernet cable
from the LAN port on the
NVR to a spare port on your
router.
Connect the mouse to the USB port.
POE power adapter (NVR-7082 only)
8-channel NVR7082 model shown below
1
2
3
4
5
6
7
8
NVR-7072 model
Connect the Ethernet and Power plugs from the
extension cable to the camera’s LAN Video and
Power ports. Then, plug the Ethernet cable into
one of the Network Camera ports on the NVR.
If connecting more than one camera, use the
power splitter that’s included before connecting
to the power adapter.
NVR-7082 model
Connect the camera’s LAN Video port to any Network
Camera port on the NVR using one of the long Ethernet
cables provided. Then, connect the PoE Power Adapter (it
has a unique 2-pin connector) to the PoE Power port on the
NVR and turn the connector’s locking ring clockwise until
connection is secure. The PoE power adapter is exclusively
used to power the Network Camera ports so that each
camera will not require a separate power adapter.
The camera’s Reset
Button. It enables you
to reset the camera’s
Admin password back to
factory default. For more
information, refer to the
camera’s user manual.
Ethernet plug
Power Plug
(NVR-7072 only)
To Power Splitter / Power
Adapter (NVR-7072 only)
Connecting Cameras to the NVR
 Loading...