BASIC SETUP
EN
BASIC SETUP
76
Installation Guidelines
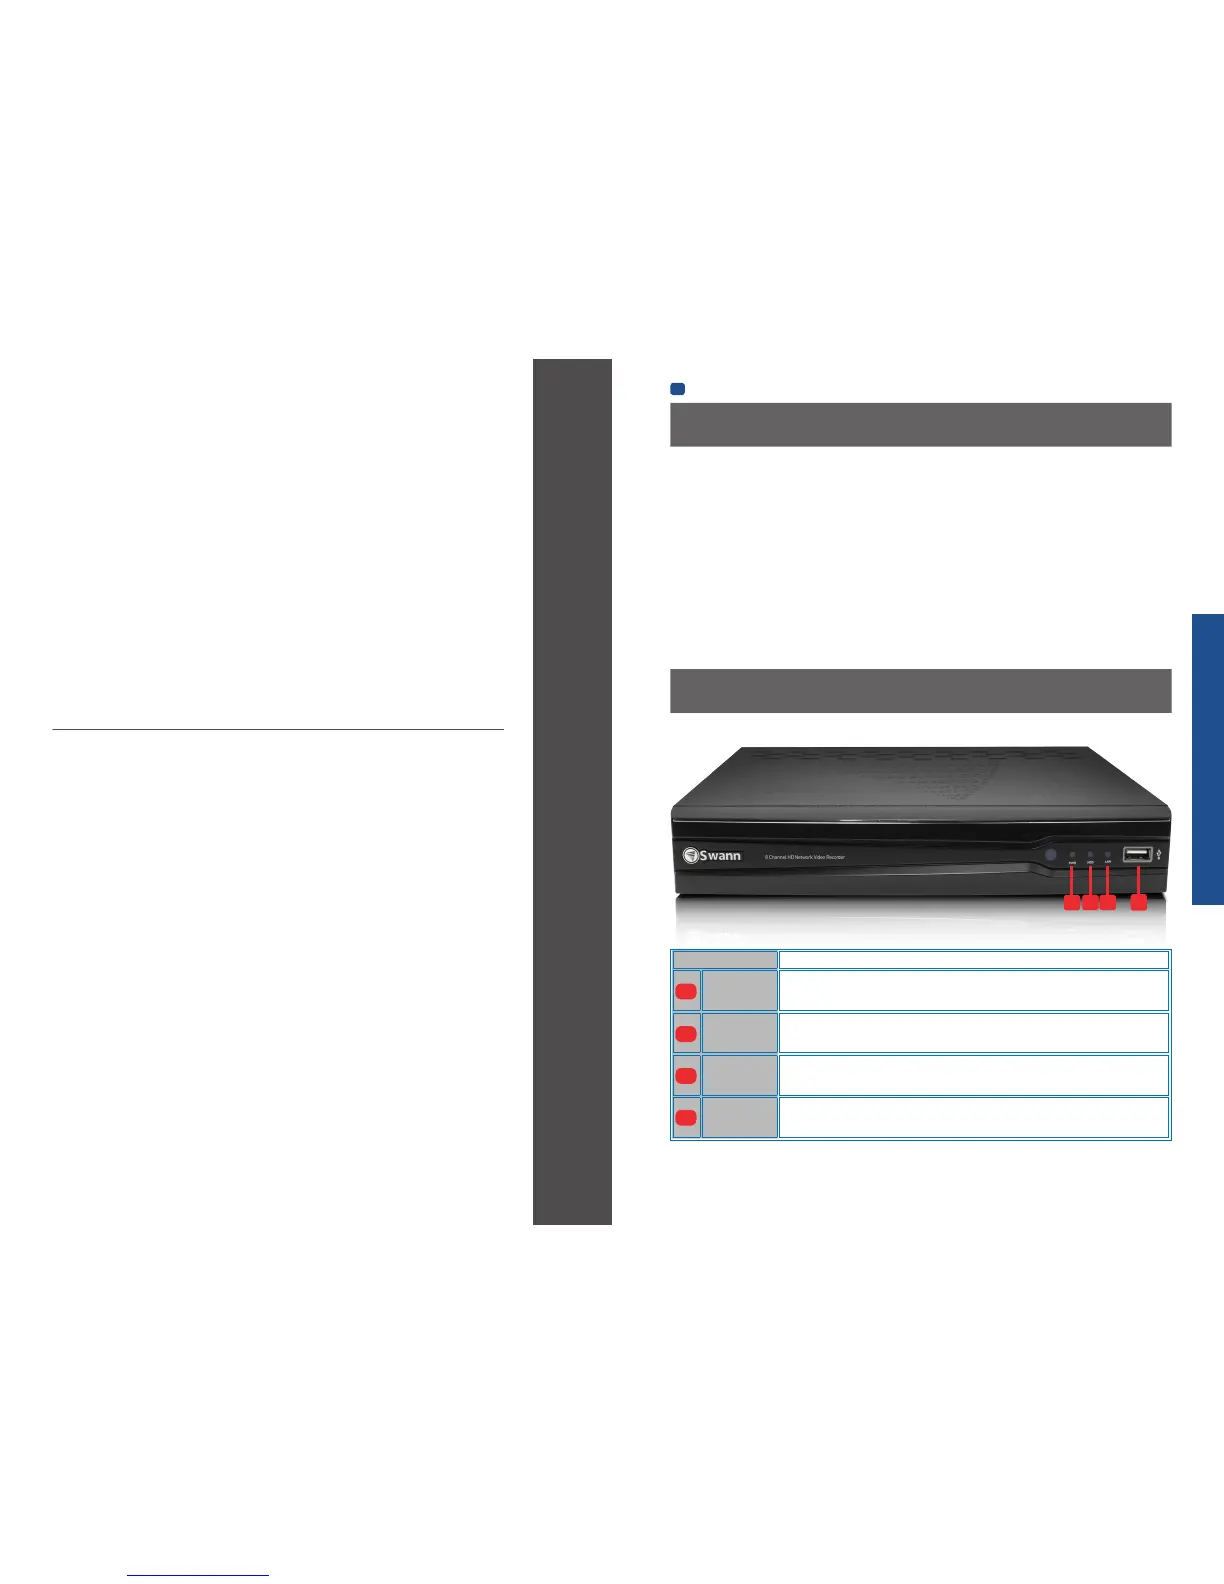
NVR Front Panel
• Do not expose the NVR to moisture. Water is the arch-
enemy of electrical components and also poses a high
risk of electric shock.
• Avoid dusty locations. Dust has a tendency to build up
inside the NVR case, leading to a high risk of failure or
even fire.
• Only install the NVR in a well ventilated space. Like
all electronics, the circuitry and hard drive in the NVR
produce heat, and this heat needs a way out.
• Do not open the NVR case except to install/swap the hard
drive inside. There are no user serviceable parts inside.
• Do not cut or modify any cable for any reason. Doing so
will void your warranty, as well as pose a great risk of fire
or electrical shock.
• Do not expose the NVR to sudden bumps or shocks
(for example, being dropped). The NVR is as robust as
possible, but many of the internal components are quite
fragile.
• Remember that the NVR is, in all likelihood, going to be
left on 24 hours a day, 7 days a week. Keep this in mind
when choosing a location for installation.
• Never open the case whilst the NVR is plugged in, and
never turn the NVR on whilst the case is open.
Chapter
2
Basic Setup
3
4
11
1
2
Name Function
Power LED
Solid red indicates the NVR is supplied power and turned on.
HDD LED
Blinking green indicates the NVR is writing to / reading from the installed hard drive.
LAN LED
Solid blue indicates the NVR is connected to the network.
USB
For connecting USB external storage to the NVR for backup, or for applying new firmware.
1
2
3
4
 Loading...