6
Mounting Guide
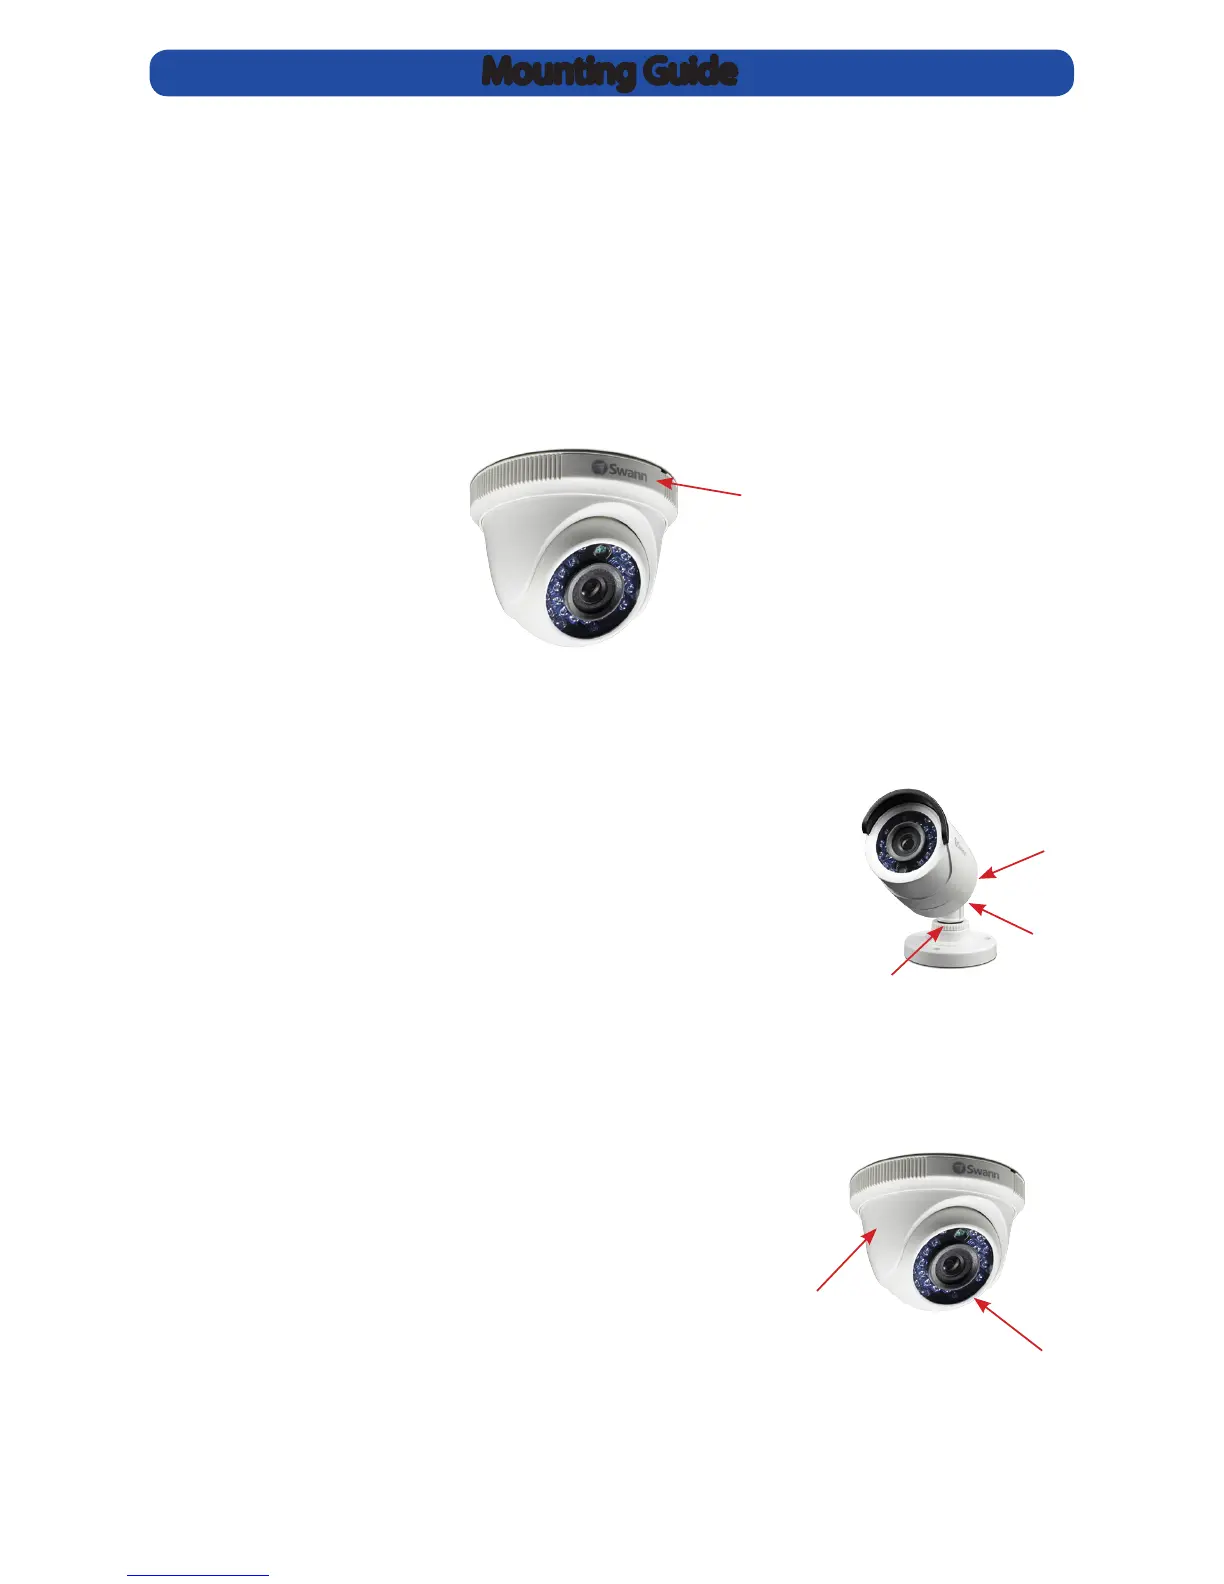
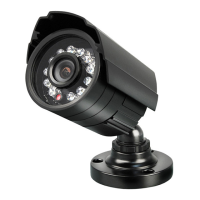
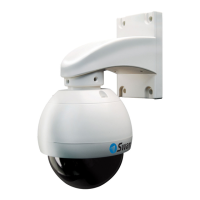
Aiming the Dome Camera
1. The dome module can be rotated left or right.
2. The camera can be aimed in almost any direction
from wherever you choose to mount it.
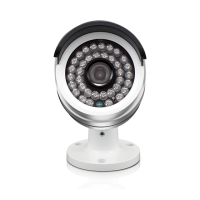
Aiming the Camera
Loosening screw 1 will allow you to tilt the camera up
and down. Tighten the screw when you have nished.
Loosening screw 2 will adjust the camera, so it can look
left or right. Tighten the screw when you have nished.
Loosening the locking ring (3) will allow you to rotate
the barrel of the camera, so no matter what direction it
faces, you can spin the camera so that your images are
correctly oriented.
1
2
3
2
1
• Position the camera in the location you want to mount it, and mark the position on the
surface to position the screws.
• If you’re mounting to a wooden surface, then screw the camera directly to the surface.
• If you’re mounting to a masonry surface (bricks, concrete or similar) then you’ll need to
use the included wall plugs.
• For the dome camera (see below), remove the mounting base from the dome module by
rotating the mounting base cover (1) clockwise. Attach the mounting base to the surface
using the supplied screws. Push the dome module back onto the mounting base unit it
is in a xed position, then rotate the mounting base cover anti clockwise until it is locked
into place.
1