©2016 SwellPro All Rights Reserved
18
1. Switch on radio controller, power on the drone, and place it on the at surface, then connect it to
computer by USB cable. Wait till the self-checking is completed.
2. Run the software assistant, making sure the connection is successful. Choose ‘ACC’ in ‘BASIC’ menu.
3. Make sure the drone is on a at level horizontal surface, click "Start Single Calibration".
A reminder dialogue will pop up when calibrate successfully.
4. Click "Write" in right-upper corner to save change, and disconnect by clicking "Disconnect" once
again. The accelerometer calibration is completed.
Calibration is necessary in below cases:
a. Use the drone for the rst time.
b. Aftera violent ight in ATTI Mode.
c. Push up THROTTLE joystick, and no moving the right AILERON joystick, the drone drift
with certain angle in ATTI Mode.
d. Heavy shaking during transportation.
e. After a completed compass calibration as well as unlock the motors successfully,
however the LED still keep solid red when trying to start up motors.
Accelerometer Calibration by assistant software
4.3.1.1 Accelerometer calibration via controller
4.3.1.2 Accelerometer Calibration by assistant software
1. Turn on Radio controller, then power on drone, wait till the self-checking is completed, then ip SWB
to SWB2 (Return-Home) position.
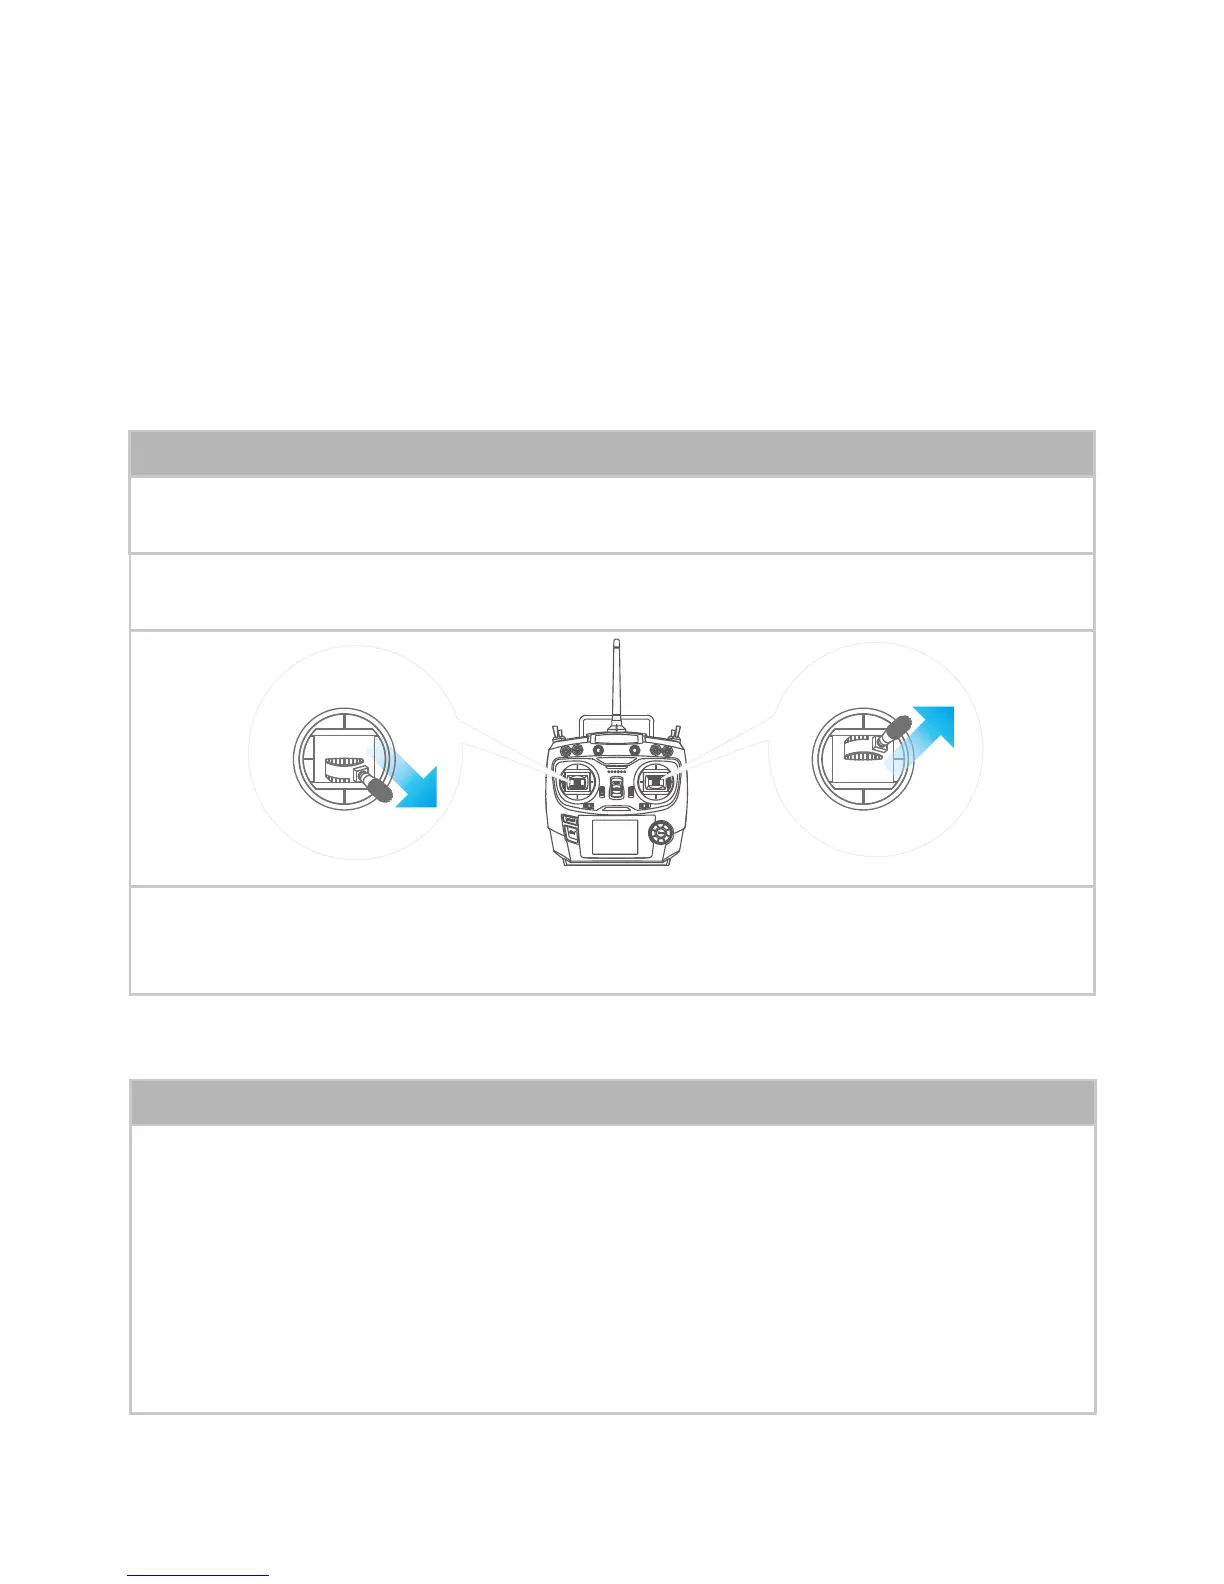
2. Pull left joystick to right-lowest 45°, push right joystick to right-highest 45°as below picture:
3. Keep above for 2s till light turns into ashing RED, the drone enters into calibration process. Wait till
the light quit ashing to blink RED slowly, release the joysticks. Then the accelerometer calibration is
nished.
Accelerometer calibration via controller