©2019 SwellPro All Rights Reserved
07
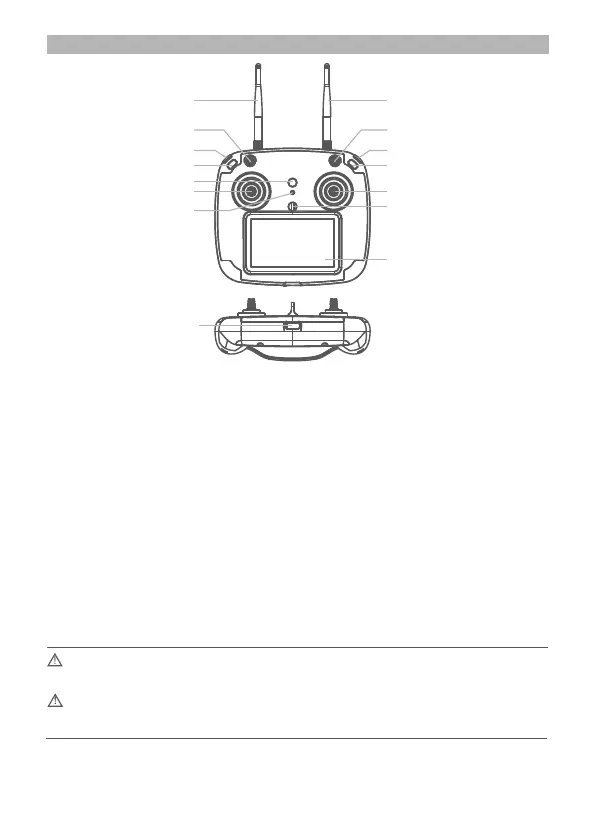
[01] 2.4G Remote Antenna
For drone control signal
[02] Return-Home Switch
Commands the drone
to return automatically
[03] Camera Tilt Down Button
Tilts the camera down
[04] Follow Me Button
Controls the drone to follow
the remote controller
[05] Power Button + Controller
Status Light
Press and hold to power on
the remote controller.
The button will glow to indicate
remote controller status.
[06] Left Joystick
Control the drone’s ascent (up),
descent (down) and/or to rotate
the aircraft nose left or right.
[07] FPV Channel Button
Press and hold to search for the
best FPV channel
[08] FPV Screen
Displays flight data and FPV video
[09] Hanger Ring
Attachment point for neck
lanyard
[10]
[11] Camera Button
Used for controlling Video
and Photo functions.
[12] Camera Up Button
Tilts the camera up
[13] Flight Mode Switch
GPS / Circle / ATTI
[14] 5.8G FPV Antenna
Receives FPV live video
5.8GHz
[15] USB Port/Vent plug
For charging the remote
controller battery and
performing firmware
upgrades
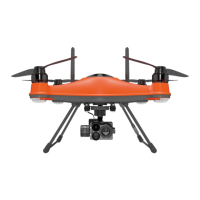
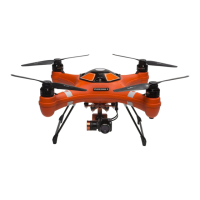
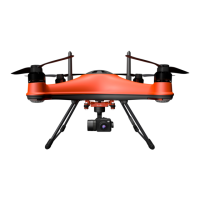
Remote Controller Illustration
[01]
[03]
[02]
[04]
[05]
[06]
[07]
[15]
[09]
[08]
[10]
[11]
[12]
[13]
[14]
Before powering on the controller, please be sure to put all the toggle switches on the controller in the up
position.
Note: The default remote control configuration uses a left hand throttle. If you prefer to have right hand throttle,
please consult your local dealer.
Right joystick
Controls the drone direction
of flight
As the remote controller is completely sealed, the air inside is subject to changes in pressure and temperature.
If the rubber joystick seals balloon or suck in, simply equalize the pressure inside the remote by briefly
opening the USB charge plug.