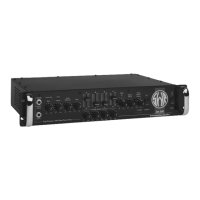
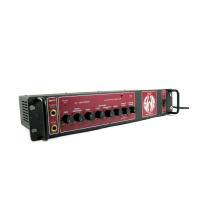
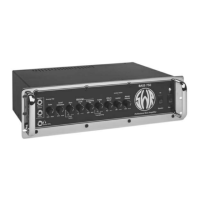
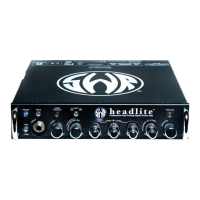
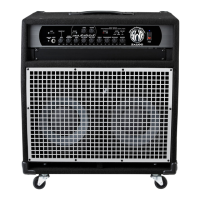
7
◊
◊
Gain is also the primary level control for the FX Loop
Send {T} jack on the rear panel and can be used to
accommodate the input sensitivity of external equipment,
if necessary.
• PREAMP CLIP LED—Indicates when the preamp
circuit is being overdriven (clipping) and causing
signal distortion. For the cleanest signal possible, set
Gain so that the Preamp Clip LED barely flashes at your
instrument's peak output levels, then back it off slightly.
If signal distortion is desired, use higher Gain settings
(unlike power amp clipping, preamp clipping is not
harmful to the amplifier).
D. AURAL ENHANCER A trademark SWR® feature for over
years, the Aural Enhancer brings out the fundamental
low notes of the bass, brightens high-end transients
and reduces certain frequencies that “mask” the
fundamentals. The ultimate effect is a more transparent
sound that opens up the sibilant characteristics of all
instruments without being harsh.
How the Aural Enhancer works: Think of it as a variable
tone control that changes frequency range AND level
according to where you set the Aural Enhancer control:
As you rotate the control clockwise from the “MIN”
position, you are elevating low, mid, and high frequency
levels in ranges that are different, yet complementary
to the Bass and Treble tone controls. The “ o’clock”
position—a favorite for many players—brings out both
low end fundamentals and crisp highs, while at the
same time, adds a little lower midrange helping you
to cut through the band. Then, as you rotate further
clockwise, selected mids will drop off—specifically, a
group of frequencies centered around Hz. While
apparent, the Aural Enhancer is gentle compared to the
extreme response curves you can create with the EQ
tone controls.
E. BASS Adjusts low-frequency signal response ±dB
centered around Hz.
• PULL TURBO—Pull the knob out to lower the range
of the Bass control to include frequencies down to Hz.
F. MID RANGESemi-parametric tone controls that
allow you to boost or cut signal response
at a chosen mid-frequency range. With the
Frequency knob, select a range from Hz
to Hz, then use the Level knob to adjust
response ±dB in that range. Mid–range tone
is critical for most instruments and the optimal settings
will depend on your situation—what may sound harsh
while playing alone may sound just right in a crowded
room or on a recording.
G. TREBLE
Adjusts high-frequency response ±dB above
the kHz range. Because high frequencies are inherently
directional (narrowly focused), it is important to listen
from different angles to find the best treble setting and
the optimum placement for your amplifier.
• PULL TRANSPARENCY—Pull the knob out to shift
the shelving point of the Treble control up to kHz
allowing you to isolate control of the tweeter and boost
clarity.
H. COMPRESSION
Adjusts the ratio of signal compression.
The brightness of the yellow LED represents how
much signal level is actively being attenuated by the
compression circuit.
I. MASTER VOLUMEUse to set the loudness output from
your speakers after all other levels are set, including any
external effects.
• POWER AMP CLIP LED—Indicates when the power
amp is being overdriven (clipping) and warns you of the
potential for overheating and equipment damage. Reduce
the Master Volume or increase the Compression {H} level
if this LED is ON (unlike preamp clipping, power amp
clipping can be harmful to the amplifier).
J. TUBE DI CONTROLCommand center for the rear panel
Tube DI {U} output jacks.
• LINE / DIRECT—Selects the source point in the signal
path for the Tube DI {U} output. LINE includes all tone,
compression and effects circuits. DIRECT is a true all-tube
signal path taken immediately after the first tube preamp
stage.
• MUTE / LIVE—MUTE disables Tube DI {U} output.
When used in combination with the main Mute {A} switch
this allows you to play through just the Speakers {Q/R} or
just through the Tube DI {U}.
• GROUND / LIFT—LIFT disconnects the ground
connection (pin-) from the XLR jack to reduce noise
caused by ground loops. Normally leave this switch in
the GROUND position.
•
PAD—Adjusts the output level of the Tube DI {U}
jacks to accommodate a variety of sound equipment
connections and input sensitivities.
K. HEADPHONES
Plug your headphones in here.
Use the main Mute {A} and Tube DI Mute {J} for privacy.
L. EFFECTS BLENDFunctional only when a plug is
inserted into the EFX Return {X} jack, this knob sets your
effects level by controlling the ratio of "wet" effects loop
signal blended into the "dry" preamp signal.
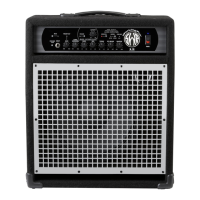
M. INTERNAL SPEAKERS
Switches the Redhead
cabinet speakers ON-OFF allowing you to use them
simultaneously with headphones or to easily disable
them when only external speakers are needed.
N. POWER SWITCH
Switches the unit ON-OFF as indicated
by the LED.
Front Panel