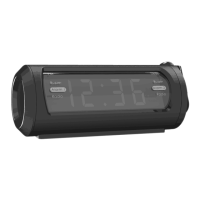
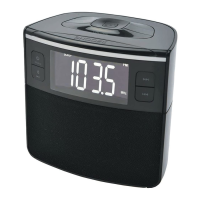
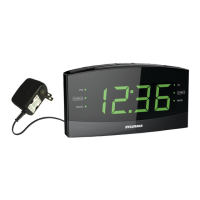
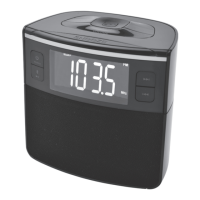
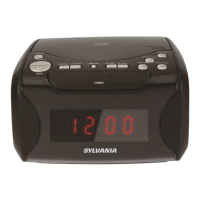
This document describes the Sylvania Model SCR1245-USB, a USB clock radio with a projector.
Function Description:
The Sylvania SCR1245-USB is a multi-functional device that combines a clock, an FM radio, an alarm, a time projector, and a USB charging port. Its primary function is to provide timekeeping, audio entertainment via FM radio, and alarm capabilities. The integrated projector allows the time to be displayed on a wall or ceiling, offering a convenient way to check the time without looking directly at the unit's LED display. The USB port serves as a charging station for compatible external devices.
Important Technical Specifications:
- Model Number: SCR1245-USB
- Power Source: AC/DC Switching adapter (Input: 100-240V~ 50/60Hz, Output: 5V === 1000mA)
- Backup Battery: 2 x 1.5V "AAA" SIZE (LR03) batteries (not included)
- USB Charger Output: DC 5V, 1A (maximum charging capacity of 1000mA)
- FM Radio Frequency: 87.5 - 108MHz
- Projection Distance: Optimal projection distance is 3-9 feet.
- Preset Memory: Stores up to 20 FM radio stations.
- Sleep Timer: Adjustable from 10 to 90 minutes.
Usage Features:
Controls and Indicators:
The device features a range of buttons and indicators for easy operation:
- Buttons: Power & Auto Scan, Volume Down & Alarm One, Volume Up & Alarm Two, Preset & Clock Set, Snooze/Sleep/Dimmer, Tuning Up & Minute, Tuning Down & Hour, 180 Degree Flip, Projector On/Off.
- Indicators: PM Indicator, Alarm One Indicator, Sleep Indicator, Alarm Two Indicator.
- Display: LED Display for time and settings.
- Ports: USB Charger (DC 5V/1A), Power Jack (DC === 5V/1A).
- Other: Projector Lens, Backup Battery Compartment, FM Antenna.
Clock Setting:
To set the clock:
- In standby mode, press and hold the PRESET & CLOCK SET BUTTON.
- The hours will blink. Use the TUNING DOWN & HOUR BUTTON to set the hour.
- Use the TUNING UP & MINUTE BUTTON to set the minute.
- Press PRESET & CLOCK SET BUTTON once to confirm. The PM indicator will light up when the hour is set in the PM.
FM Radio Operation:
- Auto Tuning: Press POWER/AUTO SCAN to turn on, then press and hold POWER/AL.OFF/AUTO SCAN. The unit will scan and store up to 20 local FM stations.
- Manual Tuning: Press POWER/AUTO SCAN to turn on, then use the TUNE BUTTON to manually tune or hold it down to scan for available stations.
- Saving Presets: Tune to a desired station, then press and hold PRESET / CLOCK. "P01" will flash. Use the TUNE BUTTON to select a preset number (P01-P20), then press PRESET / CLOCK again to save.
- Playing Presets: Press PRESET / CLOCK, then use the TUNE BUTTON to cycle through saved stations.
Alarm Setting:
The device supports two independent alarms.
- Turn the unit off if in radio mode.
- Press and hold VOLUME DOWN & ALARM ONE or VOLUME UP & ALARM TWO.
- Use TUNING UP & HOUR to adjust the hour (PM indicator for PM hours).
- Use TUNING DOWN & MINUTE to adjust the minute. The corresponding alarm indicator will light up.
- Repeatedly press VOLUME DOWN & ALARM ONE or VOLUME UP & ALARM TWO to select between Radio, Buzzer (bb), or Off for the alarm sound.
- The alarm will sound at the set time.
- Cancelling Alarm: Follow the setting steps and repeatedly press the alarm button until the alarm indicator light is "OFF".
- Snooze: When the alarm sounds, press SNOOZE, SLEEP & DIMMER for an additional 9 minutes of delay.
- Turning Off Alarm: Press POWER & AUTO SCAN to turn off the alarm until the next set alarm time.
Time Projection:
- Press PROJECTOR ON/OFF to turn the projector on or off.
- Project the time onto a flat surface (ceiling or wall).
- Swivel the projector to adjust the position and focus as needed.
- Tap the 180° FLIP BUTTON to invert the projected time if necessary.
Sleep Timer:
When listening to the radio, press SNOOZE, SLEEP & DIMMER to enter sleep mode. Press the button repeatedly to adjust the sleep timer from 10 to 90 minutes. The unit will automatically turn off after the selected time.
USB Charging:
- Ensure the unit is plugged into an AC outlet via its adapter.
- Connect your device to the USB Charger port using an appropriate USB charging cable (not included).
- The device will begin charging. Note that the 1000mA maximum charging capacity makes it unsuitable for charging iPads.
Maintenance Features:
- Cleaning: Clean the unit with a soft, damp (never wet) cloth. Avoid solvents or detergents.
- Environmental Care: Avoid direct sunlight, hot, humid, or dusty places. Keep away from heating appliances, fluorescent lamps, and motors to prevent fire or electric shock.
- Troubleshooting:
- Noise/Distorted Radio Sound: Fine-tune the FM station, fully extend the FM antenna, or reposition the unit for better reception.
- No FM Sound: Increase the volume.
- Power Outage: Unplug the AC adapter during lightning storms or when unused for long periods. Unplug immediately in case of malfunction.
Safety Instructions:
The manual emphasizes reading all instructions, keeping the unit dry, ensuring proper ventilation, avoiding heat sources, and using the correct power plug. It also warns against mixing old and new batteries or different battery types. FCC compliance information is provided, advising users on how to resolve potential radio/TV interference. All servicing should be referred to qualified personnel.