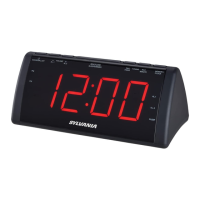
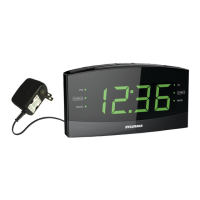
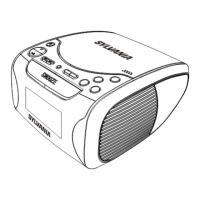
This document outlines the operation and maintenance of the Sylvania SCR1808-EO-PL Clock Radio with USB Charging. This versatile device combines the functionalities of a clock, a radio, and a USB charging port, offering convenience for daily use.
Function Description
The Sylvania SCR1808-EO-PL serves primarily as a clock radio, allowing users to keep track of time and listen to FM radio broadcasts. Its core features include a digital clock display, an FM radio tuner, and alarm functions. A notable addition is the integrated USB charging port, which enables users to charge compatible electronic devices directly from the clock radio. The device is powered by an AC/DC adapter, with a battery backup system in place to maintain clock settings during short power outages.
Usage Features
Power Source and Battery Backup:
The clock radio operates by plugging the included AC/DC adapter into a standard AC power outlet and connecting it to the POWER JACK on the unit. For added reliability, the device incorporates a battery backup compartment that accommodates two 1.5V "AA" batteries (not included). This backup system is designed to preserve clock and alarm settings during brief power interruptions, ensuring that the time is maintained even if the main power is temporarily lost. It's important to note that the primary functions of the clock radio, such as radio playback or alarm activation, cannot run solely on battery backup power.
Setting the Clock:
Setting the time on the SCR1808-EO-PL is a straightforward process. In standby mode, users can press and hold the MEMORY & CLOCK SET BUTTON. The hour display will begin to blink, indicating that it's ready for adjustment. The TUNING DOWN & HOUR BUTTON is used to set the current hour, while the TUNING UP & MINUTE BUTTON adjusts the minutes. Once the desired time is set, pressing the MEMORY & CLOCK SET BUTTON again will confirm the settings. A PM indicator light will illuminate when the hour is set in the PM, providing clear visual confirmation.
Setting the Sleep Timer:
For those who enjoy falling asleep to music or radio, the sleep timer function is a convenient feature. While listening to the radio, pressing the SNOOZE, SLEEP & DIMMER BUTTON activates the sleep mode. Users can then adjust the sleep timer duration, typically ranging from 10 to 90 minutes, by repeatedly pressing the SNOOZE, SLEEP & DIMMER BUTTON. The unit will automatically power off once the selected sleep time has elapsed, conserving energy.
Playing the FM Radio:
- Auto Tuning: To quickly find and store local FM stations, users can turn on the unit by pressing the POWER/AL.OFF/AUTO SCAN BUTTON. Pressing and holding this button will initiate an auto-scan, during which the radio will automatically search for and store up to 20 local FM radio stations in its preset memory.
- Manual Tuning: For more precise station selection, the radio can be tuned manually. After turning on the unit with the POWER/AL.OFF/AUTO SCAN BUTTON, users can press the TUNE BUTTON to manually adjust the radio frequency. Holding down the TUNE button will allow for continuous scanning of available stations.
- Manual Saving and Playing Presets: Once a desired station is found, it can be saved as a preset. By pressing and holding the MEMORY / CLOCK BUTTON, a preset number (e.g., "P01") will appear on the display. The TUNE BUTTON can then be used to select the desired preset number (from P01 to P20). Pressing the MEMORY / CLOCK BUTTON again will save the current radio station to the chosen preset number. To cycle through saved preset stations, users can press the MEMORY / CLOCK BUTTON and then the TUNE BUTTON.
Setting Alarms:
The SCR1808-EO-PL features two independent alarms, Alarm 1 and Alarm 2, allowing users to set different wake-up times or preferences.
- Setting Alarm 1: Before setting the alarm, it's recommended to tune to the radio station you wish to wake up to, and then turn off the radio. To set Alarm 1, press and hold the ALARM 1 button (which also functions as the VOLUME - button). When the display starts to flash, indicating alarm setting mode, use the HOUR button (also TUNING UP) to adjust the hour and the MINUTE button (also TUNING DOWN) to adjust the minute. Once the time is set, wait for the display to stop flashing. Then, repeatedly press the ALARM 1 button to cycle through the alarm options: the last AM station listened to, the last FM station listened to, BUZZER (displayed as "bb"), or OFF. Stop when your preferred option is displayed.
- Setting Alarm 2: The process for setting Alarm 2 is similar. Tune to the desired wake-up radio station and turn off the radio. Press and hold the ALARM 2 button (which also functions as the VOLUME + button). Adjust the hour using the HOUR button and the minute using the MINUTE button. After the display stops flashing, repeatedly press the ALARM 2 button to select from the same alarm options: last AM station, last FM station, BUZZER ("bb"), or OFF.
- Checking Alarm Time: To check the set alarm time for either Alarm 1 or Alarm 2, simply press and hold the respective ALARM button until the alarm time flashes on the display.
- Snooze Function: When an alarm sounds, pressing the SNOOZE button will temporarily silence it for an additional 9 minutes, allowing for a brief delay before the alarm reactivates.
- Cancelling Alarms: To completely cancel an active alarm, press and release the appropriate ALARM button (AL 1 or AL 2) until "OFF" is shown on the display, indicating that the alarm is deactivated.
USB Charging:
The integrated USB charging port provides a convenient way to charge electronic devices. To use this feature, ensure the clock radio is plugged into a wall outlet. Connect one end of the appropriate USB charging cable (not included) to your device and the other end to the USB Charging receptacle on the clock radio. It's crucial to consult your device's user manual to determine the required charging amperage and the correct cable. This device's USB charging port offers a maximum charging capacity of 1000mA (1A), making it suitable for charging many smartphones and small electronics, but it is not recommended for charging iPads due to their higher power requirements.
Maintenance Features
General Cleaning:
To maintain the appearance and functionality of the clock radio, it should be cleaned with a soft, damp (never wet) cloth. It is important to avoid using solvents or detergents, as these can damage the unit's finish or internal components.
Environmental Considerations:
To ensure optimal performance and longevity, the device should be kept away from direct sunlight, high temperatures, humidity, or dusty conditions. These environmental factors can increase the risk of fire or electric shock and degrade the unit's components over time. Additionally, avoid placing the unit near heating appliances or sources of electrical noise, such as fluorescent lamps or motors, as these can interfere with its operation. For better visibility of the clock display, avoid operating the unit under direct sunlight or in brightly lit rooms.
Troubleshooting Guide:
The manual provides a basic troubleshooting guide for common issues:
- Noise or distorted sound on radio: This can often be resolved by fine-tuning the FM broadcast station. If the FM antenna is not fully extended, extending it completely can improve reception.
- FM no sound: If there is no sound from the FM radio, ensure the volume is not at its minimum setting. Increasing the volume should resolve this. Additionally, repositioning the unit until the best reception is obtained can also help.
Safety Instructions:
The manual emphasizes several important safety instructions, including reading all instructions, keeping them for future reference, heeding all warnings, and following all instructions. It advises against using the apparatus near water, blocking ventilation openings, or installing it near heat sources. Users are cautioned not to defeat the safety purpose of polarized or grounding-type plugs and to protect the power cord from being walked on or pinched. Only manufacturer-specified attachments and accessories should be used. The apparatus should be unplugged during lightning storms or when unused for long periods. All servicing should be referred to qualified service personnel, especially if the apparatus has been damaged in any way, such as a damaged power cord, spilled liquid, fallen objects, exposure to rain or moisture, abnormal operation, or if it has been dropped. Changes or modifications to the unit not expressly approved by the responsible party could void the user's authority to operate the equipment. It also provides warnings regarding mixing old and new batteries or different types of batteries (alkaline, standard, rechargeable).
FCC Compliance:
The device has been tested and found to comply with the limits for a Class B digital device, pursuant to Part 15 of the FCC Rules. These limits are designed to provide reasonable protection against harmful interference in a residential installation. If the equipment causes harmful interference to radio or television reception, users are encouraged to try to correct the interference by reorienting or relocating the receiving antenna, increasing the separation between the equipment and receiver, connecting the equipment into an outlet on a different circuit, or consulting a dealer or an experienced radio/TV technician.