Do you have a question about the SYMA X 20 and is the answer not in the manual?
Lists key functionalities like 4-axis structure, 6-axis gyro, modular design, headless mode, auto hover, and stunt flip.
Covers safe storage, operation, battery handling, age restrictions, flying rules, and maintenance advice.
Advises on cleaning with a soft cloth, avoiding heat, and not immersing in water.
Lists the contents of the product package: drone, remote control, manual, screwdriver, blades, and USB cable.
Details the process of pulling out old blades and mounting new blades (A/B) to the correct positions.
Explains connecting the drone to a computer via USB for charging, indicating charge status, and estimated charging time.
Warns against improper charging, mixing battery types, exposure to heat, water, and dismantling.
Details remote control buttons, joysticks, and the process of installing batteries.
Guides on preparing the drone for flight, including powering on the remote and drone.
Explains multiple methods for starting the drone's motors and initiating flight.
Details various methods for safely shutting down the drone.
Illustrates how to control the drone's movement (ascend/descend, forward/backward, turn, side fly).
Explains how to fine-tune the drone's flight path for stability.
Describes low-voltage and over-current protection mechanisms.
Details level calibration, speed modes, and 360° stunt flip.
Steps to set the drone's forward orientation for headless mode.
Procedure to recalibrate the front direction if deviation occurs in headless mode.
Instructions on switching between headless and normal flight modes.
Provides warnings and declarations regarding FCC and EU regulations, frequency bands, and transmitter power.
Visual list of all included accessories and parts for the drone.
Diagram and table detailing each part of the drone with its corresponding number and quantity.
Lists the drone's physical dimensions and battery specifications.
Provides solutions for common drone problems like no response or sensitive flight.
Addresses issues like drifting during hovering, head bias, and fixed instability.
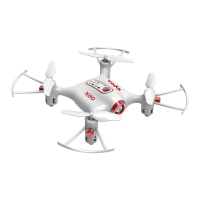
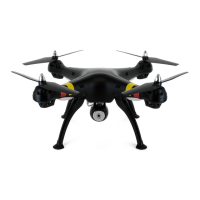
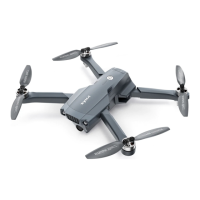
The SYMA X20 is a 4-channel pressure fixed position hovering remote control drone, designed for users aged 8 and above. It incorporates a 6-axis gyro stabilizer for stable flight and a modular design for easy installation and repair. The drone is suitable for indoor flight due to its flexible and speedy 4-axis structure.
The drone operates with a remote control that features several key functions. The left joystick controls ascending and descending movements, while the right joystick manages forward, backward, left, and right directional flight. The remote control also includes buttons for high/low speed, headless mode, one-key landing, one-key take-off, and a 360° stunt flip. Fine-tuning adjustments for different directions can be made by pressing a dedicated button and simultaneously controlling the left/right joystick. All fine-tuning settings can be cleared by pressing the fine-tuning button and the power button at the same time.
The drone features a pressure-fixed-position hovering function, allowing it to maintain a specific height when the left joystick (throttle) is released after controlling ascending/descending flight. This auto-hover function simplifies flight control.
The headless function is a notable feature that simplifies directional control. To define the forward direction in headless mode, the user first pushes the power button on the remote control. After connecting the drone to the power supply and switching it to "ON," the user adjusts the drone's head to the desired new forward direction. Then, by pushing the left joystick (throttle) to its farthest upward position and pulling it down to its farthest downward position, the frequency and forward direction functions are completed, indicated by a long beep sound from the remote control.
Calibration for the definition of the front in headless mode is also possible. If the drone deviates from its defined direction due to impact, the user can push both the left and right joysticks to the bottom left corners simultaneously for 2-3 seconds after placing the drone in the correct flying direction. The LED indicator light on the drone will blink rapidly and then return to a continuous "ON" mode after slowly flashing for 3 seconds, indicating successful calibration.
Toggling between headless and normal function is straightforward. After frequency matching, the drone defaults to normal mode, with the indicator light continuously "ON." Pressing the High/Low speed button on the remote control for 2 seconds will produce three "beep" sounds, indicating entry into headless mode. Pressing it again for 2 seconds will produce a single "beep" sound, indicating an exit from headless mode. In headless mode, the operator does not need to differentiate the drone's head position, controlling its direction solely with the right joystick.
The drone also includes a level calibration function. By placing the drone on a level surface and pushing both left and right joysticks to the lower right corners for 2-3 seconds, the LED light indicator will blink rapidly and then return to normal status, signifying successful calibration.
For speed control, the drone defaults to slow speed upon power-on. Users can switch to fast speed by briefly pressing the High/Low speed button, indicated by two "beep" sounds. Pressing it again will return to slow speed, indicated by one "beep" sound.
The 360° stunt flip function allows for exciting aerial maneuvers. Once familiar with basic actions, users can fly the drone to a height of 3 meters, then push the upper right corner button (Stunt Flip Button) on the remote control and simultaneously push the right joystick to the farthest position (Front/Back/Left/Right). The drone will then execute the corresponding stunt flip action. For optimal stunt flip performance, the batteries should be fully charged.
The drone is designed for ease of use and safety. For first-time flights, the left joystick should be pushed up slowly to prevent rapid ascent and potential collisions. After flight, the remote control should be turned off first, followed by the drone.
The drone incorporates several protective features. Low-voltage protection is indicated by the four bottom indicator lights flashing, signaling that the battery power is low and the drone should be flown back immediately. Over-current protection activates if the drone impacts a foreign object, is obstructed, or if the blades are not rotating, preventing damage.
Battery installation for the remote control requires 4 x AAA alkaline batteries (not included). It is crucial to match the polarities correctly, avoid mixing new and old batteries or different types of batteries, and not use rechargeable batteries.
Turning on the drone can be done in a few ways. Method 1 involves pushing the left joystick (accelerator) to the highest point and then back to the center, initiating slow blade rotation. Method 2 requires moving both left and right joysticks inwards in an internal "8" loop for 1 second, also starting slow blade rotation. Method 3, when the drone is stationary, involves pressing the two buttons on top of the remote control simultaneously, causing the drone to automatically take off and hover at a certain height.
Turning off the drone also offers multiple methods. Method 1 is to push the left joystick (accelerator) to the lowest level and hold for 2-3 seconds. Method 2 involves moving both left and right joysticks inwards in an internal "8" loop for 1 second. Method 3, when the drone is in flight, requires pressing the two buttons on top of the remote control simultaneously, causing the drone to descend and land, and the blades to stop rotating.
Trimming operations are available for precise flight adjustments. For forward and backward trim, while the drone is hovering and automatically flying forward/backward, the user presses the "A" button and simultaneously pushes the right joystick forward/backward slightly to fine-tune the direction. The "A" button should not be released until the drone is stable. Similar procedures apply to left/right side flight trim and left/right side turning trim, using the appropriate joysticks and the "A" button.
The drone's modular design facilitates easy installation and repair of parts. Blade replacement is straightforward: pull out the old blades and mount new ones, ensuring that blade A is on arm "A" and blade B is on arm "B."
For charging the drone's battery, connect the drone's charging port to the USB cable, then connect the USB interface to a computer. The indicator light below the charging port will turn on during charging and turn off or flash when charging is complete. A full charge takes approximately 70 minutes, providing about 5 minutes of hover flight time.
Precautions during battery charging include ensuring rechargeable batteries are charged under adult supervision, removing exhausted batteries from the toy, and disposing of used batteries according to instructions. Batteries should be kept away from high temperatures, direct sunlight, naked light, or electrical equipment installations to prevent damage or explosions. Immersion in water should be avoided, and batteries should be stored in a cool, dry place. Dismantling batteries is not recommended, and the charging place should not be left unattended during charging. Rechargeable batteries must be removed from the toy before charging.
For general repair and maintenance, the product should be cleaned with a dry and soft cloth. Exposure to heat should be avoided, and the product should not be immersed in water, as this can damage electronic parts. Transformers used with the toy should be regularly examined for damage to the cord, plug, enclosure, and other parts. If damage occurs, the toy should not be used with that transformer until it has been repaired.
To extend battery life, if the drone will not be used for 10 days or more, the battery should be discharged to 40%-50% (equivalent to half of the total flight time on a full charge). The battery cover can be opened with a screwdriver. The packing should be retained as it contains important information.
| Category | Drones |
|---|---|
| Manufacturer | SYMA |
| Model | X20 |
| Type | Quadcopter |
| Charging Time | 60 minutes |
| Skill Level | Beginner |
| Camera | No |
| Color | Black |
| Control Distance | 50 meters |
| Battery | 3.7V |
| Age Recommendation | 14+ years |