Do you have a question about the SYMA X8G and is the answer not in the manual?
Details on controlling the quadcopter's movement in Mode 1.
Details on controlling the quadcopter's movement in Mode 2.
Indicates aircraft power status and return recommendation.
Describes the circuit protection during crashes or stalls.
Procedure to reset and stabilize the aircraft's orientation.
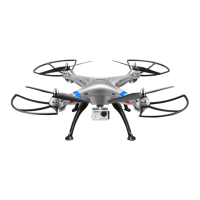
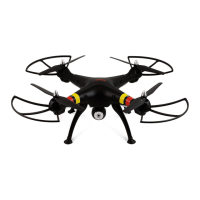
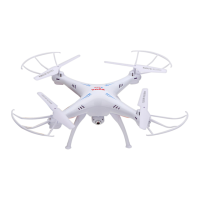
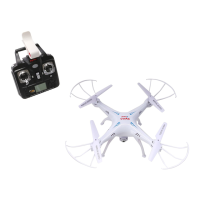
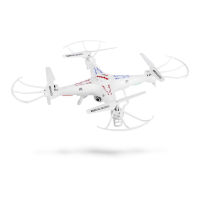
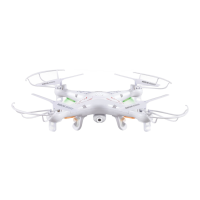
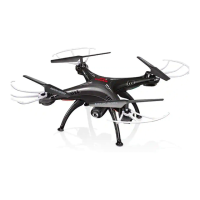
The device is a quadcopter, specifically the Syma X8G Explorers model, designed for remote-controlled flight. It operates on a 4-channel 2.4G remote control system and is suitable for users aged 14 and above.
The quadcopter features a four-axis structure, which contributes to its flexibility and rapid flight capabilities. This design also enhances its wind resistance, allowing it to be flown both indoors and outdoors. A built-in 6-axis gyroscope ensures precise hovering in the sky, providing stability during flight.
One of its notable functions is the 360° 3D eversion, enabling the quadcopter to perform flips and stunts. It also supports a "throwing flight" function, which suggests an easy launch mechanism. A newly added "headless function" simplifies control by allowing the aircraft to be recalled easily, regardless of its orientation. This means the operator doesn't need to recognize the aircraft's headpiece position, as control is based on the remote control's operating rod direction. The headless mode can be activated or exited by pressing a specific button on the transmitter for 3 seconds. If there's any deviation in the fixed-head direction in headless mode, it can be corrected by stirring the accelerator and direction lever to the bottom left side until the indicator lights shine steadily after slow flashing.
The quadcopter is equipped with a high-definition camera, which can be installed and disassembled. The camera supports both photograph and video recording functions. When the camera is in normal working mode, pressing the "photograph/video" button once will trigger a photograph, indicated by a single flash of the red light. Pressing it twice will start video recording, indicated by continuous blinking of the red light. Pressing it again will stop the video, and the red light will turn green. The camera offers two modes: high definition (1080P) and smooth (720P). It's important to ensure the camera lens is clean for optimal aerial photo quality. The video format is MOV, requiring a compatible player for playback.
Safety features include low-voltage protection, where the aircraft's indicator lights will twinkle if the battery is low, prompting an immediate return. Over-current protection is also integrated, activating if the fan blades are crashed or stuck, to prevent circuit damage.
The quadcopter's modular design structure simplifies assembly and maintenance. The remote control, or transmitter, has a clear layout with various controls and indicators. It includes a high/low speed and headless mode switch, a 3D eversion button, and separate levers for left/right control and forward/backward movement. Fine-tuning buttons are available for sideward, forward/backward, and left/right adjustments, ensuring precise control over the quadcopter's flight.
The transmitter operates on 4 AA batteries (not included) and has an LCD display that shows information such as speed mode (High/Low), headless mode status, battery energy for the controller, and signal strength. The transmitter supports two modes, Mode 1 and Mode 2, to accommodate different user preferences. Mode 1 is the default upon power-on, and users can switch between modes by pressing button "B" to the right while turning on the transmitter.
Before flying, the quadcopter needs to be prepared. This involves inserting the stands into the quadcopter body and securing them with screws. The battery needs to be connected to the dash receiver and enclosed in the fuselage, then the switch on the bottom of the aircraft should be turned on. To enter the pre-fly state, the throttle lever on the transmitter must be pushed to the highest position and then pulled back to the lowest position, which will be confirmed by a clear sound from the transmitter.
For horizontal correction, the quadcopter should be placed on a horizontal surface, and both left and right levers on the transmitter should be pushed to the lowest right corner for 2-3 seconds. The quadcopter's indicator lights will flash quickly and then return to normal, signifying a successful reset.
The installation of safety guards involves pulling out decorating parts, pressing them down, and inserting the blade protective frame into the fuselage interface, then securing them with screws. It's noted that without the rigger, the blade protective frame effect in flight will be better.
Regular maintenance is recommended to ensure the longevity and proper functioning of the quadcopter. The product should be cleaned frequently with a clean, soft cloth. It should be kept away from direct sunlight and heat to prevent damage. The device is not waterproof, so it should not be put in water to avoid damaging electronic parts.
Users are advised to check plugs and other accessories at regular intervals. If any damage is found, usage should be stopped immediately until repairs are completed.
Regarding battery care, non-rechargeable batteries should not be charged, and attention to polarity is crucial when installing or changing batteries. A mixture of old and new batteries or different types of batteries should be avoided. When not in use, the power supply of both the remote controller and the quadcopter should be turned off, and batteries should be removed from the remote controller. The power supply terminal should not be short-circuited.
For charging, the product should be placed in a dry, ventilated area, away from heat sources or explosive materials. Batteries should be removed from the quadcopter before charging, and the charging process should be supervised by an adult. It's important not to charge the battery if its surface temperature is still hot after flying, as this could lead to swelling or fire. Only the original USB charging cable provided should be used. Swollen batteries or those used for a long time should be replaced. Batteries not in use for extended periods will lose their charge automatically, and frequent charging or discharging can reduce battery life.
The manual also provides troubleshooting steps for common problems. For instance, if the aircraft has no response, solutions include charging the aircraft, changing the remote control's battery, or adjusting channels to ensure consistency with the aircraft's match codes. If the flying response is insensitive, changing to a better quality battery or flying in an area without transmitting interference of the same frequency is suggested. If side flight occurs when hovering, horizontal correction should be performed. If the aircraft deviates in headless mode, redefining the forward direction is recommended.
Fan blade installation and disassembly steps are detailed, involving rotating and backing out the fan blade cover, rotating the blade lockstitch, getting the iron shaft out, and pulling the fan blade upward for disassembly. For installation, the fan blade is inserted into the principal axis pipe, the blade lockstitch is installed, the iron shaft is installed and rotated, and the fan blade cover is rotated and twisted into place.
| Brand | SYMA |
|---|---|
| Model | X8G |
| Type | Quadcopter |
| Camera | HD Camera |
| Control Range | 100 meters |
| Features | Headless Mode |