421m
6
Before you plug the 421m into a wall socket, carefully read the information in the following chapter.
AC Line Connection
A sticker on the right end of the unit (as viewed from the front) indicates the nominal voltage
setting for the unit as it left the Symetrix factory. If this does not correspond to the voltage setting
for your locale then do not attempt to apply power to the 421m. Instead, return the unit to your
local Symetrix distributor for modification or replacement.
The 421m is shipped from the Symetrix factory with a detachable AC power cable (IEC standard)
included. Depending on the intended destination, the power plug is either the US type (intended
for 115VAC use), or the Europlug type. If the power cable’s plug is not right for your locale, then
please contact your local Symetrix distributor for the proper cable.
Once you have determined that the 421m’s operating voltage matches that of your locale and you
are ready to begin, follow these steps:
1. Plug the socket end of the power cable into the recessed AC power receptacle on the back of
the 421m.
2. Plug the other end of the power cable into a three-hole grounded outlet or power strip.
Warning: The 421m is intended to be electrically grounded. It has been provided with a three-
wire grounding plug - a plug that has a third (grounding) pin. This plug will fit only
a grounded AC outlet. This is a safety feature. If you are unable to insert the plug
into the outlet, contact a licensed electrician to replace the outlet with a properly
grounded outlet. Do not defeat the purpose of the grounding plug!
Mounting In An Equipment Rack
The 421m occupies one rack space (1U) in a standard equipment rack with a width of 19" (48.3cm),
a depth of 6.5"(16.8cm), and a height of 1.75"(4.45cm). Allow at least 4"(10.16cm) behind the unit
for the protrusion of connectors. We recommend you take care not to mount the 421m next to
devices that emit large electromagnetic fields, such as audio power amplifiers. To do so may
compromise the noise performance of the 421m. The 421m has been designed to conform to
mechanical guidelines as described in EIA Standard RS-310-C and IEC Recommendation 297.
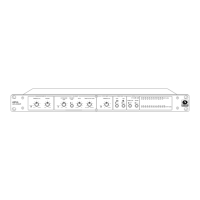
Audio Input Connections
The 421m’s line input connections are via a standard 1/4" phone jack, and barrier terminals. The
421m’s microphone input connection is an XLR female. For optimum system performance we
recommend that the 421m be connected to balanced signals. If this is not practical in your situa-
tion, then you may connect to unbalanced sources.
Audio Output Connections
The 421m’s audio output connections are via standard male XLR jack, 1/4" phone jack, and barrier
terminals located on the rear panel. For optimum system performance we recommend that the 421m
be connected to balanced devices. If this is not practical in your situation, then you may connect
to unbalanced devices.
Use any combination of the input and output connections. All of the input connections are
paralleled. The XLR output connector and the balanced screw terminal outputs are paralleled. The
unbalanced output is paralleled from the + screw terminal output. The 421 wants line level signals,
such as those found at the output of a CD player, cassette machine, mixer output, mixer channel
insert jack, etc.
Installation Chapter 4