528E
4
Initial Setup
The 528E’s controls and switches are now set ac cord ing
to the preceding section. All con nec tions listed in
Section 6.1 are now made. The 528E should now pass
signal. The OUTPUT LEVEL LED display and the POWER
LED should be illuminated. Depending upon the signal
levels, the com pres sor’s gain-reduction display may be
illuminated.
Refi ning Your Settings
At this point, the 528E should pass signal. There should
be some activity on some of the LED displays.
Mic Preamp Gain
Temporarily put the De-ess, Exp/Comp, and EQ sections into bypass mode, set the MIC GAIN con-
trol so that the OUTPUT LED display indicates a signal level between -10 and 0 VU. The CLIP LED
should almost never illuminate.
De-Esser Settings
Use the de-esser to reduce the level of sibilant sounds (S and T sounds) if they are ob jec tion able.
Set the THRESHOLD control so that the de-esser gain-reduction display shows about 12 dB of gain-
reduction. Now “tune” the FREQUENCY control for maximum sibilance reduction. Finally, reduce the
setting of the THRESHOLD control until you reduce the sibilance to a tolerable level. Try to use the
lowest setting of the FREQUENCY control that gets the job done.
Downward Expander Settings
Use the downward expander to reduce room noise and/or mouth noises. Set the THRESHOLD control
to allow low level speech sounds to pass while still blocking the room sound.
Compressor Settings
Use the threshold control to vary the amount of gain reduction, as indicated on the compressor’s
gain-reduction display. Generally, 3 to 6 dB is suffi cient, unless you are using a low compression
ratio (below 2:1), or you want a special effect. Pick a ratio suited to the task at hand: low ratios and
low thresholds for unobtrusive level control, medium ratios for overall level control and con sis -
ten cy, high ratios (> 8:1) for limiting or in-your-face sorts of sounds.
Equalizer Settings
The settings given will work well with male voices. For women, the low-EQ range shifts up to 200
or 300Hz, the mid-EQ range shifts up to 3-5 kHz.
If you are using a microphone that exhibits proximity effect when you close-talk it, then you’ll
probably need to reduce (cut) the bass (low) response somewhat. 3-6 dB should be fi ne (don’t do
this if you want a big, ballsy sound). A bit of mid-EQ will help make voices cut and seem loud. The
high-EQ adds brightness and intimacy.
If you are using a microphone that has no proximity effect (like the ElectroVoice RE-20), then
you’ll probably need to increase (boost) the bass response somewhat. 3 to 6 dB should do the job.
The same mid- and high- EQ recommendations given previously still apply. A thorough discussion
of equalization may be found in Chapter 6.
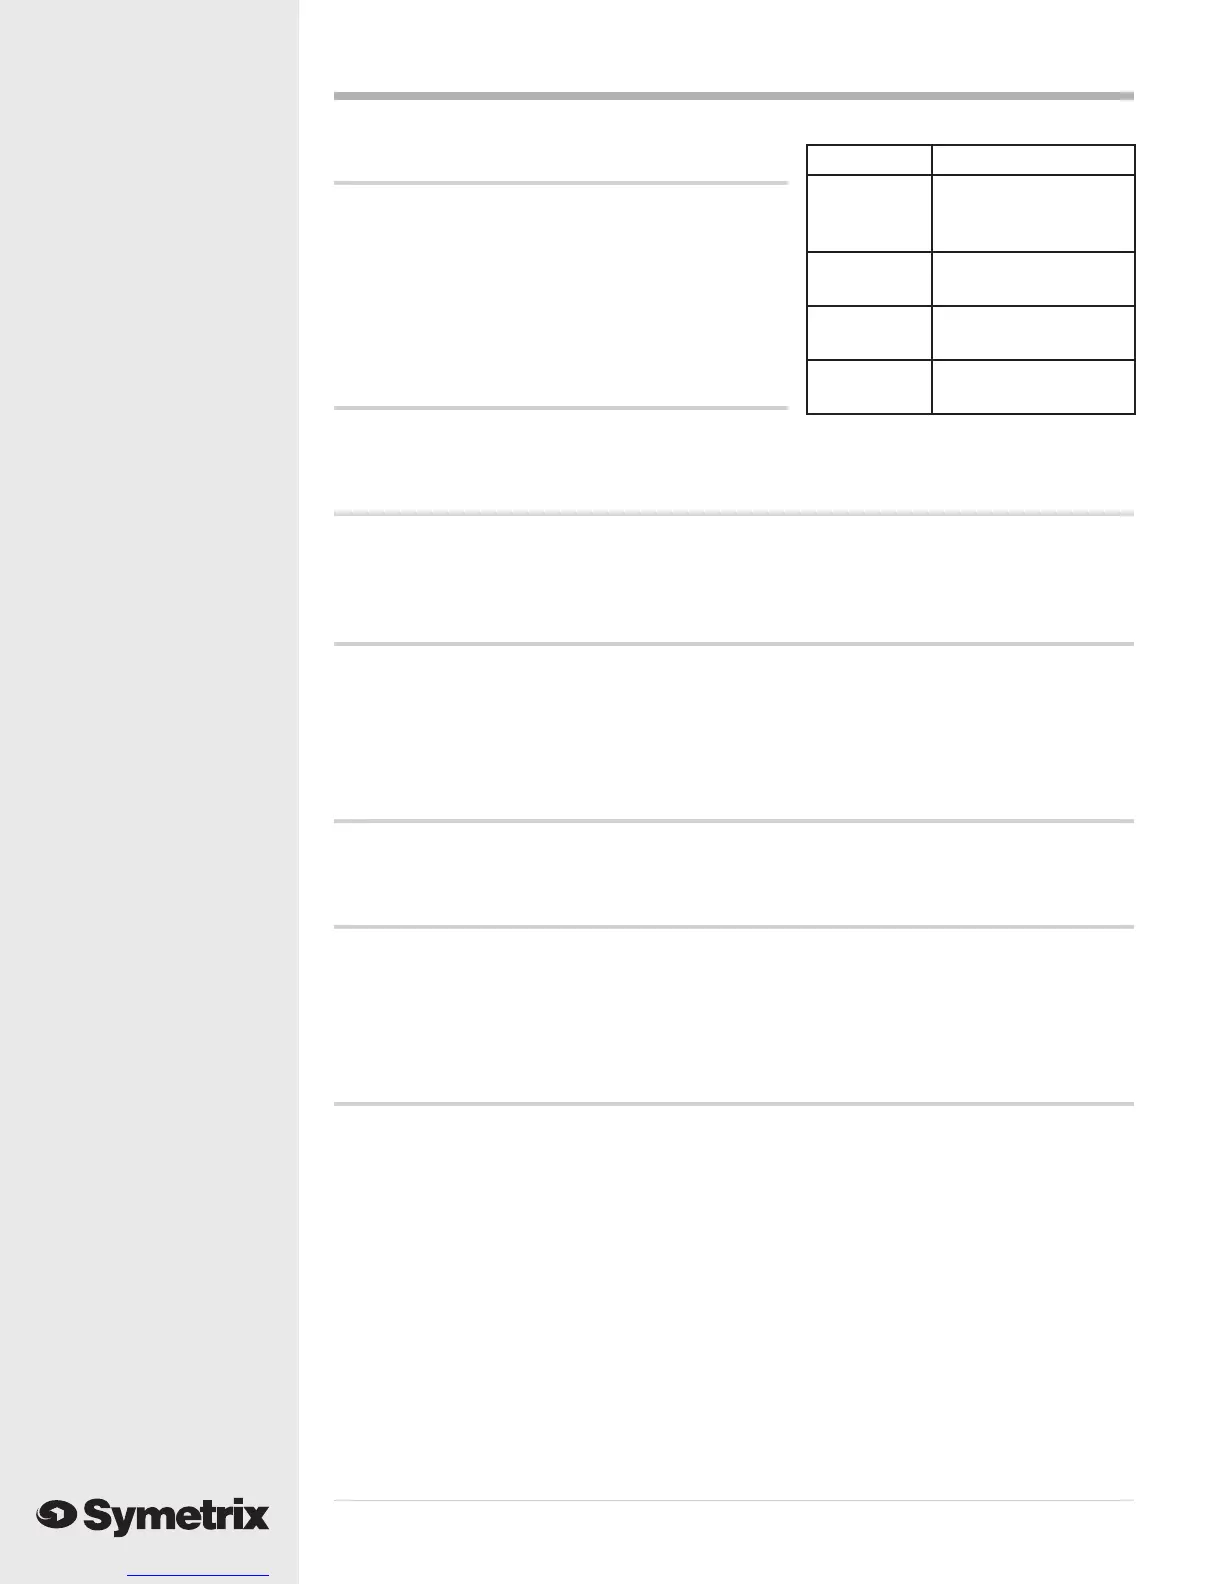
Rear Panel Setting
Output Connect to input of
console, tape recorder,
etc.
Line Input Connect line-level
source here.
Mic Input Connect microphone
here
Phantom
Power
Depress if mic requires
phatntom powering.