528E
41
Appendix A
Disassembly Instructions and Output Level Switch
Caution These servicing instructions are for use by qualifi ed personnel only. To avoid
electric shock do not perform any ser vic ing other than that contained in the
operating in struc tions portion of this manual unless you are qualifi ed to do so.
Refer all ser vic ing to qualifi ed service personnel.
Warning Lethal voltages are present inside the chassis. Perform all service work with the
unit disconnected from all AC power.
Tools Required
#2 phillips-head screwdriver.
Top Cover Removal
1. Ensure that the 528E is disconnected from the AC power source.
2. Remove two 6-32 x 1/2 inch fl at-head screws from the top panel.
3. Remove two 6-32 x 1/2 inch screws from each side of the chassis.
4. Lift the top cover free of the chassis.
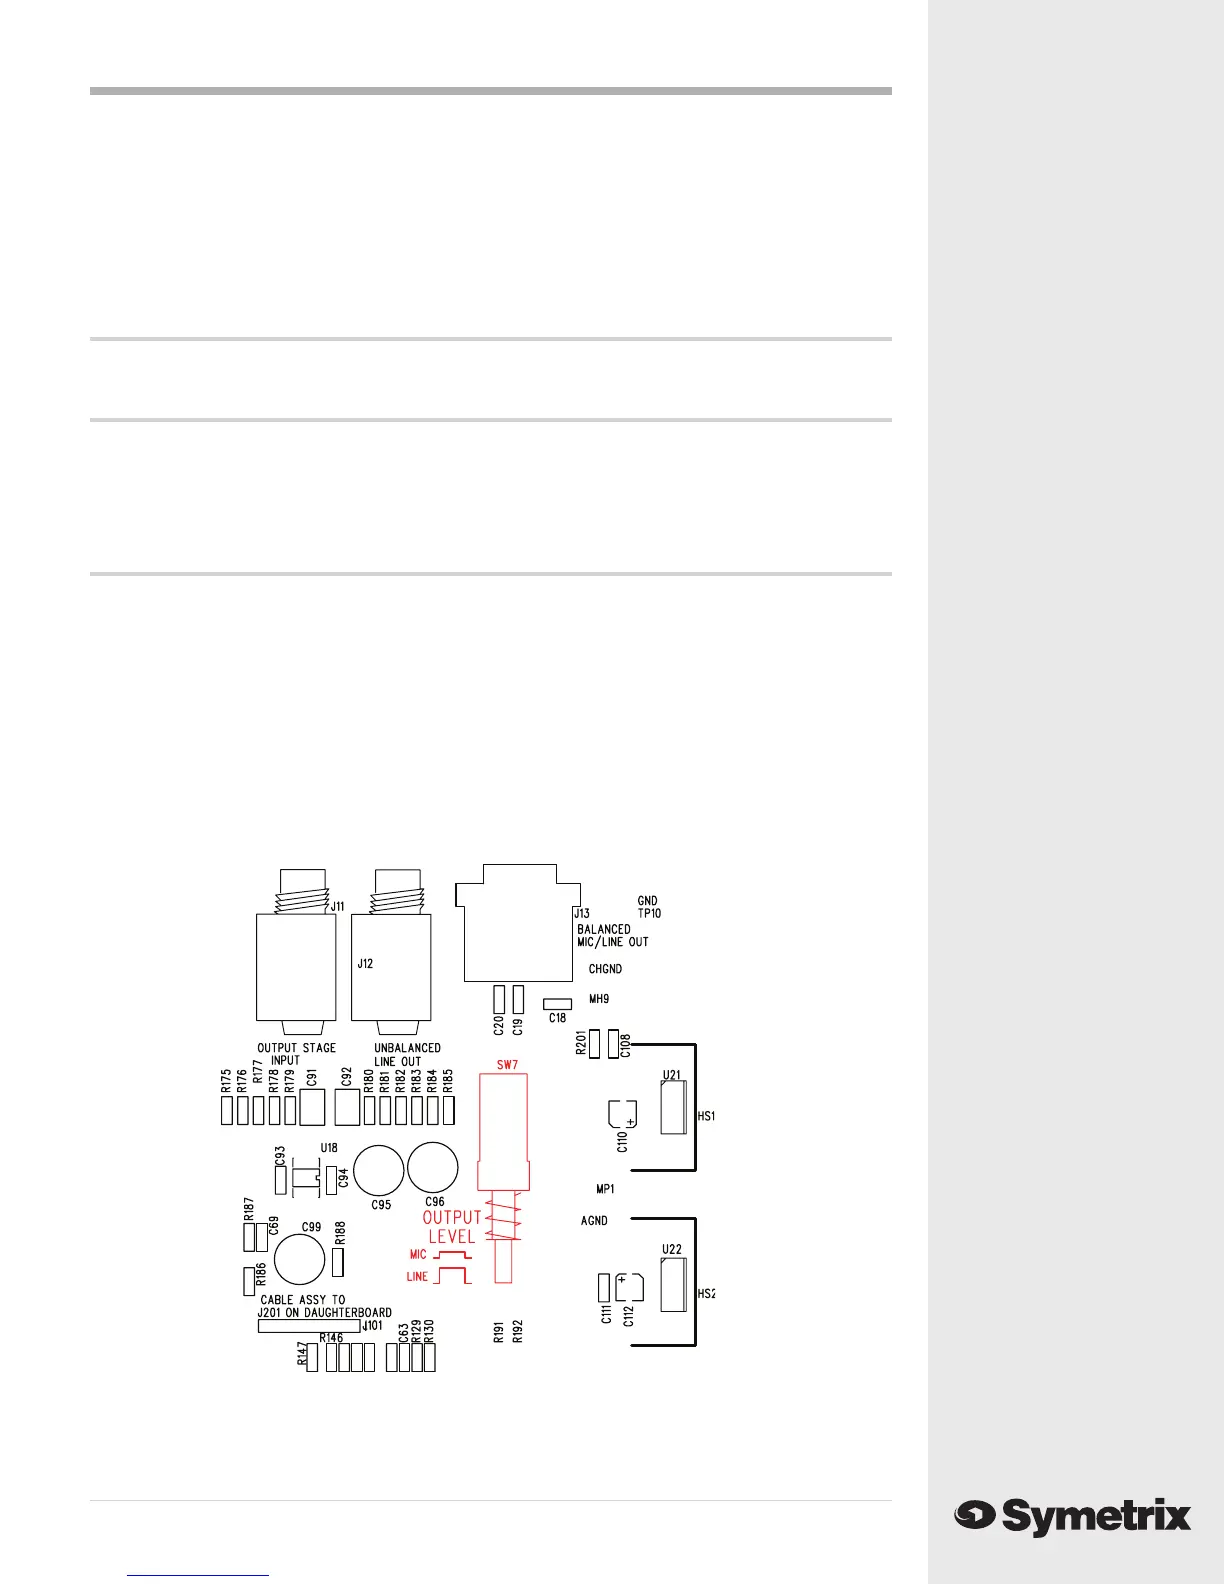
Changing the XLR Output to Microphone-Level
The 528E ships from Symetrix with the XLR output confi gured for a line level output. If you must
have a microphone level output, the following steps lead you through the process of switching the
XLR line level output to microphone level (or back to line level).
1. Remove the top cover according to the steps outlined above.
2. As you look at the unit with the front panel facing you, locate the OUTPUT LEVEL switch
(SW7) in the upper right side of the unit just below the XLR output connector. SW7 is in red in the
diagram below.
3. Push the switch in to select MIC level output or out to select LINE level output.
4. Replace the top cover.
5. Reinstall the 528E into your setup.