Do you have a question about the Synology DiskStation DS1817 and is the answer not in the manual?
Lists the items included in the product package.
Guidelines for device handling, placement, and environmental conditions.
Precautions regarding power supply voltage and battery replacement.
Lists necessary tools and parts required for installing hard drives.
Step-by-step instructions for installing hard drives into the DiskStation.
Detailed steps for inserting a RAM module into the designated slot.
Steps to safely remove an installed RAM module from the DiskStation.
Steps to remove and replace a faulty fan in the DiskStation.
Guide to installing DiskStation Manager (DSM) using the Web Assistant tool.
Information on where to find additional resources and support for the DiskStation.
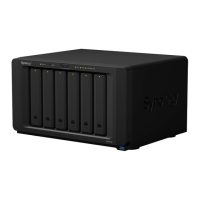
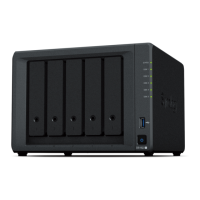
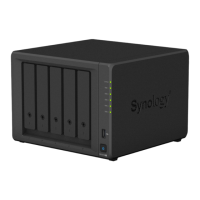
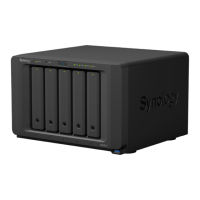
The Synology DiskStation DS1817 is a network-attached storage (NAS) device designed for data storage, management, and sharing. It functions as a central hub for your digital content, offering robust hardware and a user-friendly operating system for various applications.
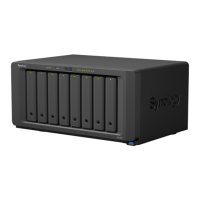
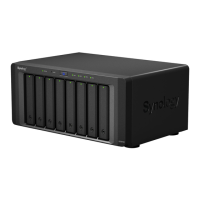
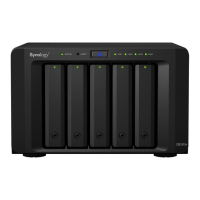
The primary function of the DS1817 is to provide a centralized storage solution for multiple users and devices on a network. It supports the installation of up to eight 3.5" or 2.5" SATA drives, allowing for significant raw storage capacity. This capacity can be further expanded by connecting Synology Expansion Units via its eSATA ports. The device is equipped with multiple LAN ports, including 1GbE and 10GbE options, ensuring high-speed network connectivity for efficient data transfer and access.
At its core, the DS1817 runs on Synology's DiskStation Manager (DSM), a browser-based operating system that simplifies device setup, configuration, and management. DSM enables users to install various applications and services, transforming the NAS into a versatile server for tasks beyond simple file storage. These tasks can include setting up a private cloud for file synchronization, hosting websites, managing surveillance systems, or streaming multimedia content. The device supports various RAID types (Basic, JBOD, RAID 0, RAID 1, RAID 5, RAID 6, RAID 10, and Synology Hybrid RAID), offering flexible options for data redundancy and performance optimization. This ensures that your data is protected against single or multiple drive failures, depending on the chosen RAID configuration.
The DS1817 is designed to be a reliable and always-on storage solution. It features a power button for easy power management, and its LAN indicators provide visual feedback on network connection status. Drive status indicators on each drive tray allow users to quickly assess the health and activity of individual drives. The device also includes USB 3.0 ports for connecting external hard drives, printers, or other USB devices, extending its functionality. For security, a Kensington Security Slot is available to attach a lock, preventing physical theft.
Setting up the DS1817 involves a straightforward hardware installation process. Users begin by installing drives into the provided drive trays. The trays are designed for easy insertion and removal, with a locking mechanism to secure them in place. For 3.5" drives, fastening panels are used to secure the drive without screws, while 2.5" drives require screws to be tightened in a designated area of the tray. Once drives are installed, the trays are inserted into the drive bays, ensuring they are pushed in completely for proper function. A hard drive tray key is used to lock the trays, preventing accidental removal.
After hardware assembly, the DiskStation is connected to the network via LAN cables and powered on. The initial software installation is facilitated by Synology's Web Assistant, a built-in tool that helps download and install the latest version of DSM from the Internet. Users access Web Assistant through a web browser on a computer connected to the same local network as the DiskStation. The Web Assistant guides users through the setup process, making the initial configuration accessible even for those with limited technical expertise.
The DS1817 offers several features for enhancing its usability and performance. It supports RAM module expansion, allowing users to add an optional Synology DDR3 RAM module to increase memory capacity. This process involves shutting down the DiskStation, removing the top case, and carefully inserting the RAM module into the designated slot. After installation, users can verify the new memory capacity through DSM's Info Center. This upgrade can improve the overall responsiveness and multitasking capabilities of the DiskStation, especially when running multiple applications or handling demanding workloads.
The DS1817 incorporates features that simplify maintenance and ensure continuous operation. The system includes fans for heat dissipation, and the device is designed to emit a beeping sound if a fan malfunctions, alerting the user to a potential issue. Replacing a system fan is a user-serviceable task that involves shutting down the DiskStation, disconnecting cables, and removing the fan panel. The fans are numbered for easy identification, and the process requires removing a few screws to detach the malfunctioning fan and install a new one. This design allows for quick and efficient replacement of faulty components, minimizing downtime.
The device also includes a RESET button with dual functionalities. A short press and hold will restore the default IP address, DNS server, and password for the admin account, which can be useful in cases of forgotten credentials or network configuration issues. A longer press and hold, followed by another press and hold after a beep sound, will return the DiskStation to a "Not Installed" status, allowing DSM to be reinstalled. This provides a robust recovery option for severe software issues or when preparing the device for a fresh installation.
For drive maintenance and data integrity, the DS1817's drive status indicators provide crucial information. These indicators show whether a drive is ready and idle, actively accessing data, or experiencing an error. In the event of a drive error, users are advised to restart the DiskStation or re-insert the drive(s) and then run the HDD/SSD manufacturer's diagnostic tool or DSM's built-in S.M.A.R.T. test to check the health status of the affected drive(s). This proactive approach to drive health helps prevent data loss and ensures the longevity of the storage system.
The DS1817 is also designed with safety in mind, with clear instructions for proper handling and cleaning. Users are advised to keep the product away from direct sunlight, chemicals, and liquids, and to ensure it is placed on a stable surface. Before cleaning, the power cord should be unplugged, and only damp paper towels should be used, avoiding chemical or aerosol cleaners. These guidelines contribute to the overall safety and longevity of the device.
| Type | NAS |
|---|---|
| Noise level | 24.2 dB |
| Device class | Small & Medium Business |
| Backup features | Cloud, iSCSI LUN |
| Backup function | Yes |
| Browser supported | Chrome, Firefox, Internet Explorer 9+, Safari 8+ |
| Security algorithms | HTTPS, SSH, SSL/TLS |
| Built-in optical drive | No |
| Operating system version | 6.1.5 |
| Operating system installed | DiskStation Manager |
| RAID levels | 0, 1, 5, 6, 10, JBOD |
| Storage drive size | 2.5/3.5 \ |
| Storage drive capacity | - GB |
| Supported file systems | FAT, HFS+, NTFS, ext3, ext4 |
| Storage drive interface | Serial ATA |
| Supported storage drive types | HDD & SSD |
| Total installed storage capacity | 0 TB |
| Number of storage drives installed | 0 |
| Number of storage drives supported | 8 |
| Processor cores | 4 |
| Processor model | Alpine AL-314 |
| Processor family | Annapurna Labs |
| Processor frequency | 1.7 GHz |
| Memory slots | 2 |
| Internal memory | 4 GB |
| Internal memory type | DDR3L |
| Maximum RAM supported | 8 GB |
| Wi-Fi | - |
| Ethernet LAN data rates | 10, 100, 1000, 10000 Mbit/s |
| Supported network protocols | SMB, AFP, NFS, FTP, WebDAV, CalDAV, iSCSI, Telnet, SSH, SNMP |
| Copper ethernet cabling technology | 10BASE-T, 10GBASE-T, 100BASE-TX, 1000BASE-T |
| Ethernet LAN data rate supported (max) | 10000 Mbit/s |
| AC input voltage | 100 - 240 V |
| AC input frequency | 50 - 60 Hz |
| Power supply location | Built-in |
| Number of power supply units | 1 |
| Power supply unit (PSU) capacity | 250 W |
| Cables included | AC, LAN (RJ-45) |
| USB 2.0 ports quantity | USB 2.0 ports have a data transmission speed of 480 Mbps, and are backwards compatible with USB 1.1 ports. You can connect all kinds of peripheral devices to them. |
| Chassis type | Desktop |
| Cooling type | Active |
| Fan diameter | 120 mm |
| Product color | Black |
| Number of fans | 2 fan(s) |
| Cable lock slot type | Kensington |
| Certification | EAC CCC RCM KC FCC CE BSMI |
| Sustainability certificates | RoHS |
| Storage temperature (T-T) | -20 - 60 °C |
| Operating temperature (T-T) | 5 - 40 °C |
| Operating relative humidity (H-H) | 5 - 95 % |
| Depth | 233 mm |
|---|---|
| Width | 340 mm |
| Height | 157 mm |
| Weight | 5310 g |