11 Chapter 2: Hardware Setup
Important: Hold the memory module by its edges, and do not touch the gold connectors.
4 Replace the side case. Replace and tighten the 2 screws you removed in step 2.
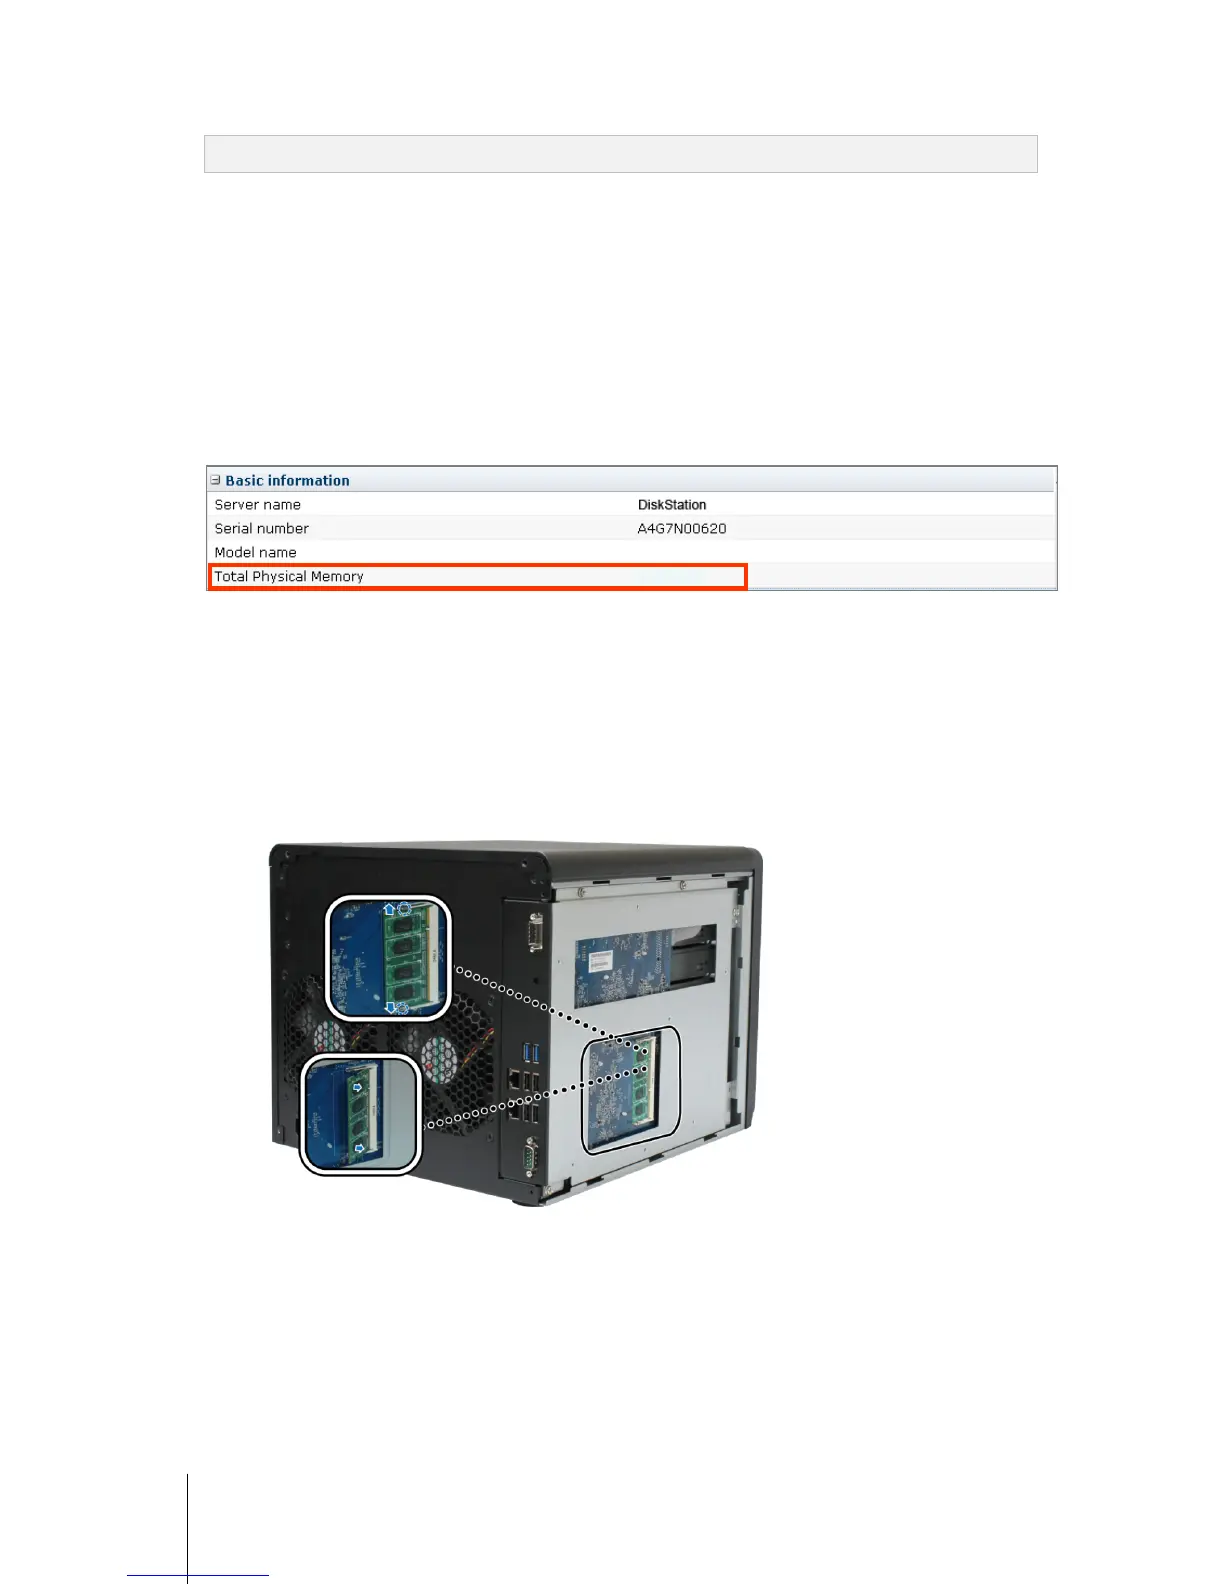
Make Sure DiskStation Recognizes the New Memory Capacity
After installing the memory module on DiskStation, it’s recommended that you check whether the server
recognizes the new memory.
To check the memory of your DiskStation:
1 Start up your DiskStation. (See “Start Up Your DiskStation” on Page 9 for more information.)
2 Install DSM. (See “
Chapter 3: Install DSM on DiskStation” on Page 12 for more information.)
3 Log in to Synology DiskStation Manager (DSM).
4 Check Total Physical Memory in Main Menu > System Information.
If your DiskStation doesn’t recognize the memory or doesn’t start up correctly, confirm that the memory is
installed correctly.
Remove the RAM Module from DiskStation
1 Follow step 1 and 2 of the “Install the RAM Module” section to remove the case of DiskStation.
2 Push the levers on the sides of the memory module in an outward direction to release the module from the
memory card slot. Before removing it, make sure you see the half-circle notches. If you don’t, try pushing the
levers outward again.
3 Hold the memory module by its notches and remove it from the slot.
4 Replace the side cover. Replace and tighten the 2 screws you removed in step 1.